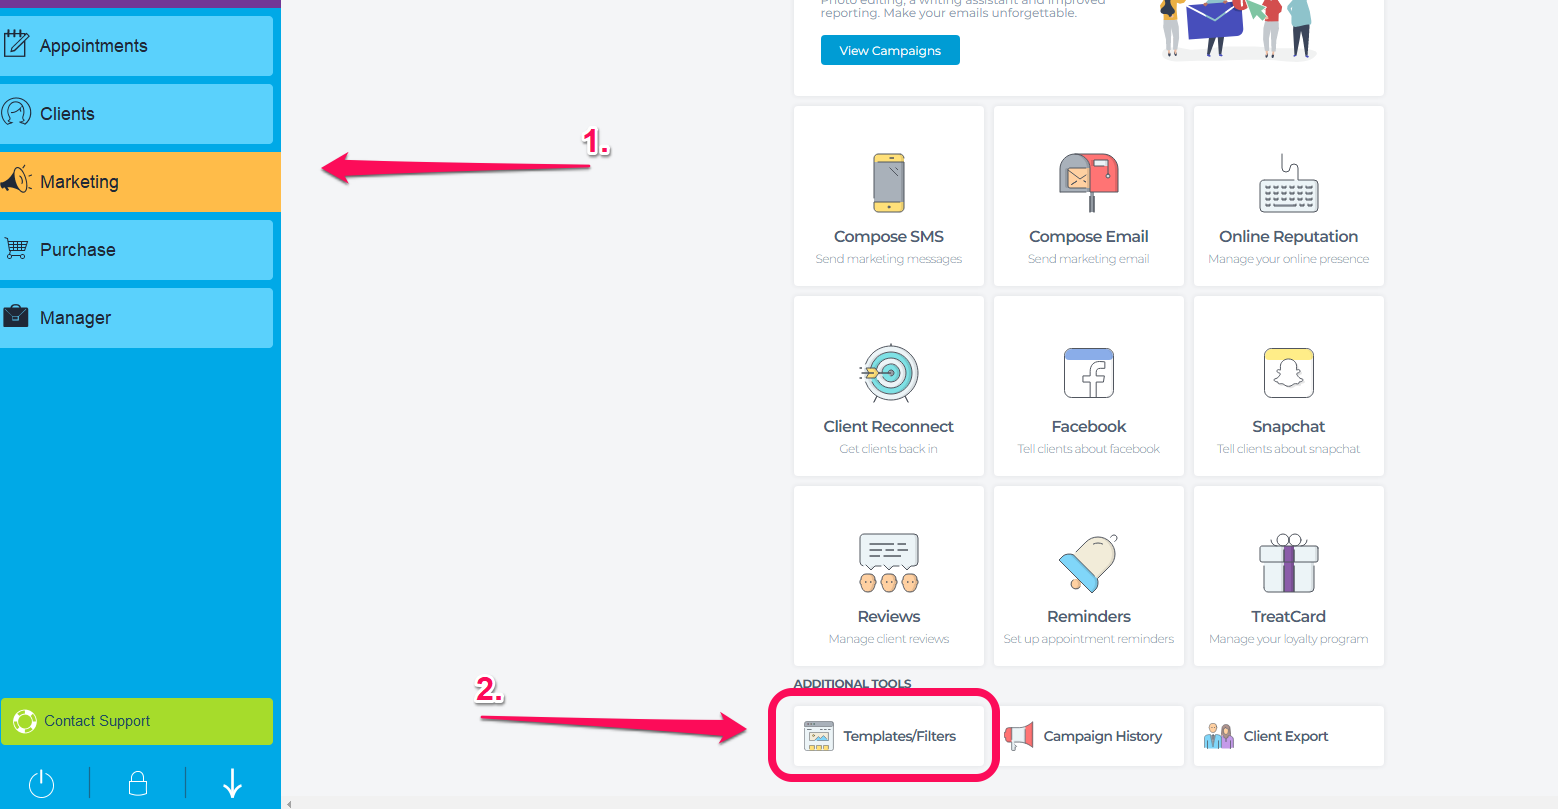
Go to Marketing > Templates and Filters.
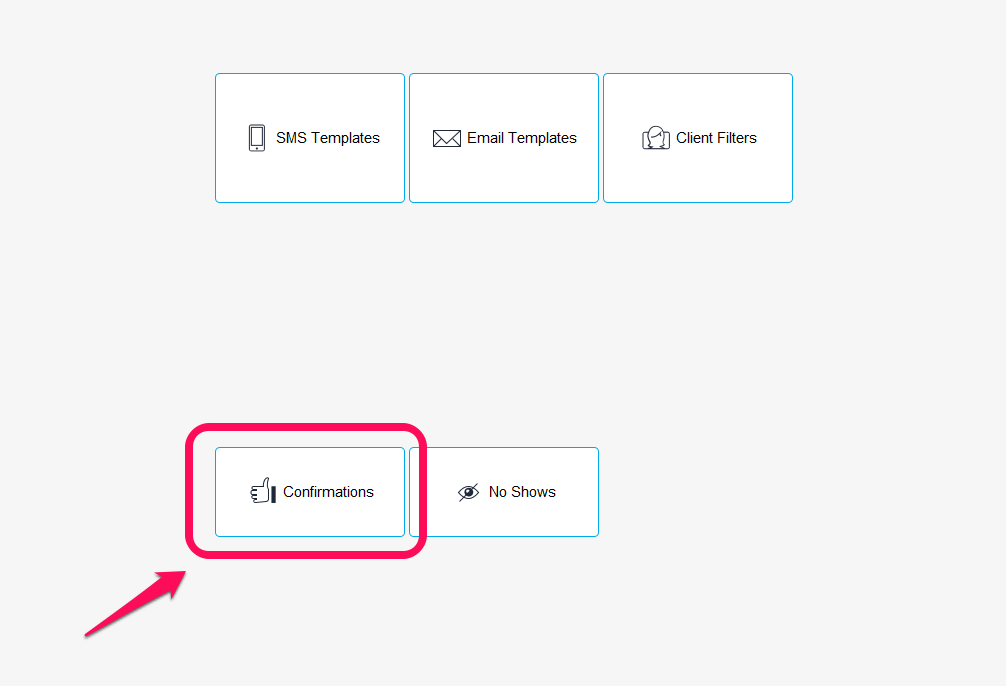
Click on Confirmations.

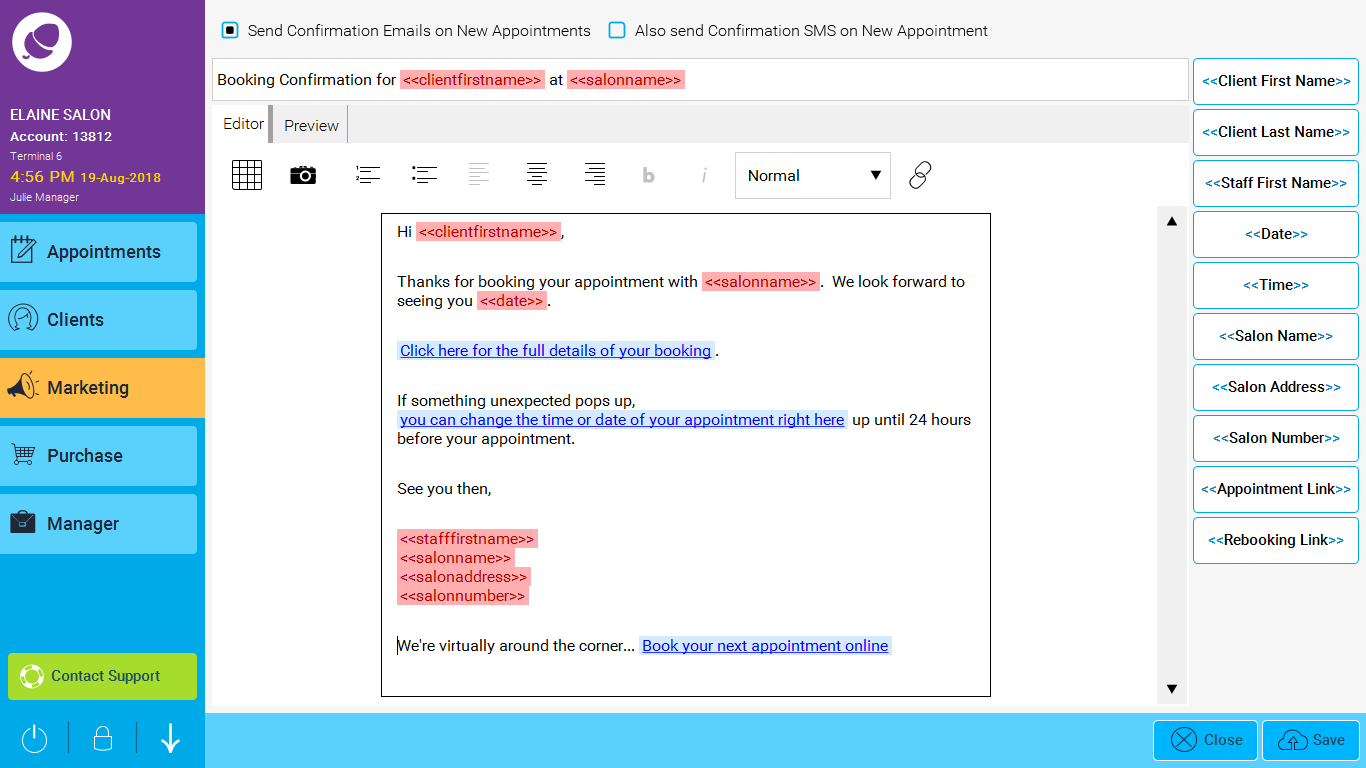
There is a template in the system that can be edited.

There are Macros that can be entered into the template. This will customise the email for each recipient automatically. A Macro is a special piece of code that gets replaced with information specific to each recipient. For example, the <<Client First Name>> macro will be replaced with each recipient's first name.
List of Macros in this section:
<<Client First Name>> Puts in the clients first name in the email.
<<Client Last Name>> Puts in the clients last name in the email.
<<Staff First Name>> Puts in the name of the member of staff they are booked in with.
<<Date>> Puts in the Date of the appointment.
<<Time>> Puts in the Time of the appointment.
<<Salon Name>> Puts in the name of the Salon.
<<Salon Address>> Puts in the Salon Address.
<<Salon Number>> Puts in the Salon number.
<<Appointment Link>> Puts in the link to view the full Appointment.(need to sign up if not signed up)
<<Rebooking Link>> Puts in the link to the Full list of Services online, so the client can book a new appointment ( please note you need online booking setup)
Macros can also be entered into the Subject as well.
Note: The following macros will not work in the subject - <<Salon Address>>, <<Appointment Link>> and <<Rebooking Link>>
Images can be entered in the body of the email. Bear in mind that in the sign off section at the end of the template containing staff, salon name, address and phone, the spacing between the lines is different / smaller. This is because this lines are not split in different paragraphs, but they are separated by simple line breaks. Line breaks are translated in <br/> tags in the resulting html.
There is no button or key for adding such a line break. If you need to add more paragraphs with this line breaks, copy a line break from somewhere else (like from gmail compose email), and paste it directly in the editor.