To learn about more areas like this in your Phorest system enrol in our SMS & Email Marketing Campaigns series in Phorest Academy - online, on-demand and on-the-go learning for busy salon professionals.
Video: Create an Email
Step-by Step-Guide
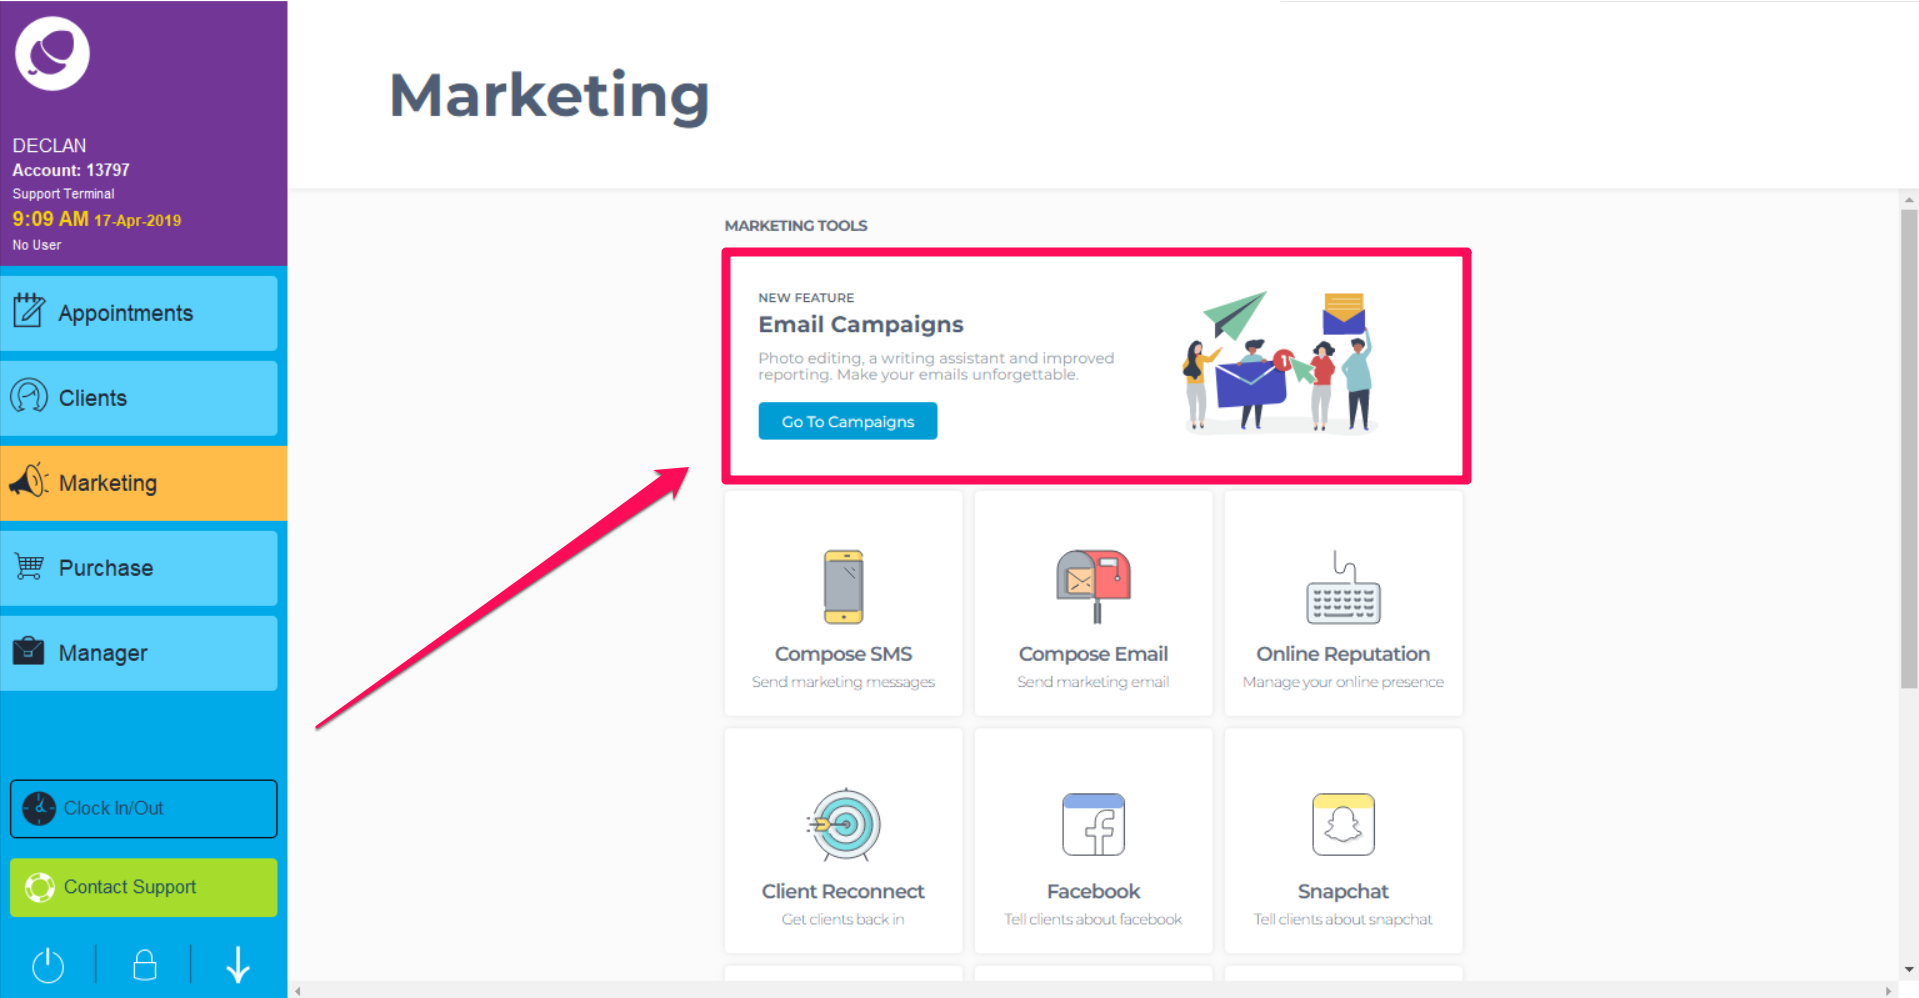
To access the Email Marketing Image Editor go to Marketing and click the Go To Campaigns at the top of the screen.
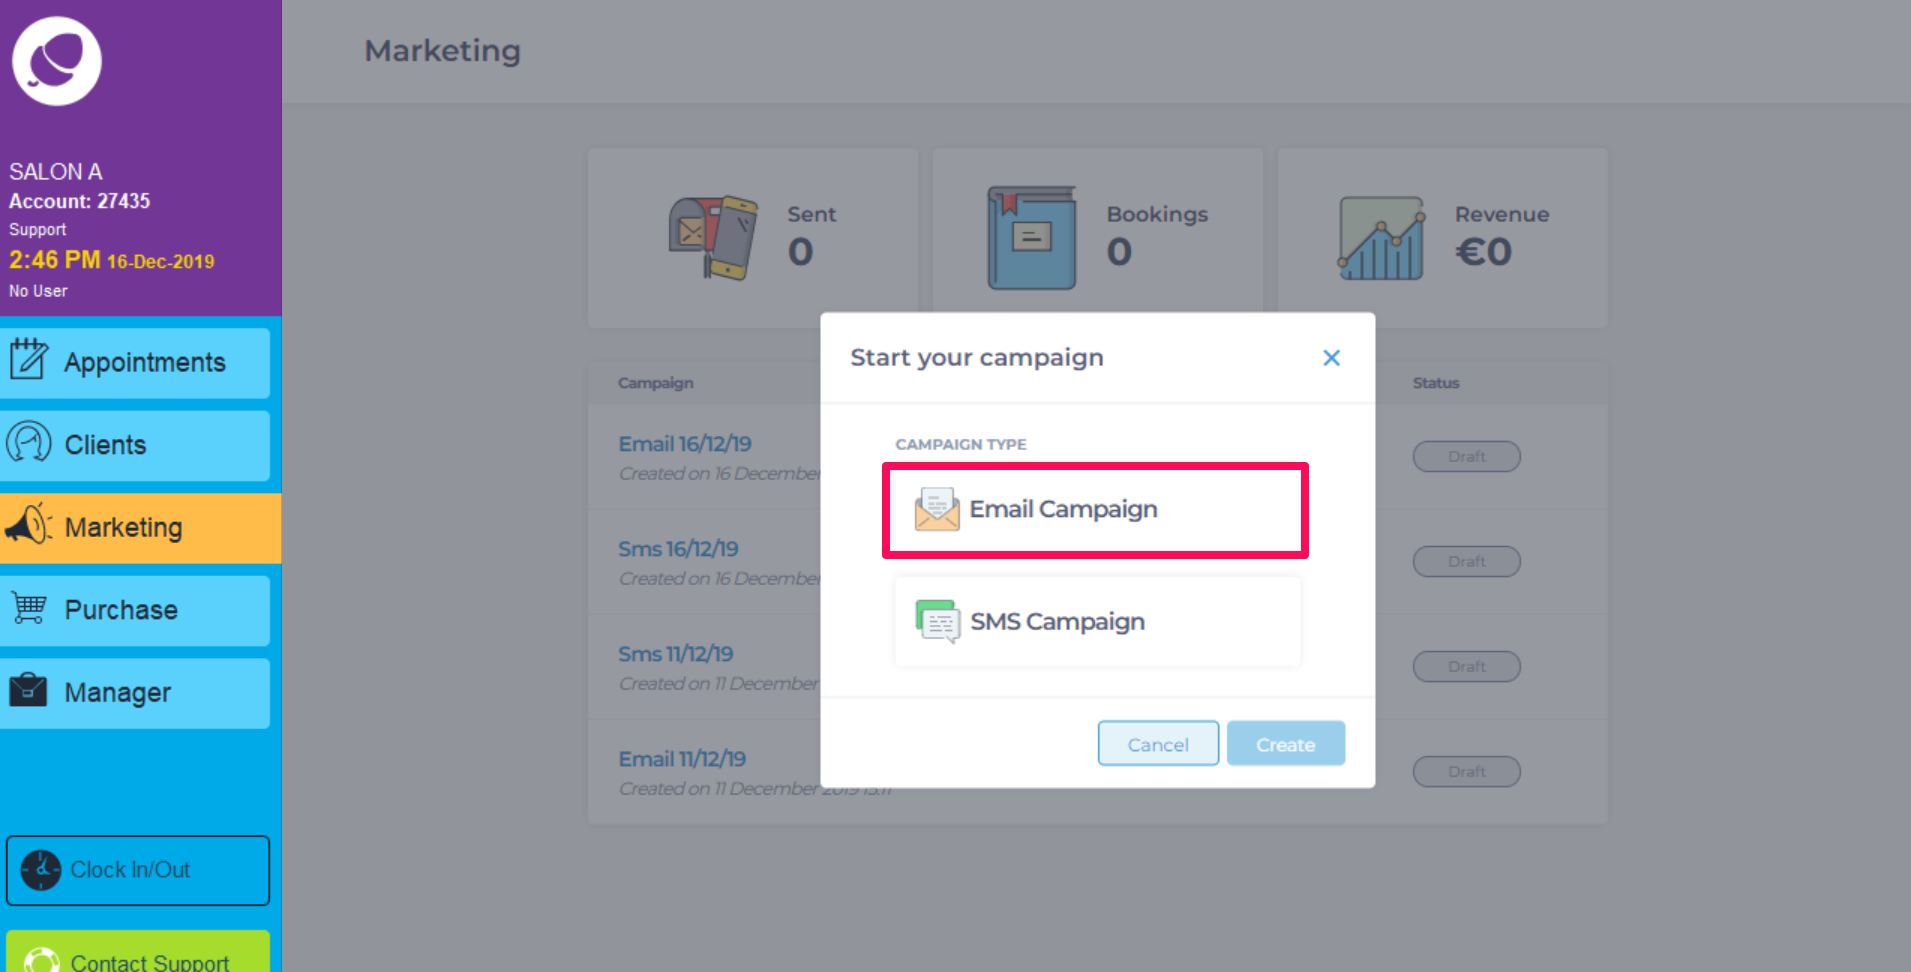
On this screen you will see any Campaigns created and/or sent. In the bottom right hand corner is the option to create a campaign. Click New > Email Campaign
On this screen, there are two tabs, Email Templates and Recently Sent. The templates are categorised on the left to use for the campaign, which can be customised later. Give the campaign a name at the top of the screen.
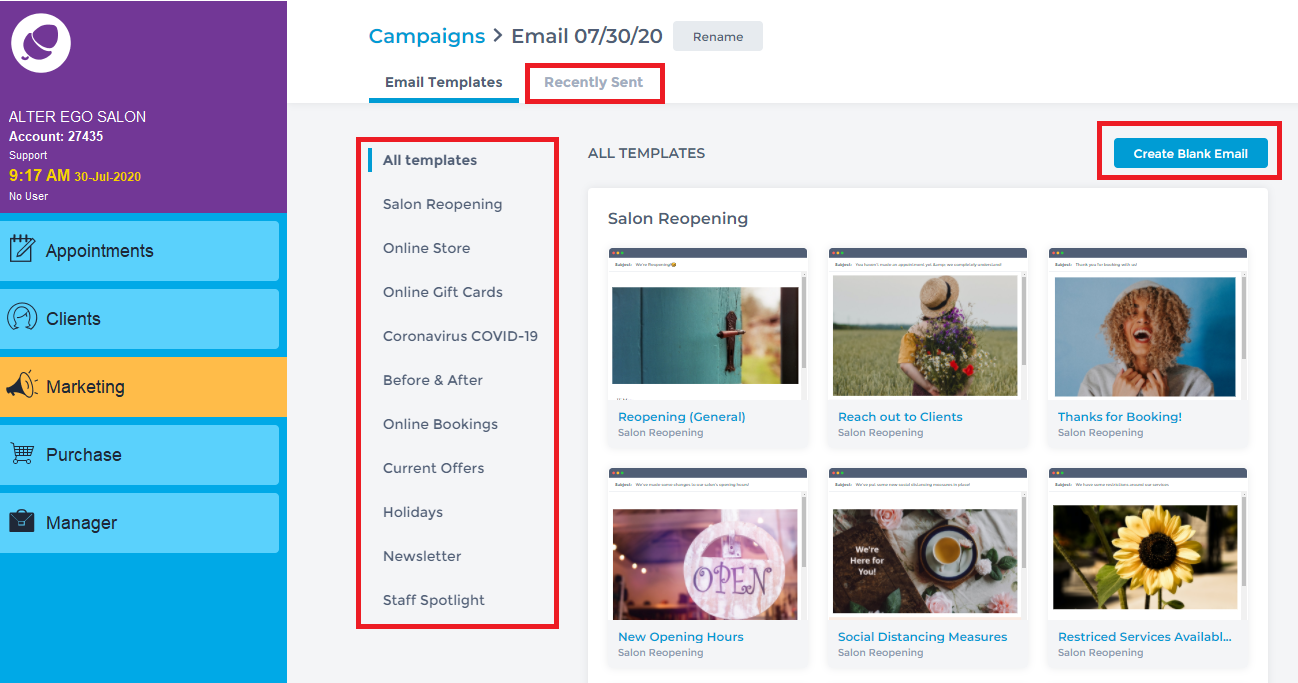
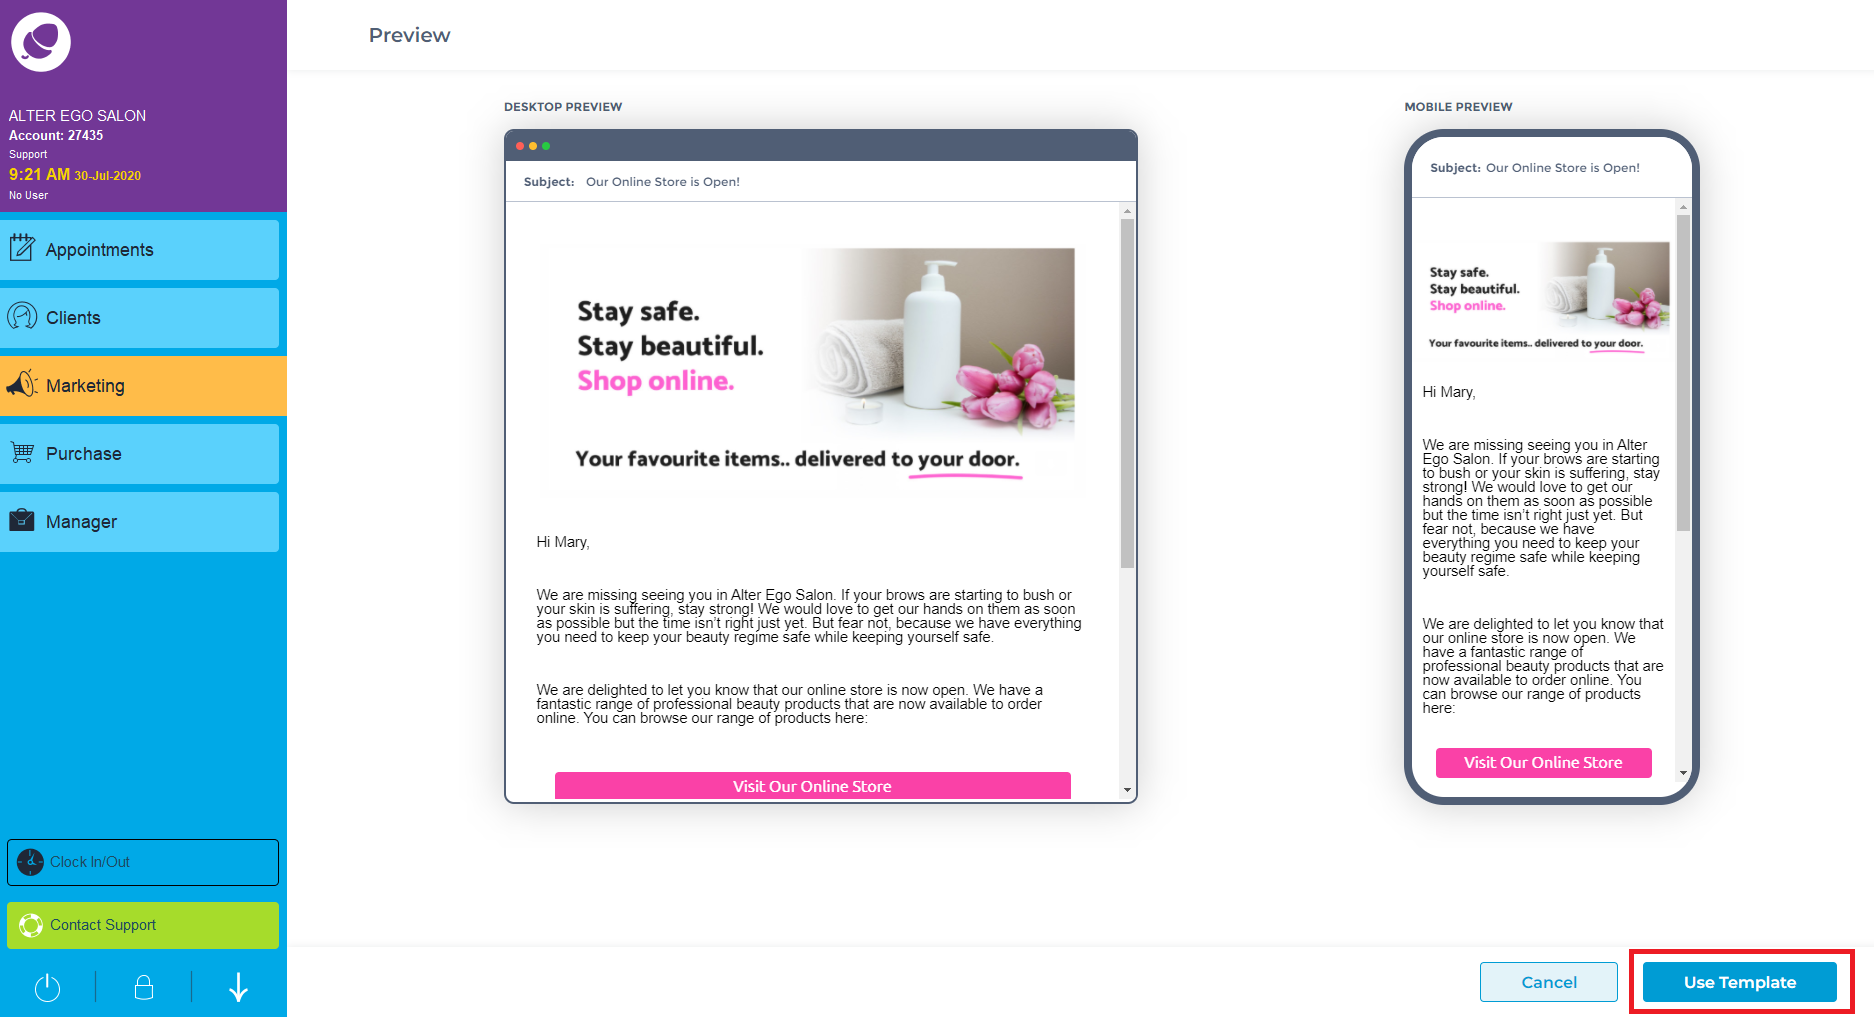
Select a Template from the list or click Create Blank Template. When using a template, a preview of the template will appear with a desktop/laptop preview and a mobile device preview. Click Use Template.
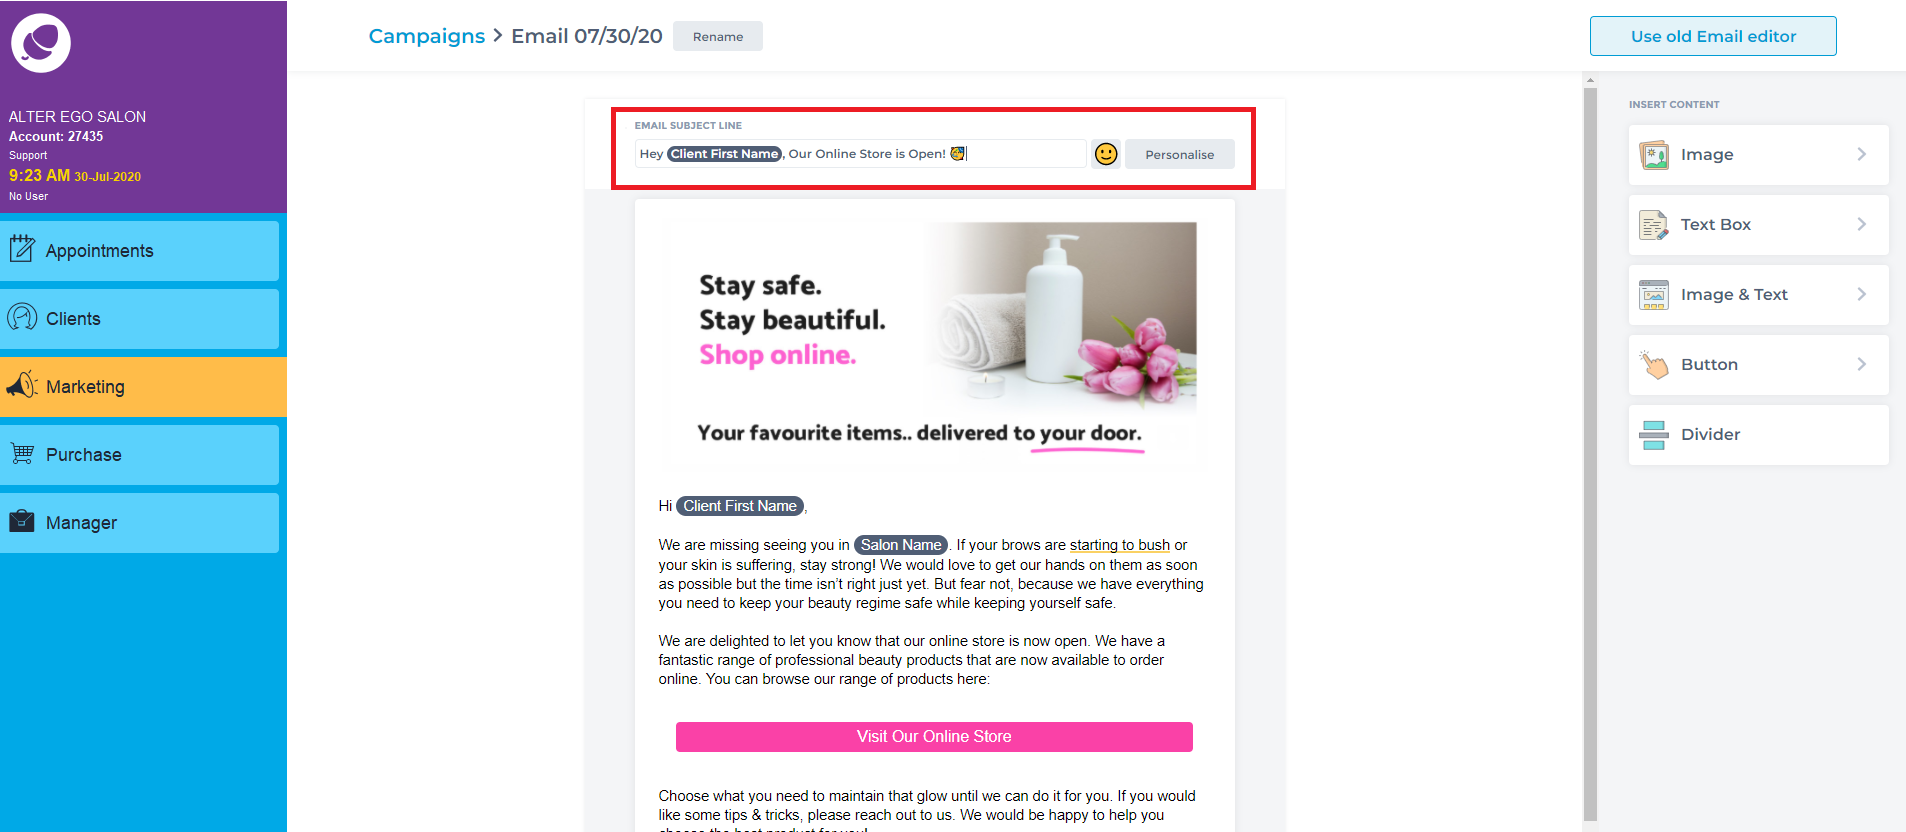
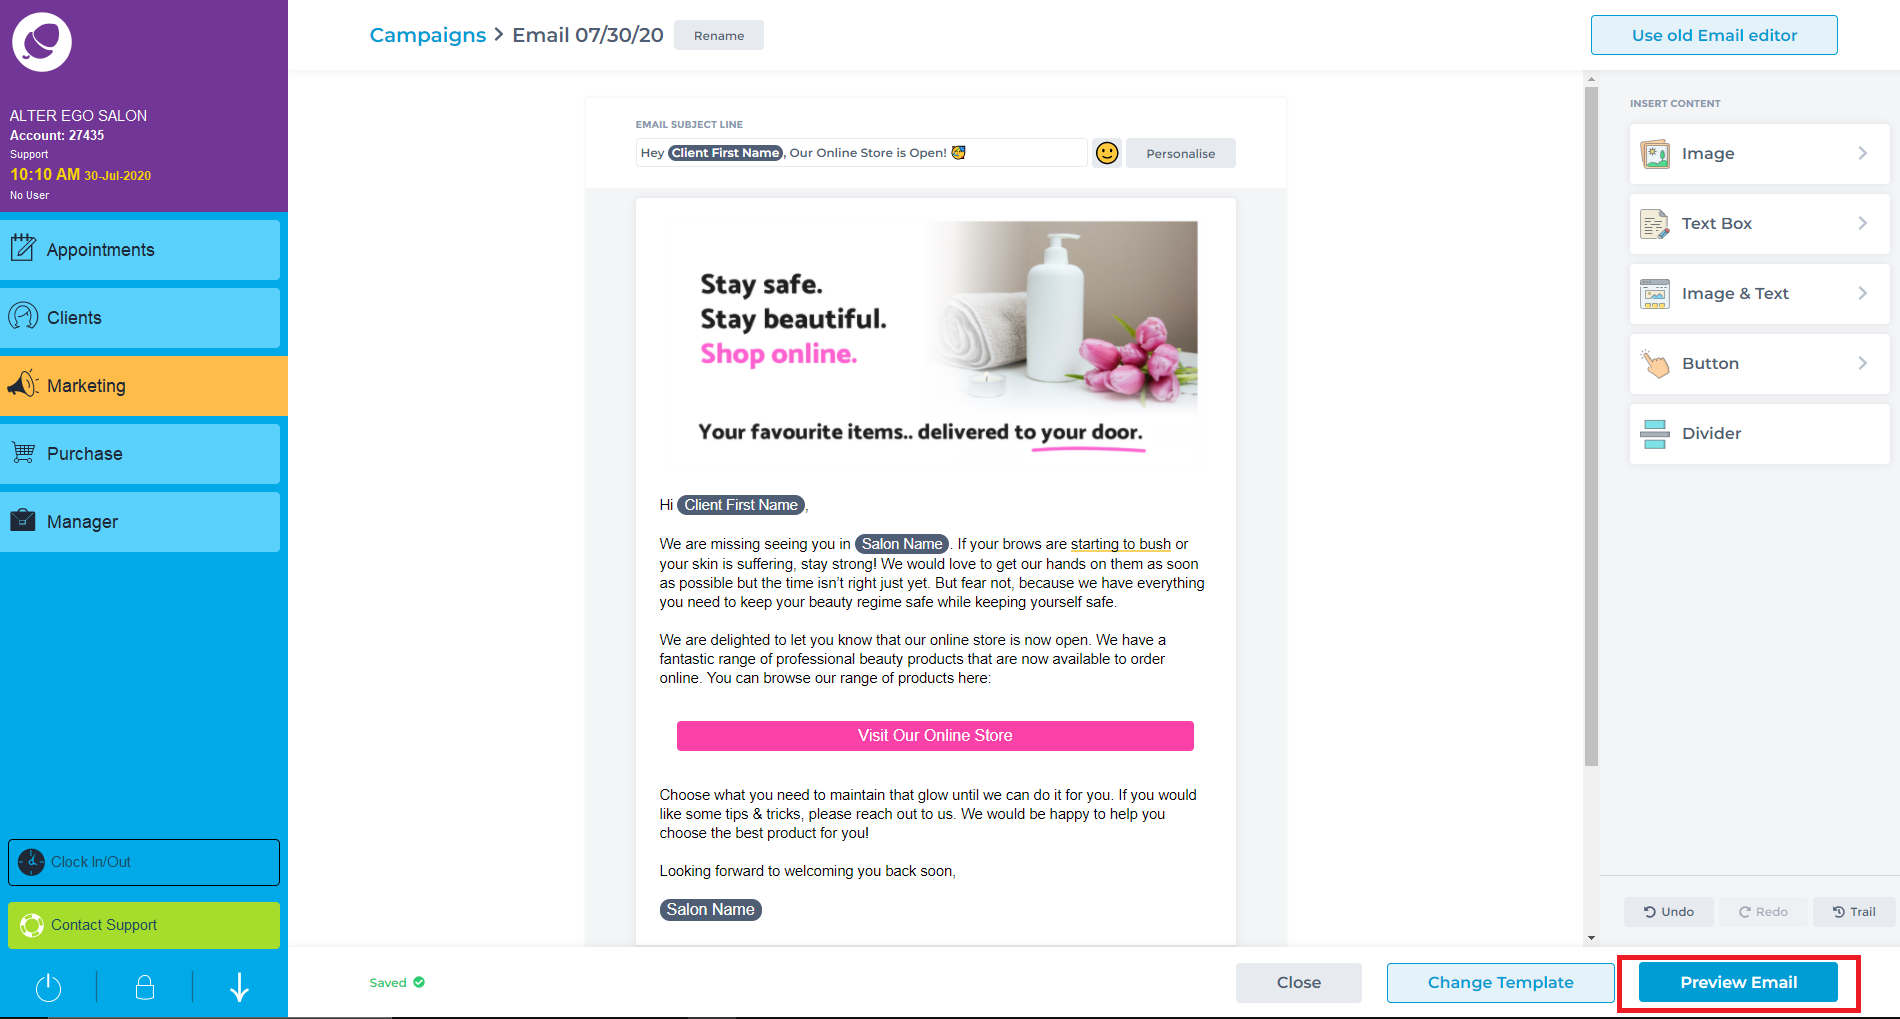
Personalise the subject line by adding an emoji.
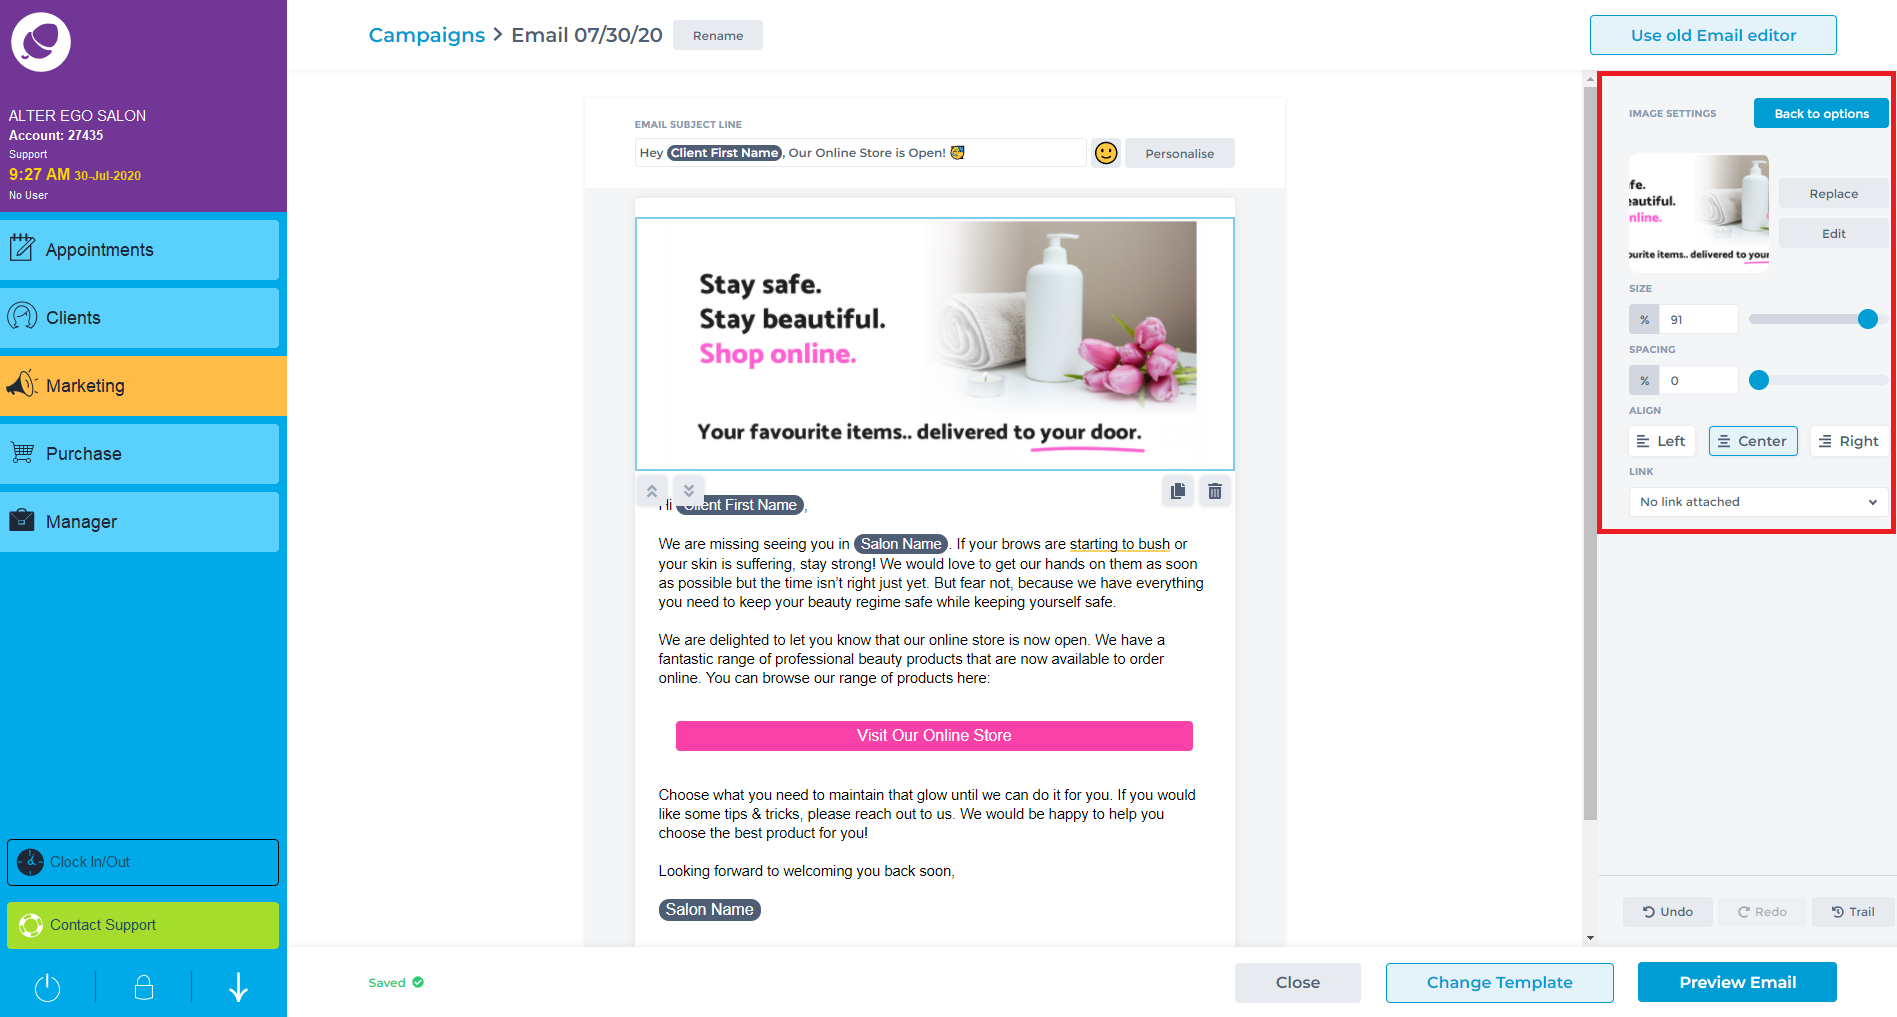
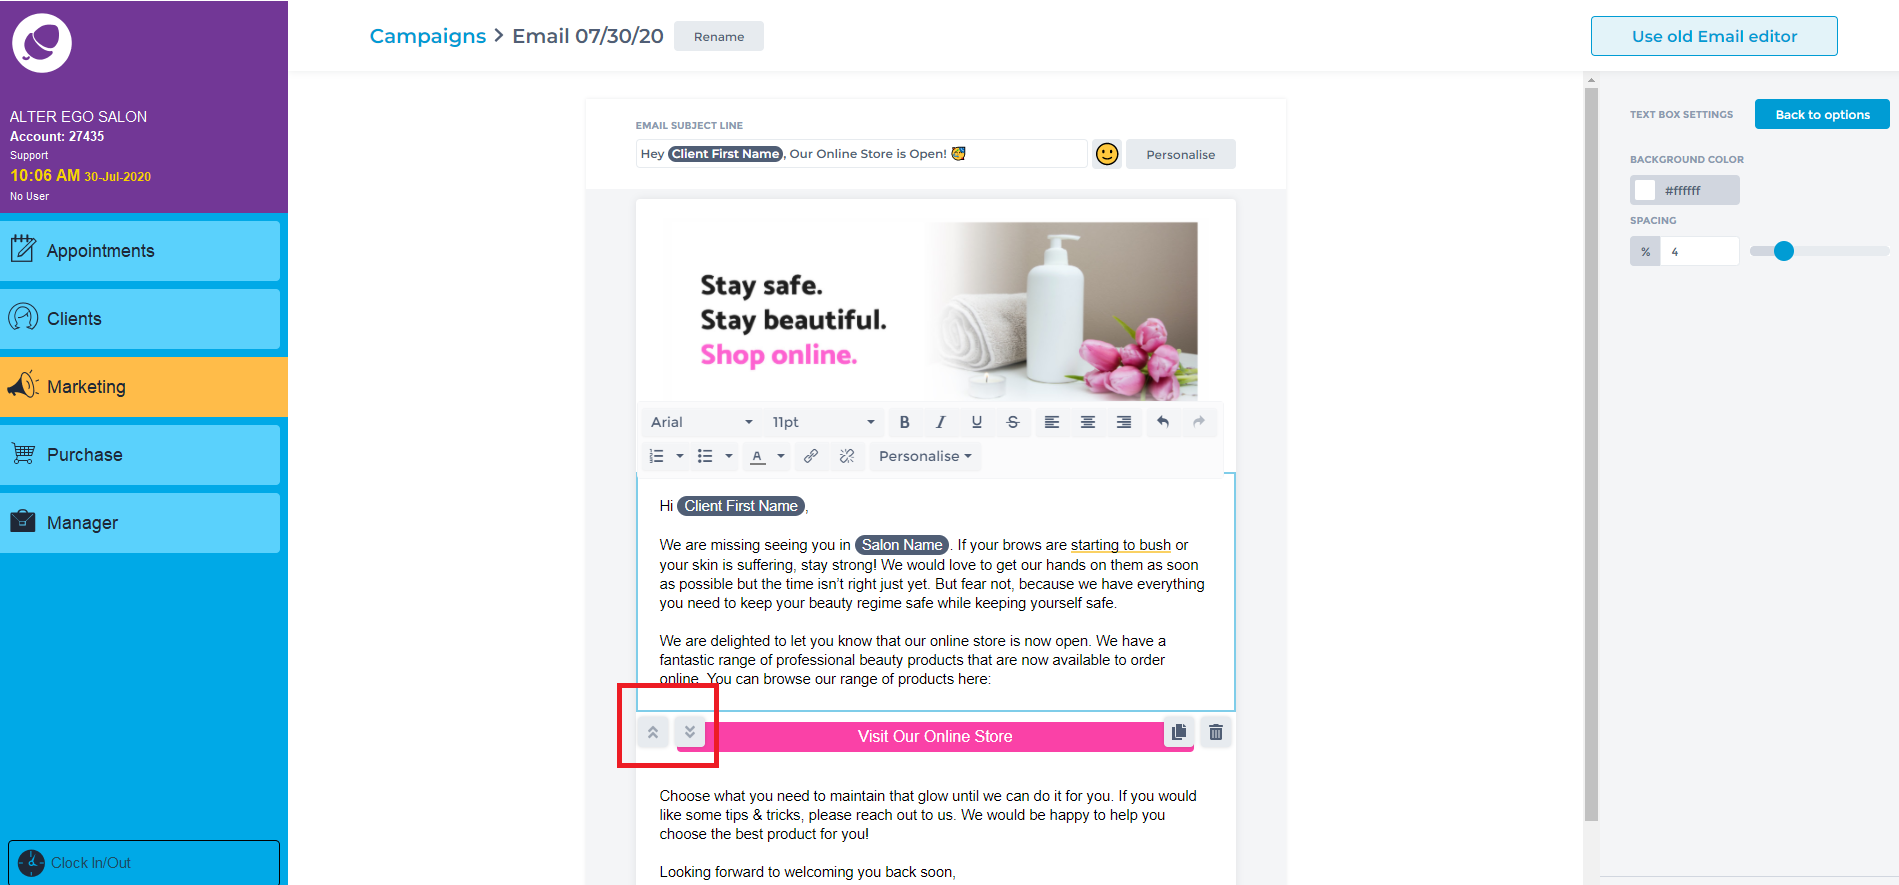
Click on content in the template to edit that section. A side panel with options will appear. Edit the Image, Image Size, Spacing, Alignment and Link here.
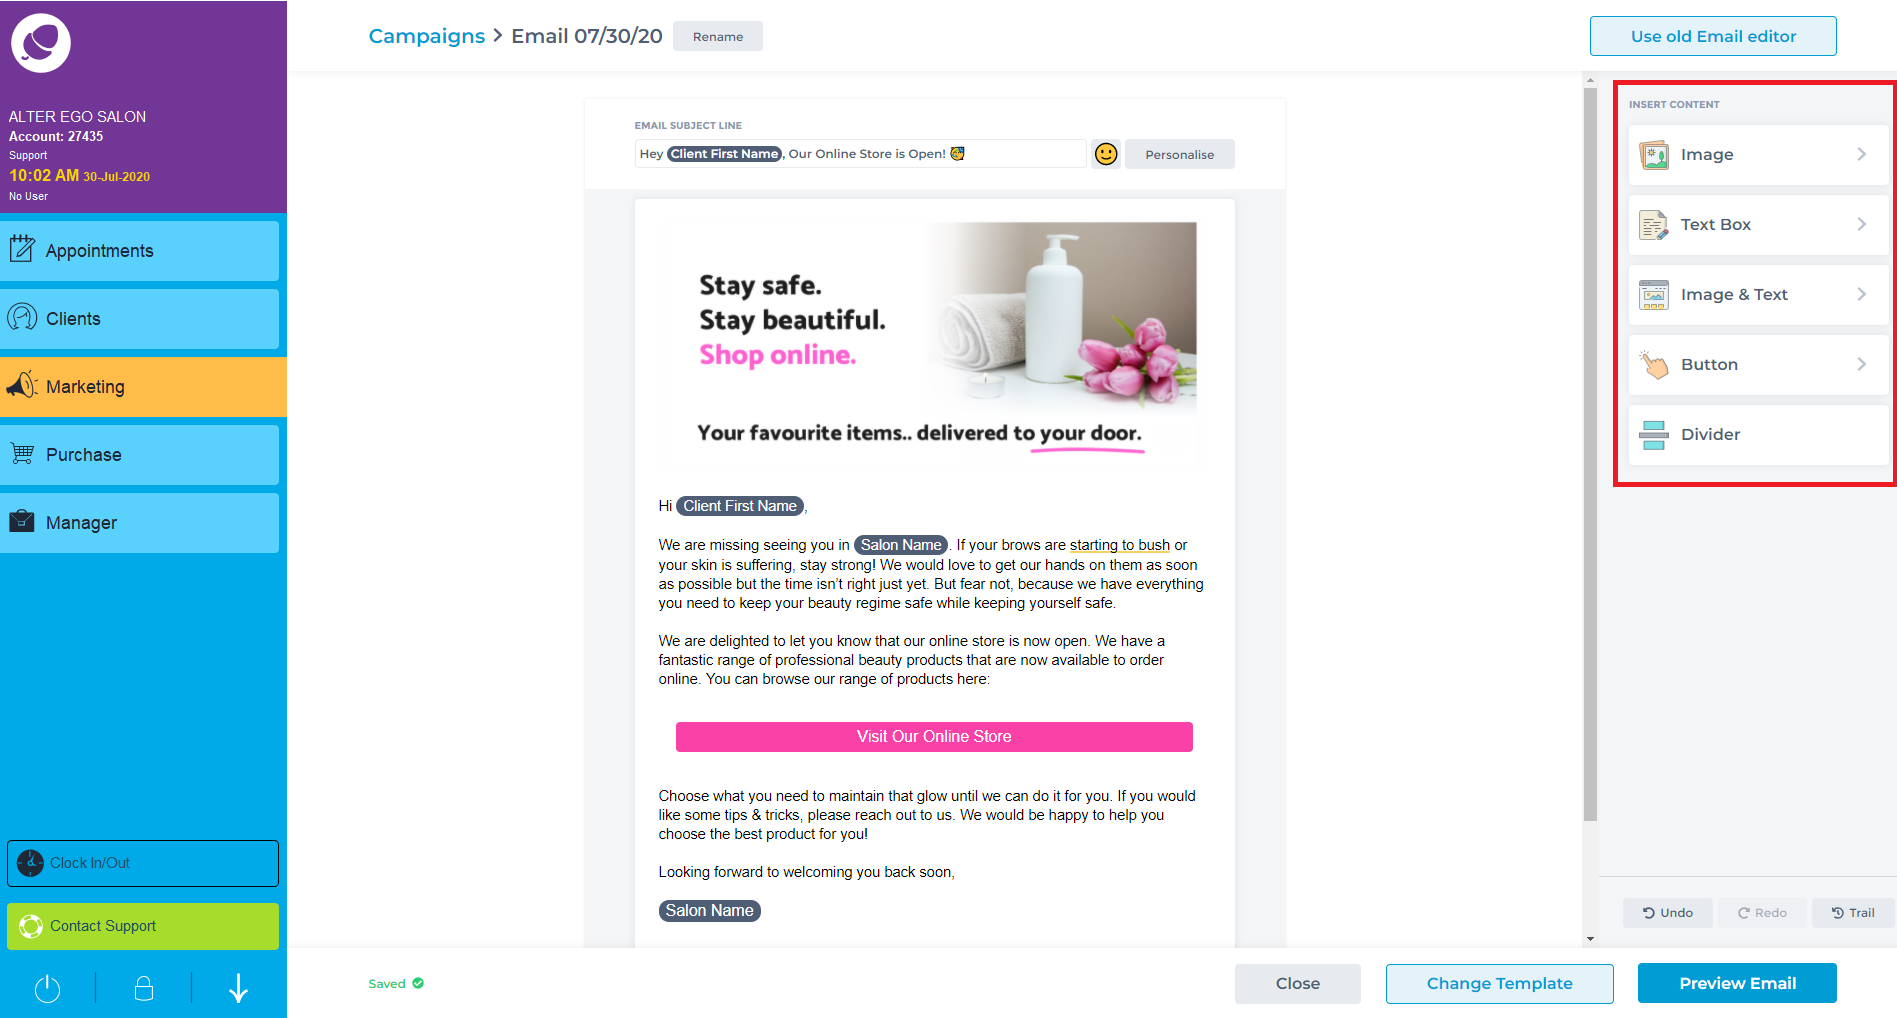
Add a new section by choosing an option from the side right panel.
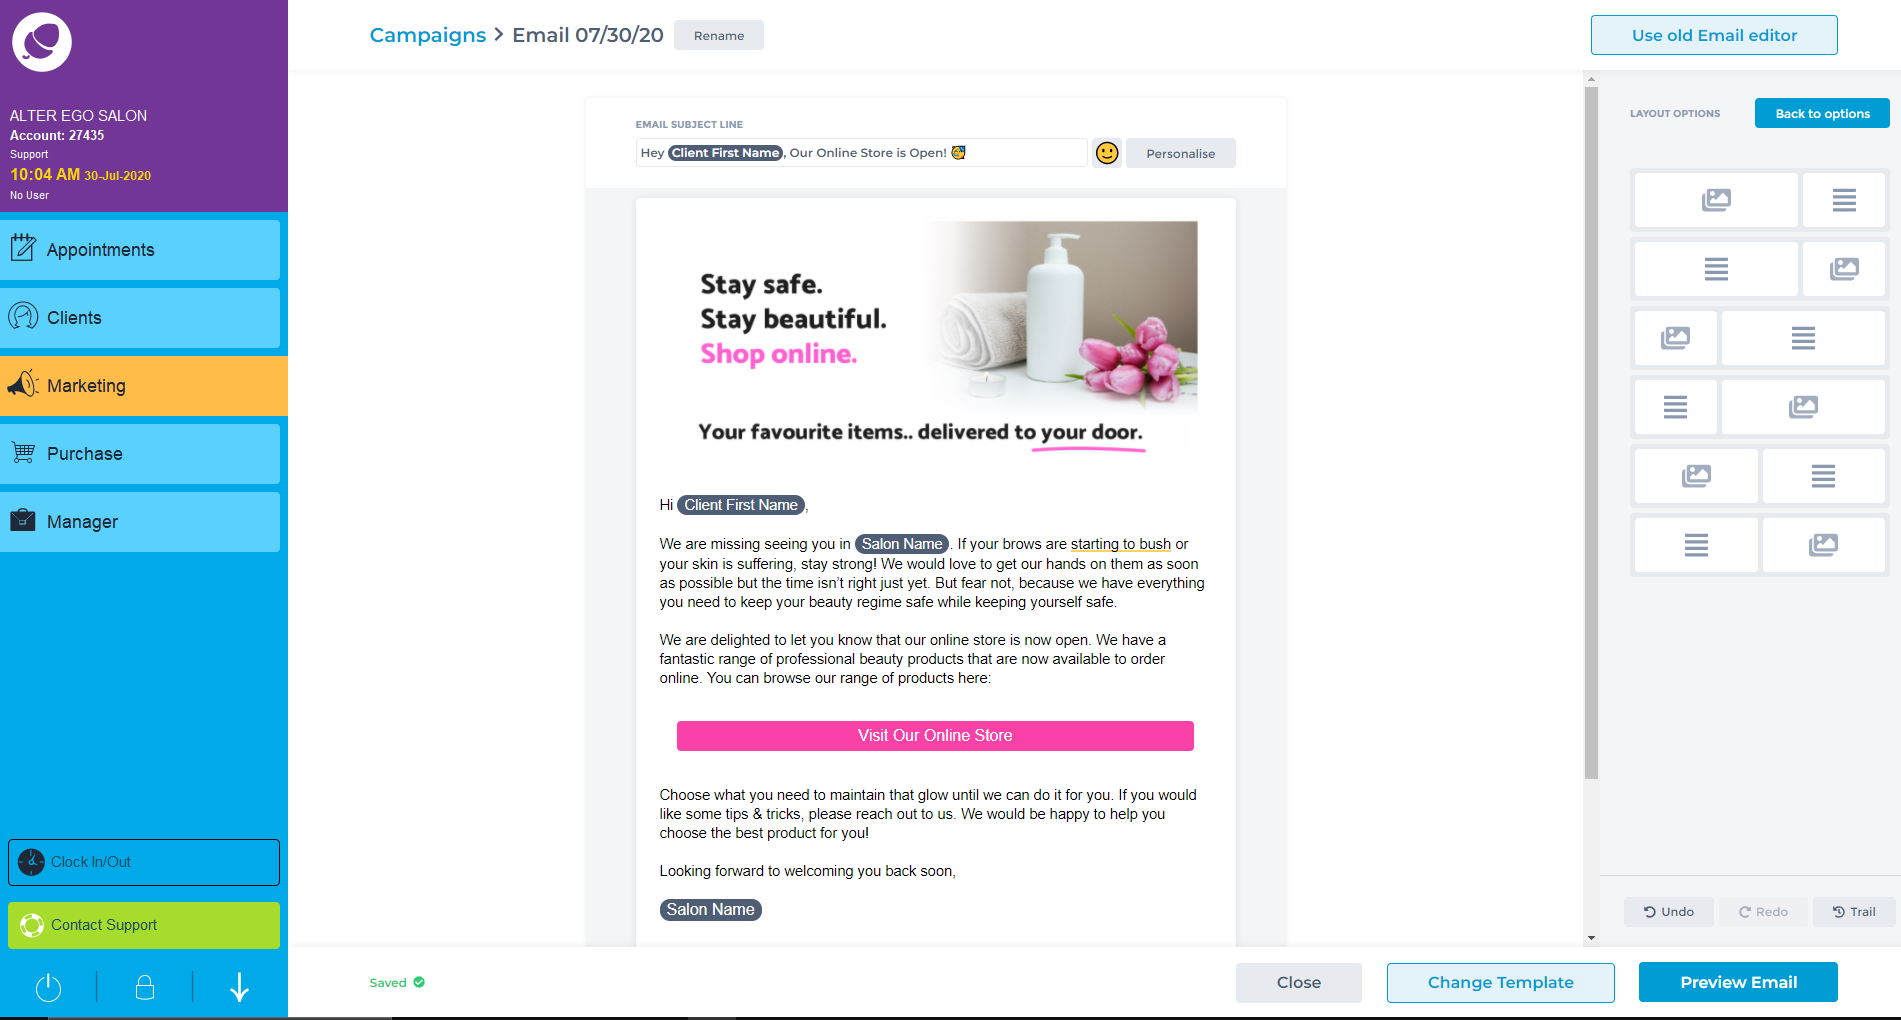
For this example, a Image & Text option will then allow to choose a layout.
Click on the new section added to the email content. The arrows that appear in the left side will allow you to move this section up and/or down.
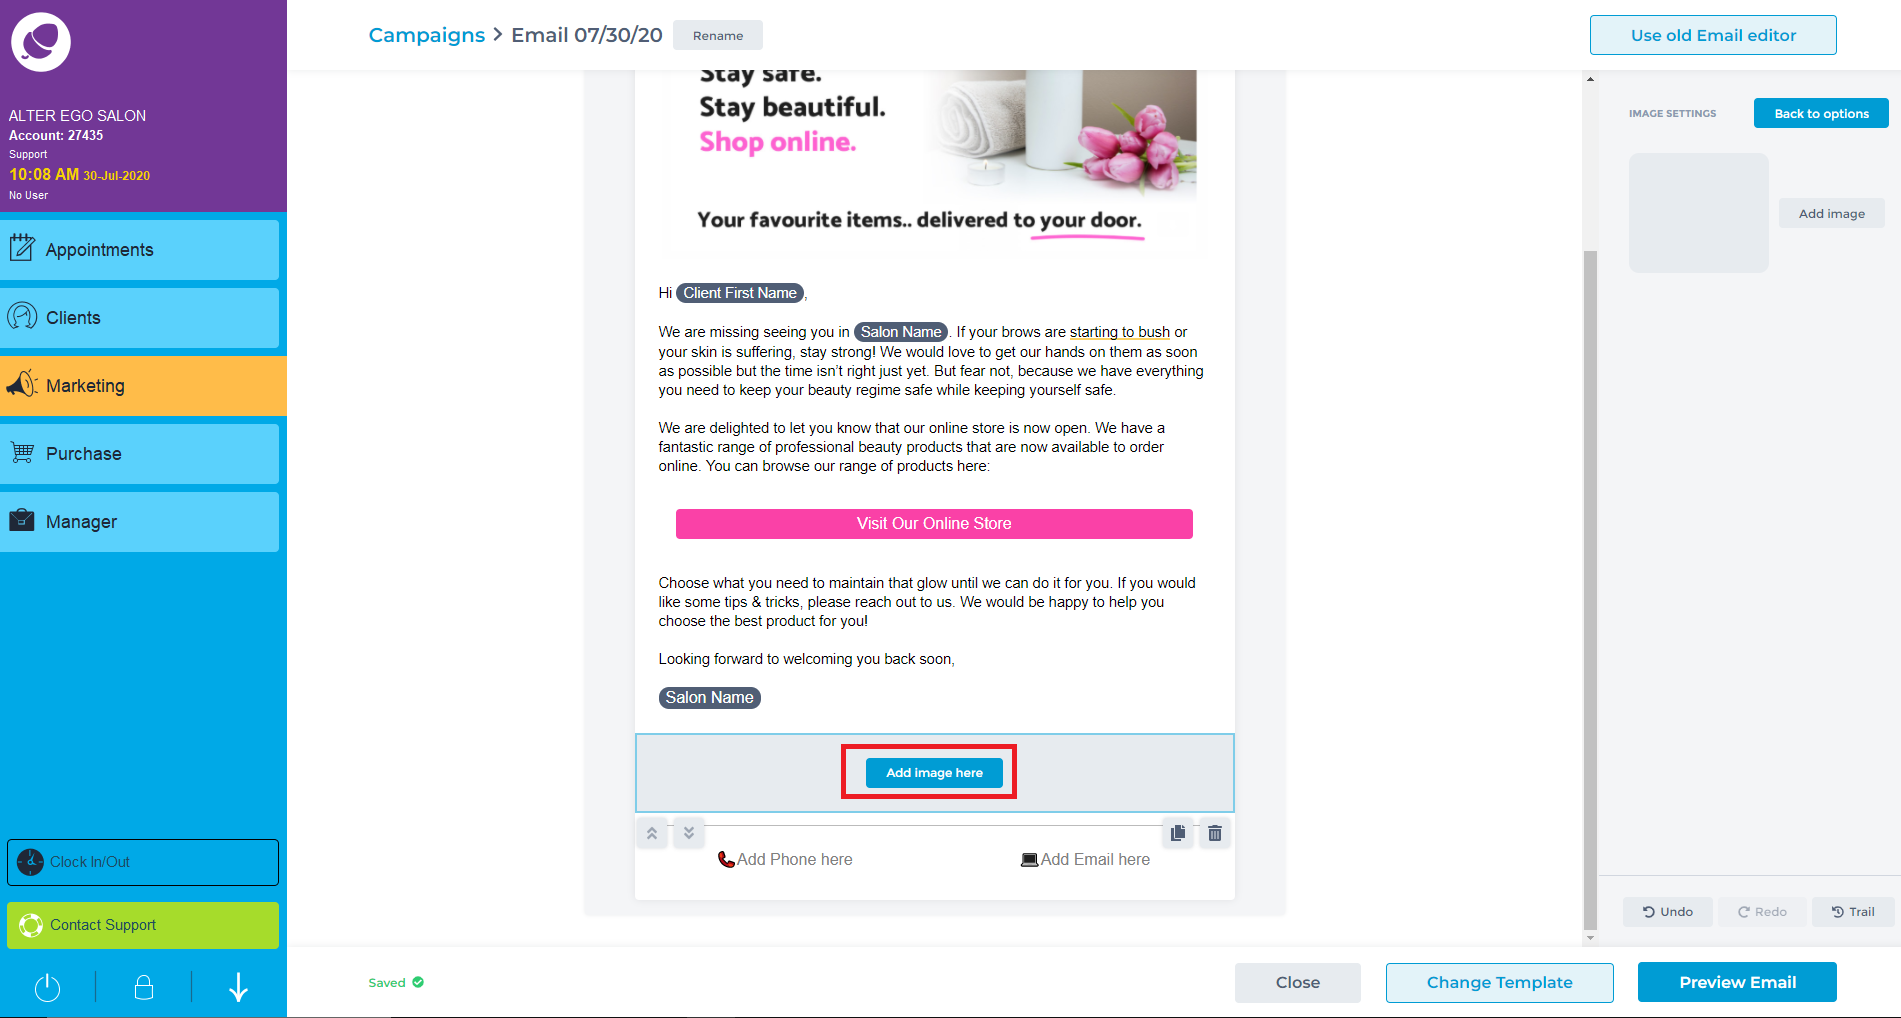
A grid can be inserted to add images.
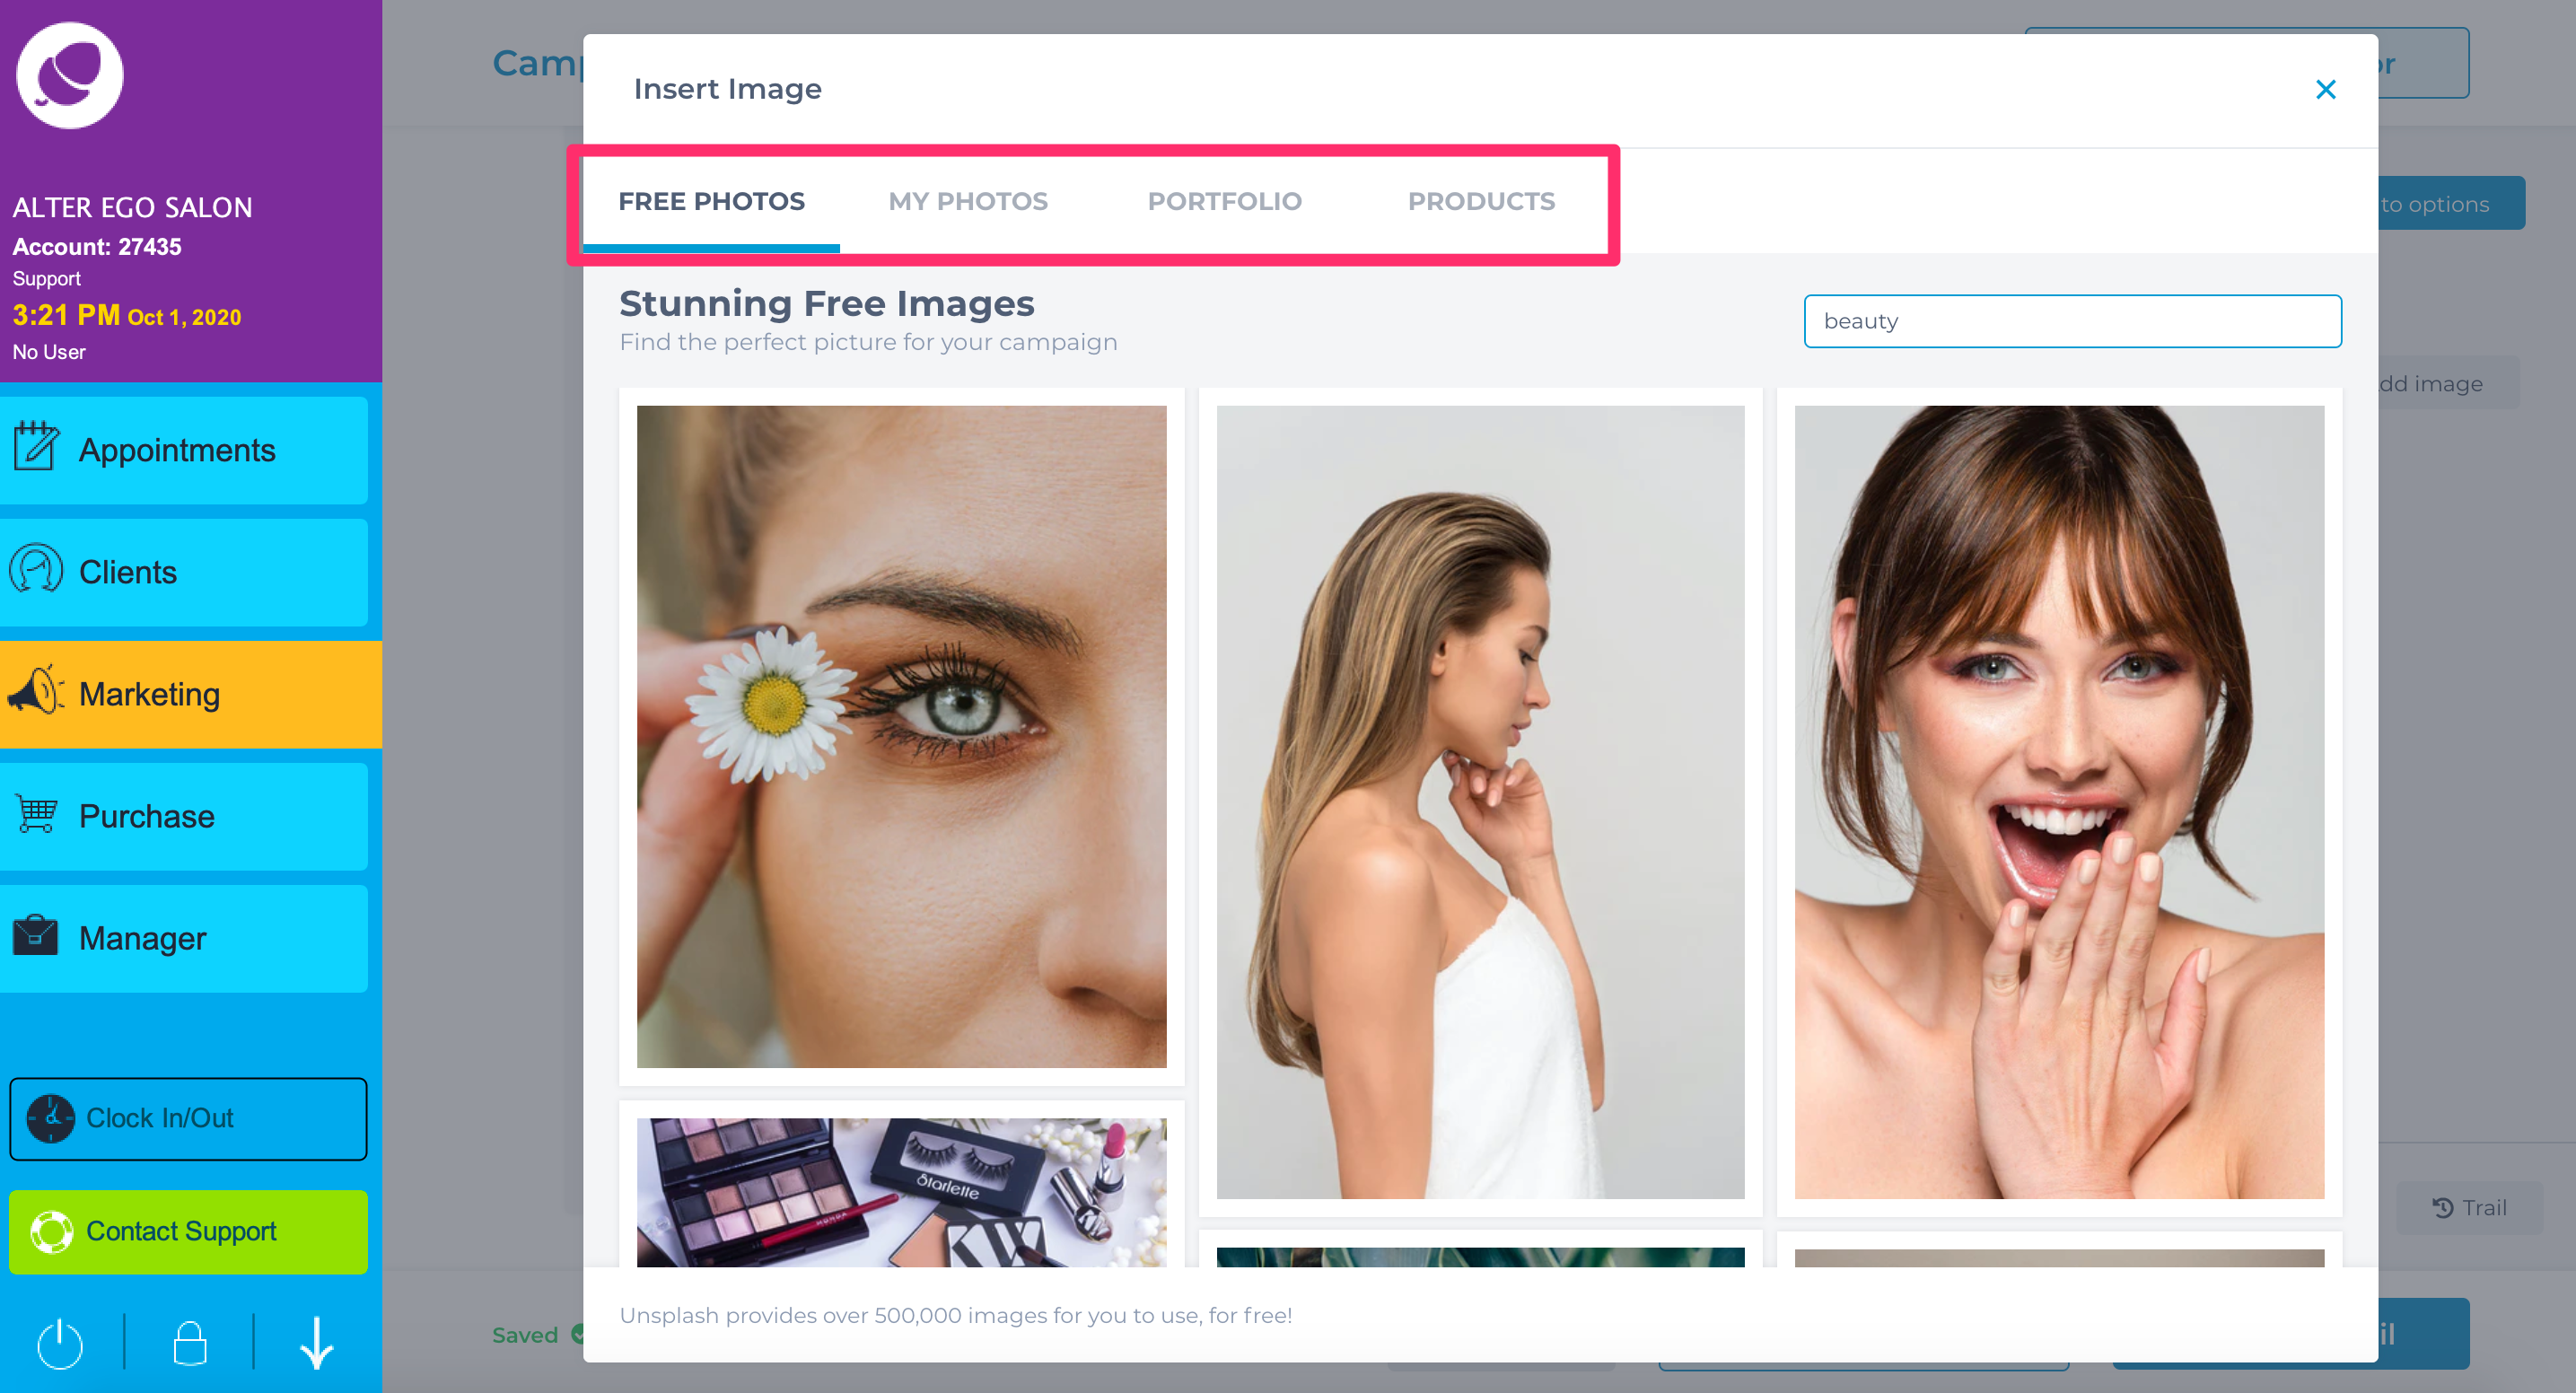
There is a library of Free Photos to use, upload My Photos from your computer or include photos from your Portfolio and Online Store Products.
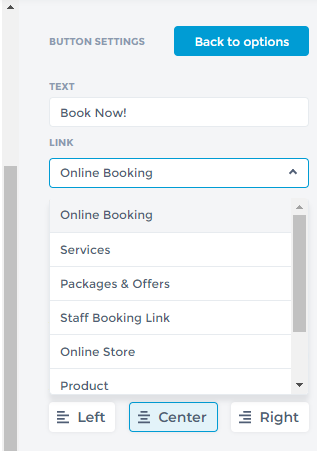
In each email, it's vital to add a Button. This gives clients a cal to action by a direct link to Book Online, shop in the Online Store or promote a new Staff.
When finished editing the email content, click Preview.
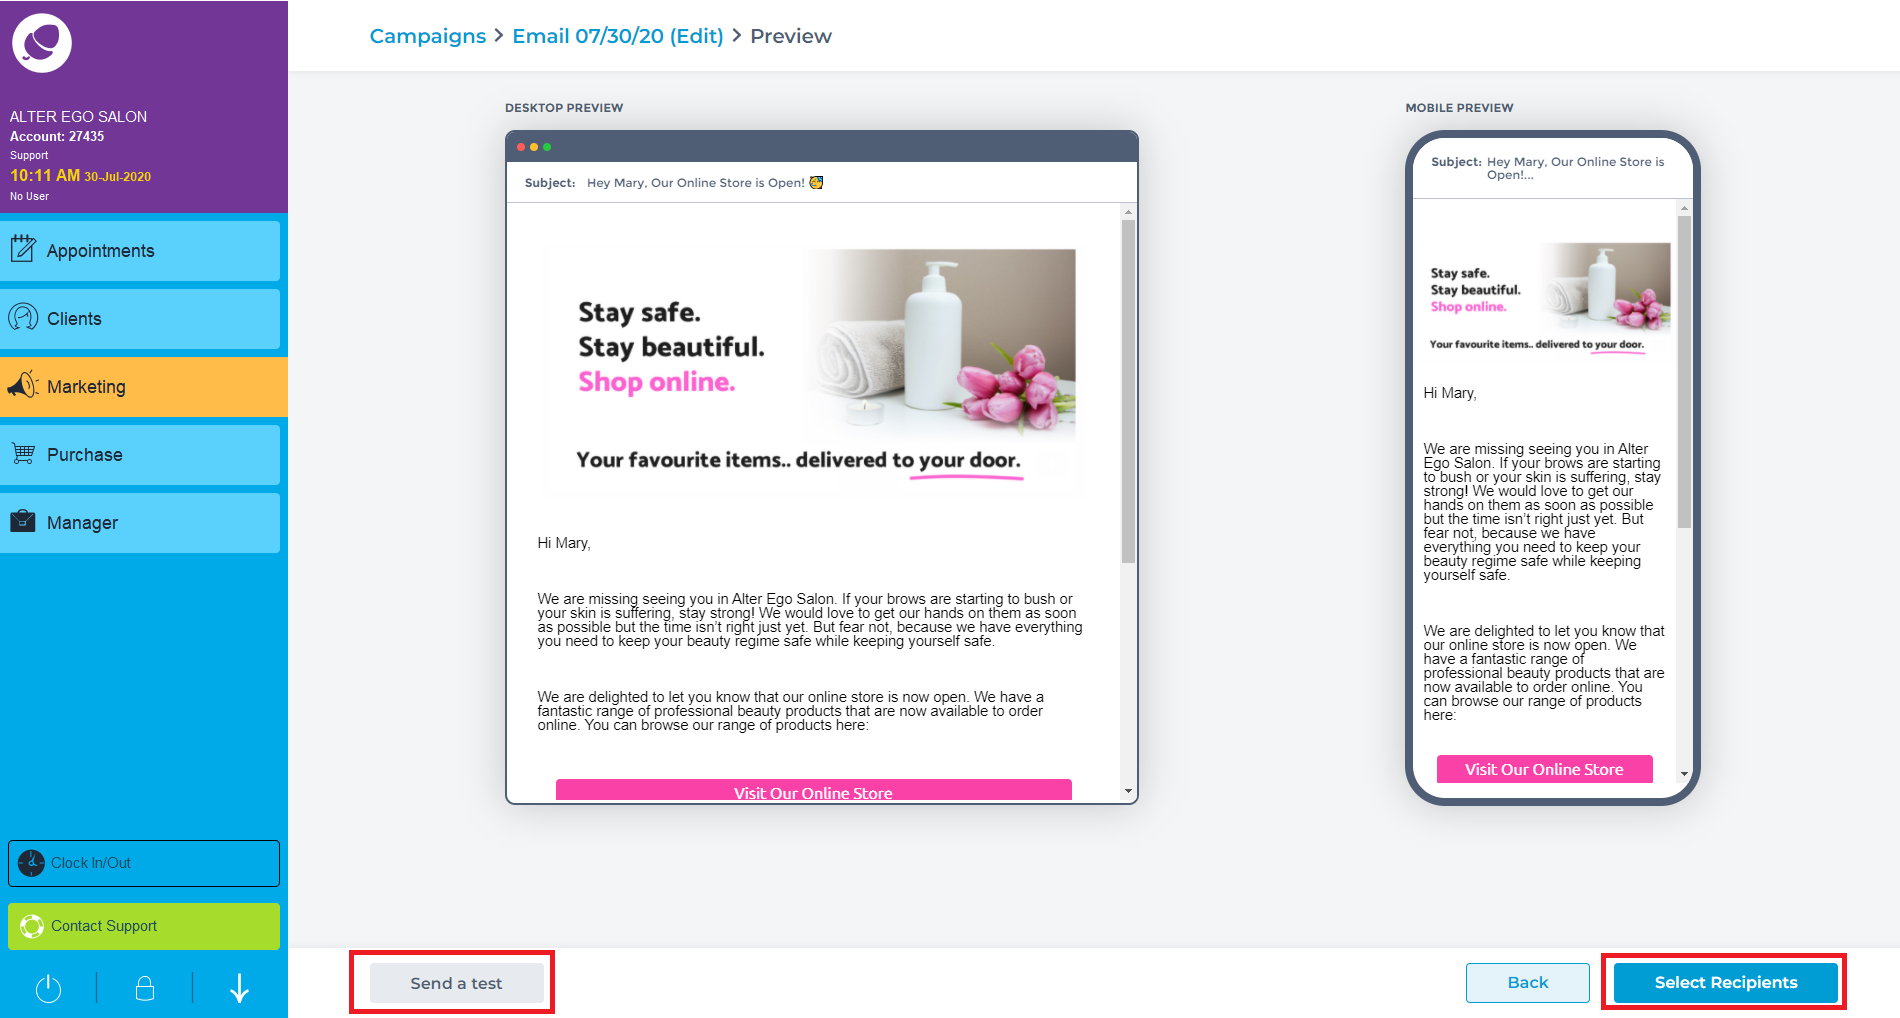
Again, a preview option of the email will appear on a desktop/laptop device and mobile device. Click Send a Test or Select Recipients.
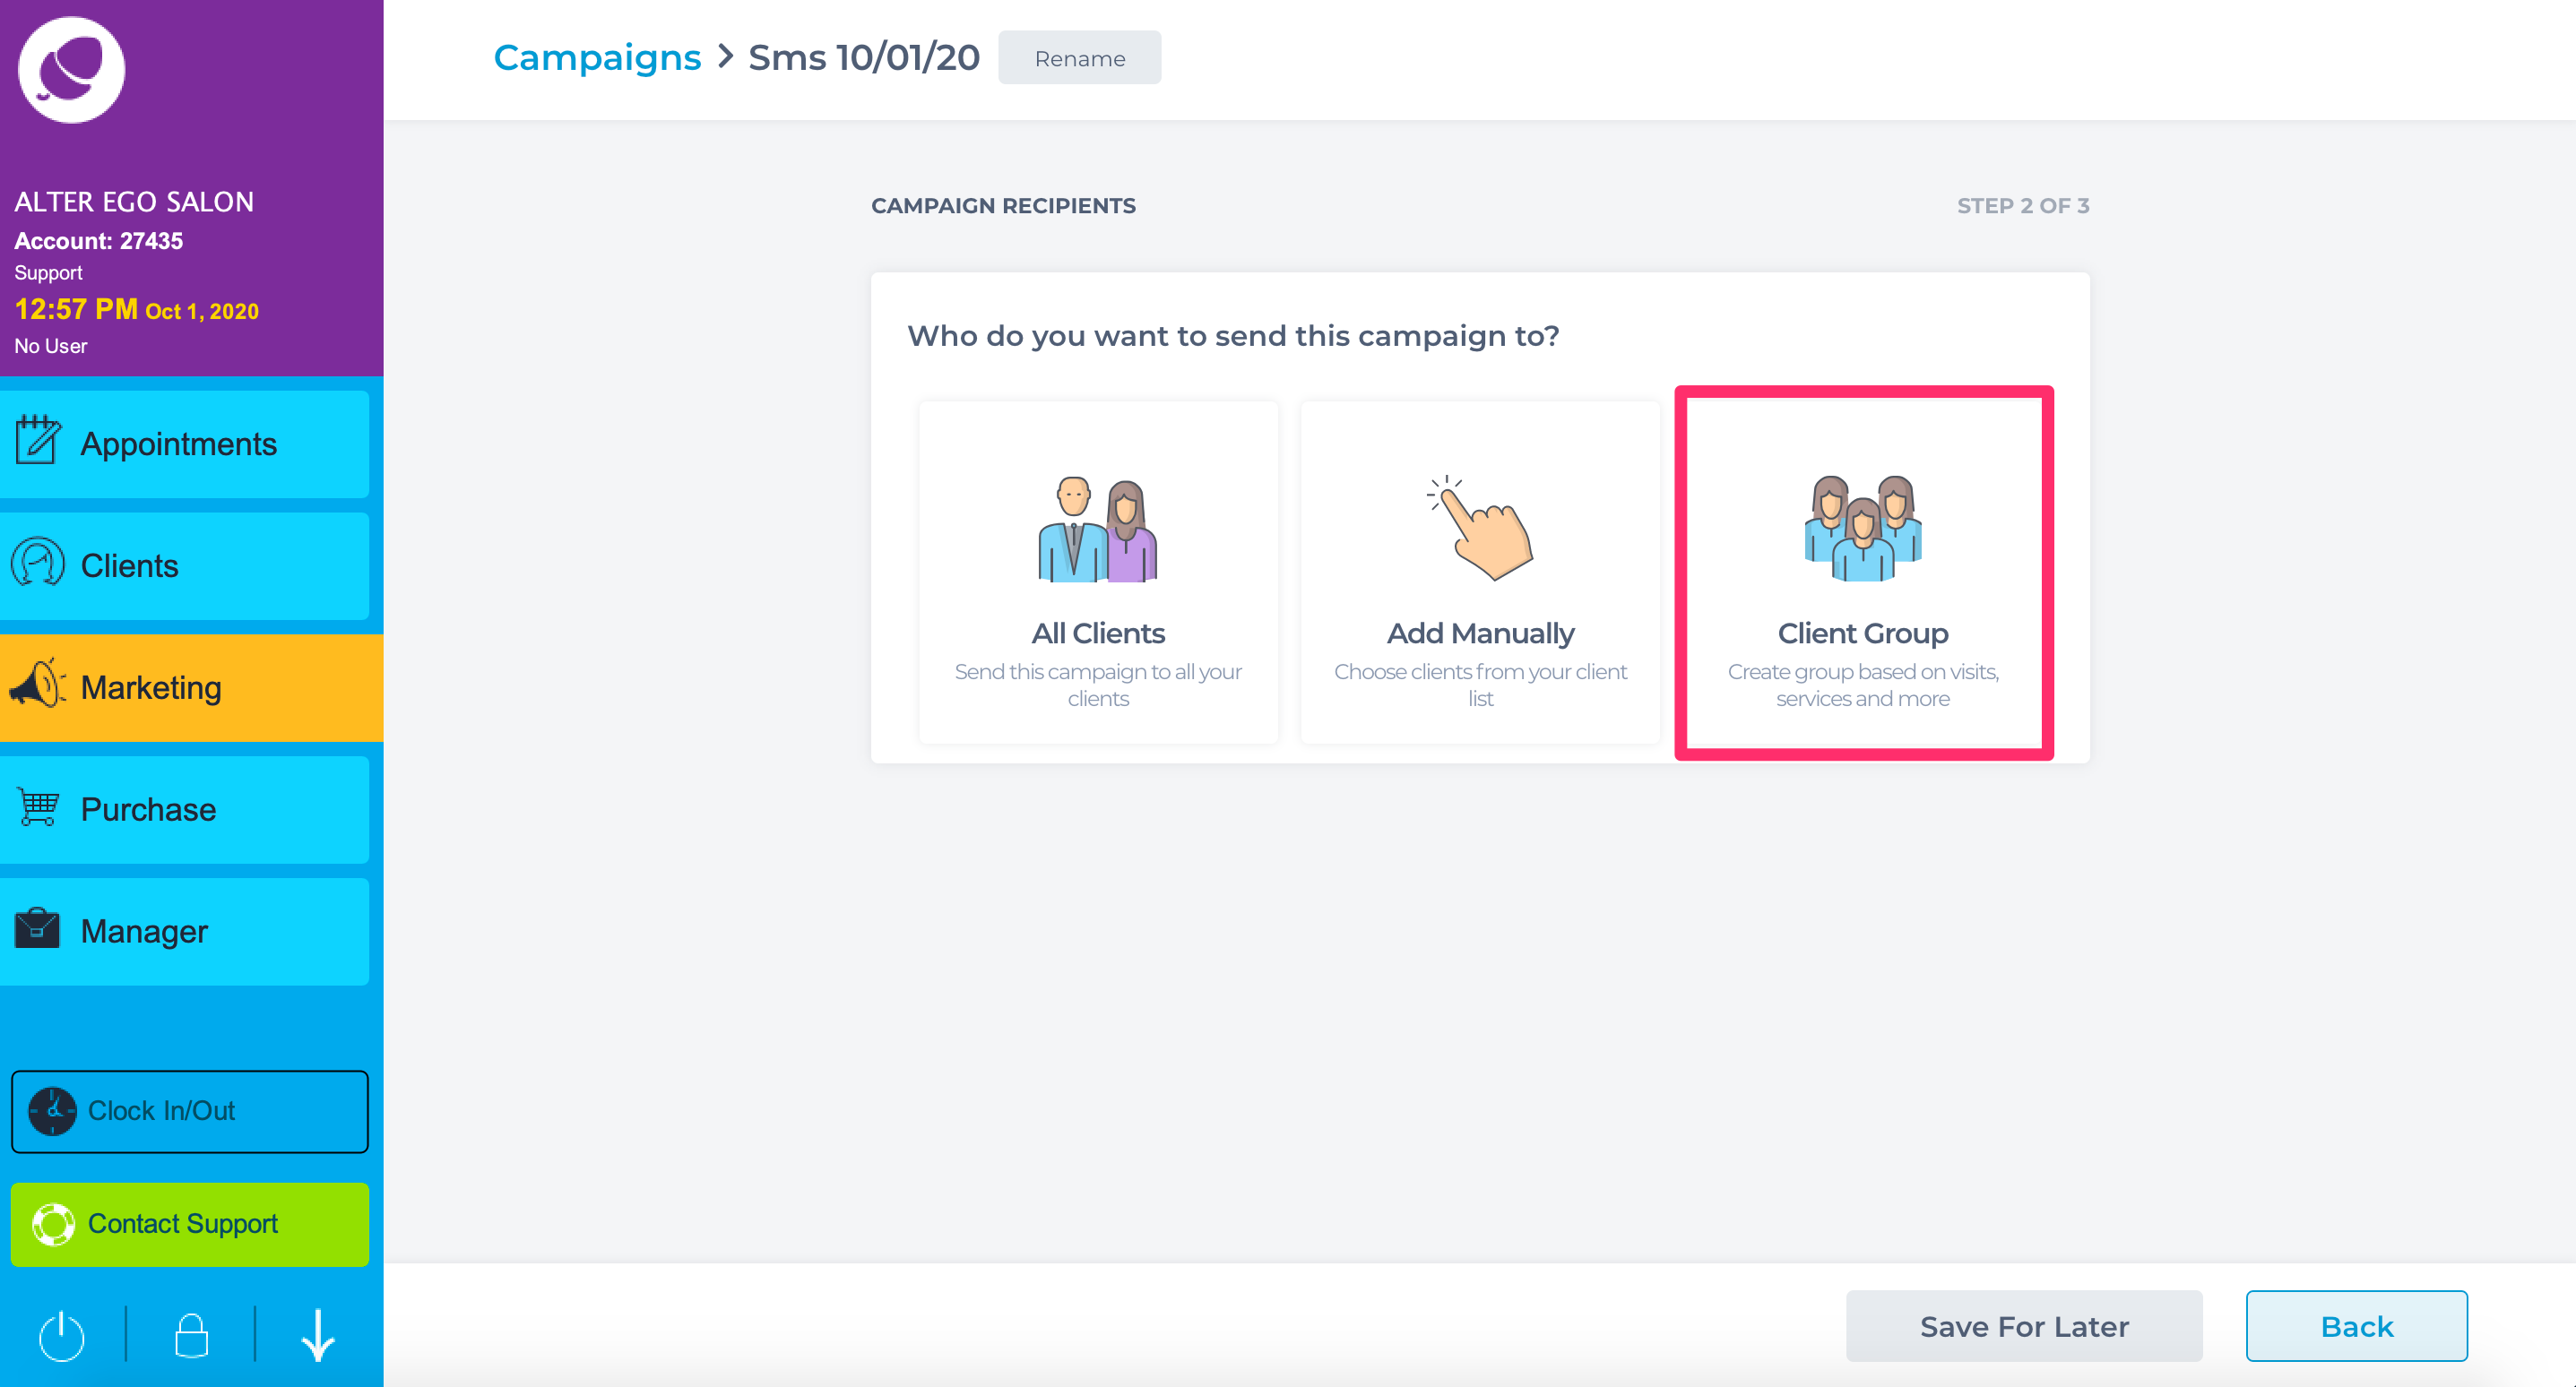
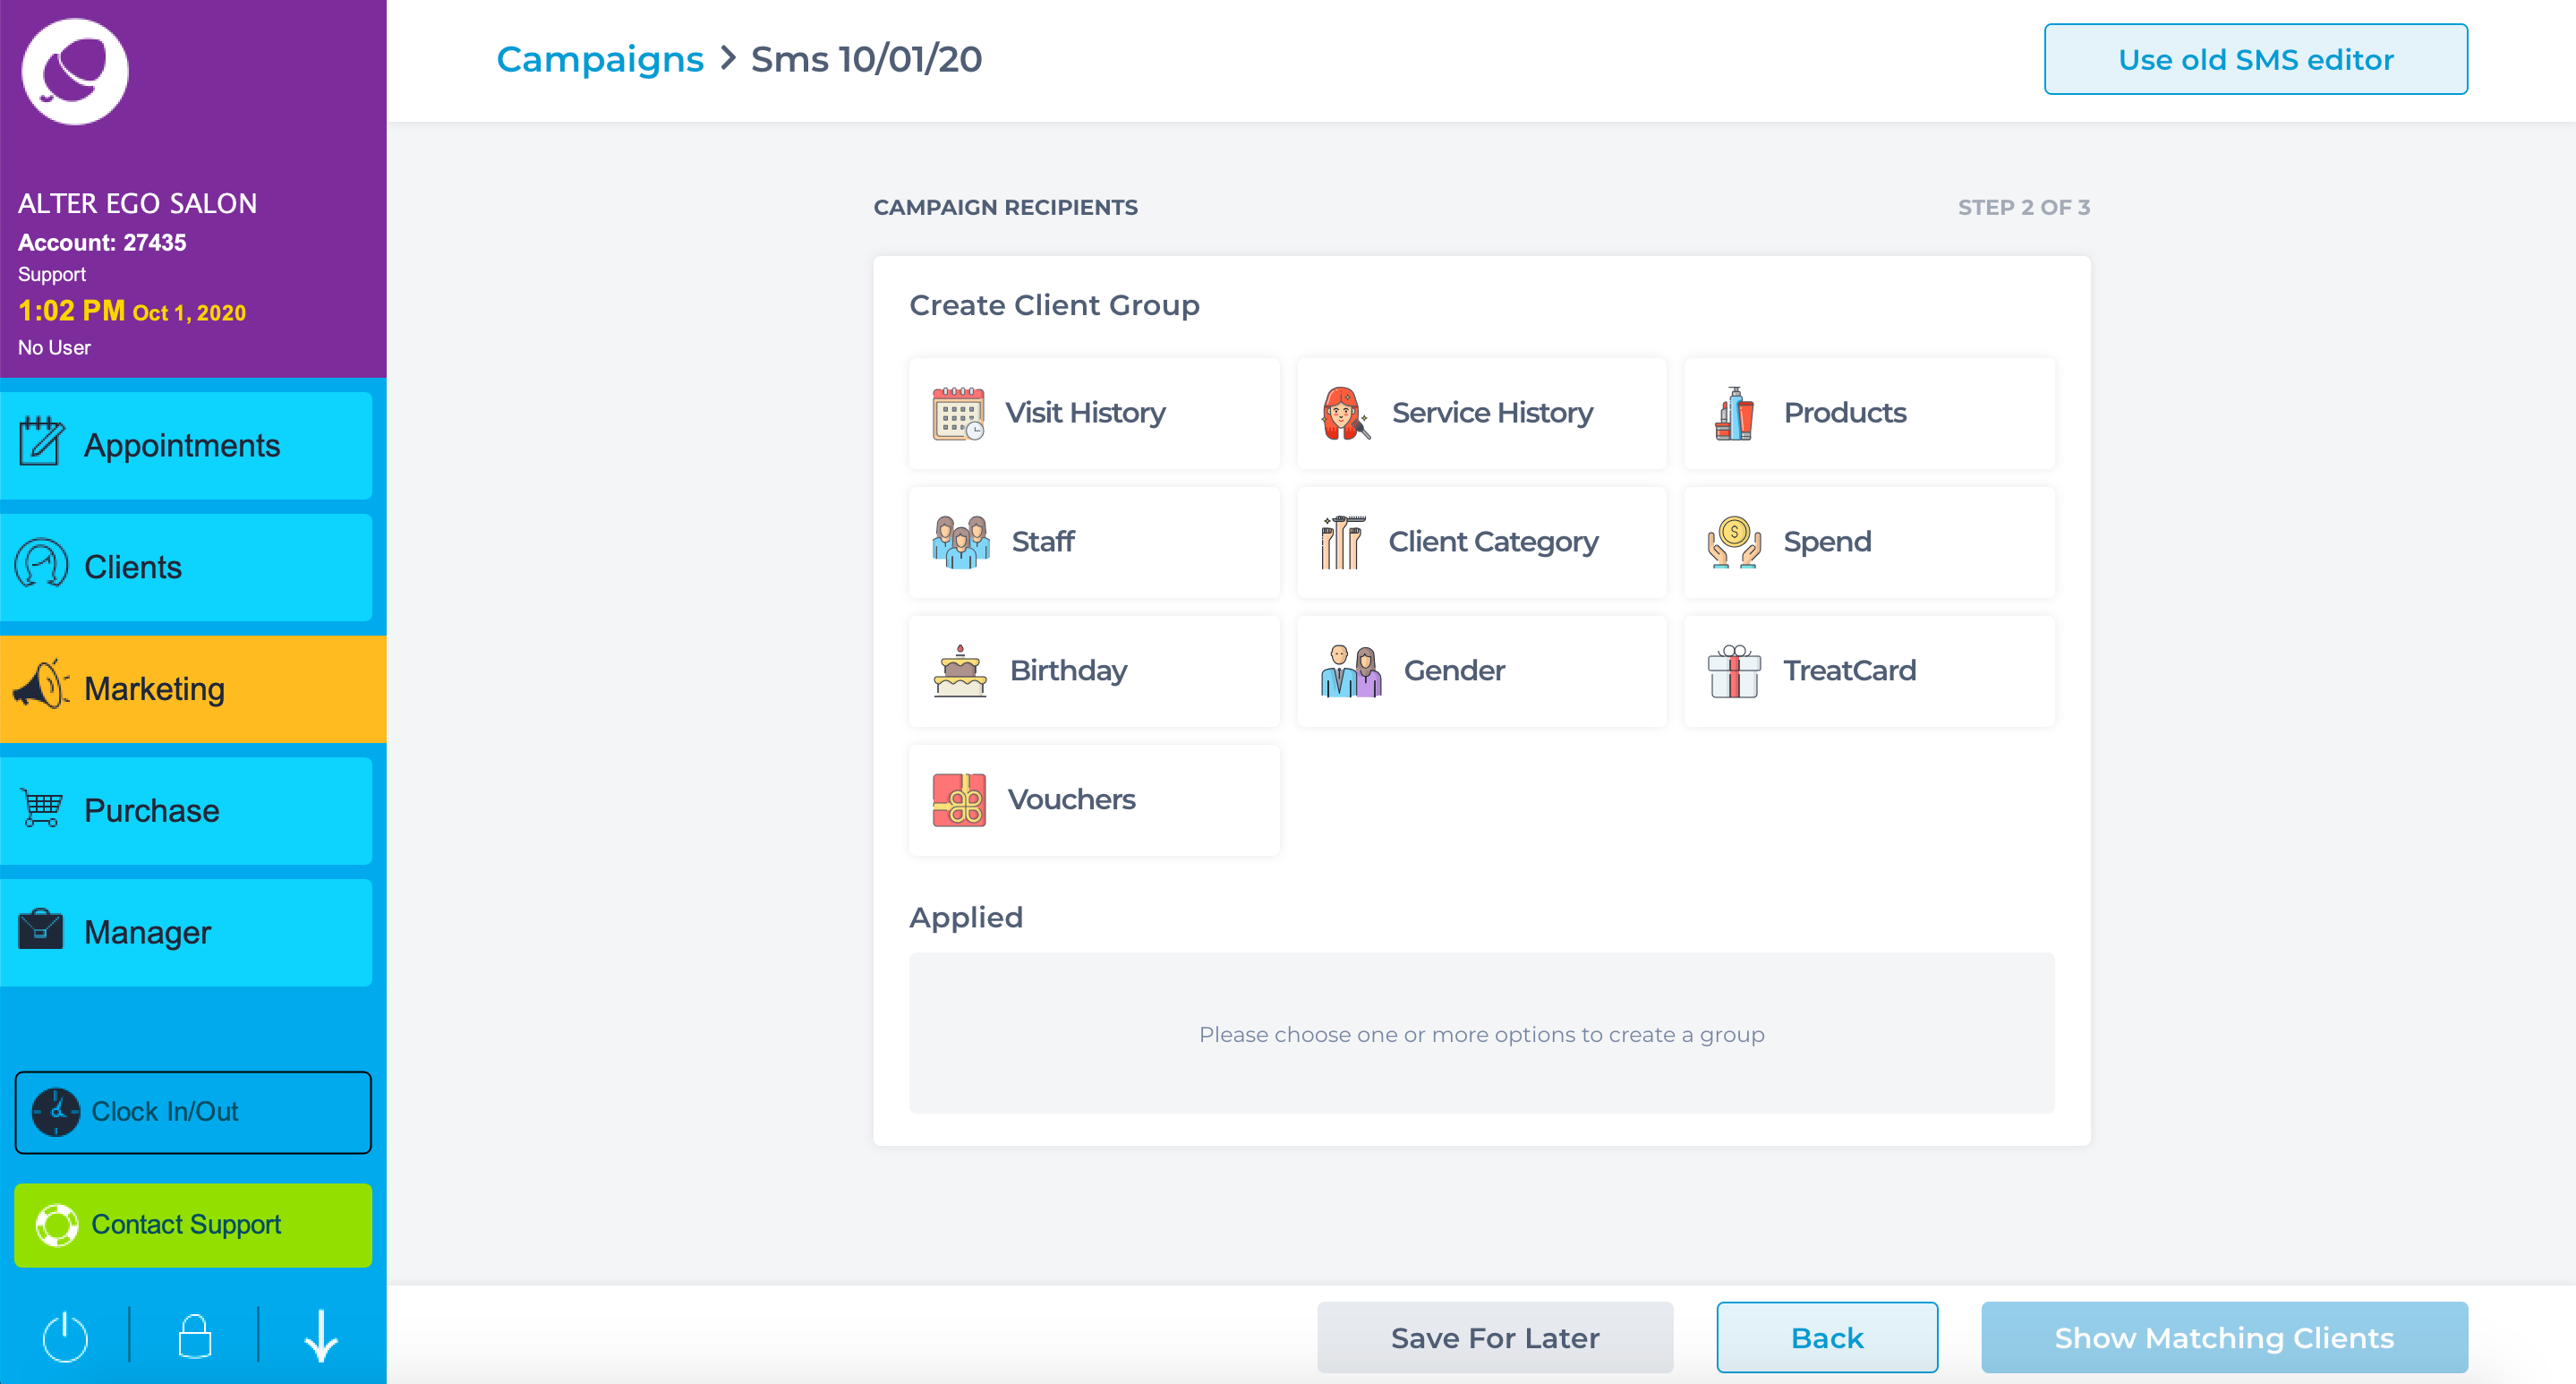
Choose which clients will receive the email. Send to All Clients, Add them Manually or send a targeted campaign with Client Groups. Below is an example of Client Groups to choose from.
The system will load the number of client with email addresses and those without.
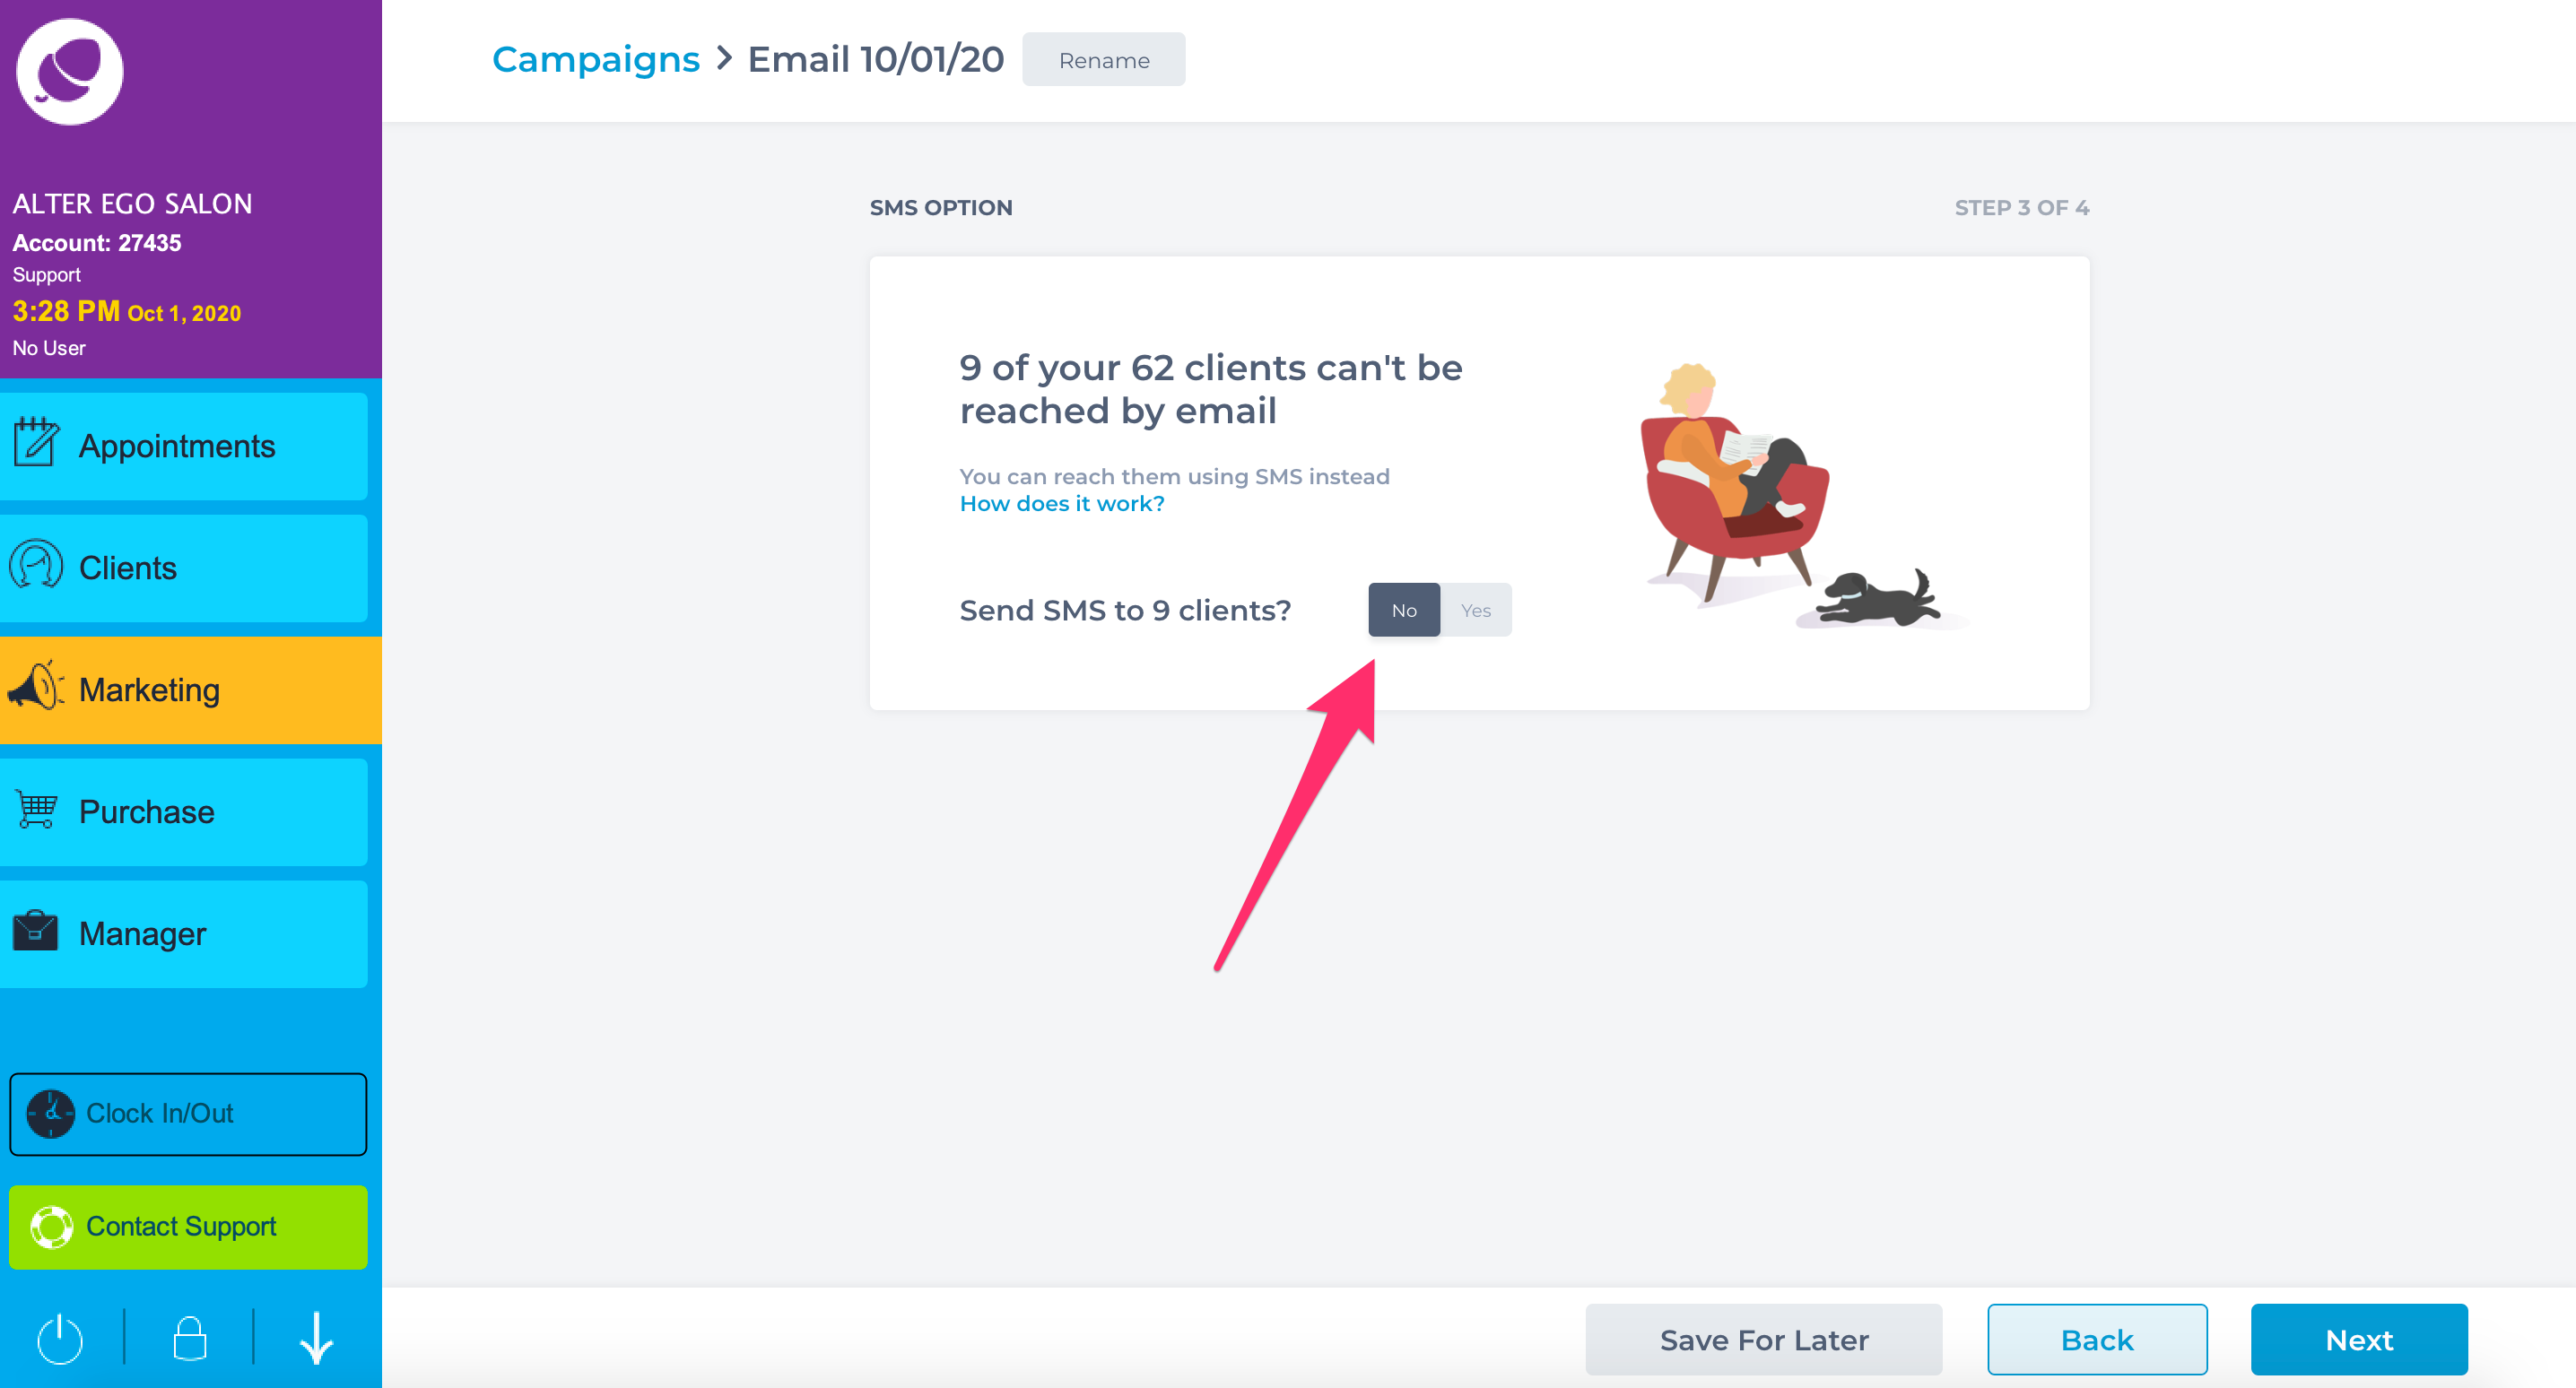
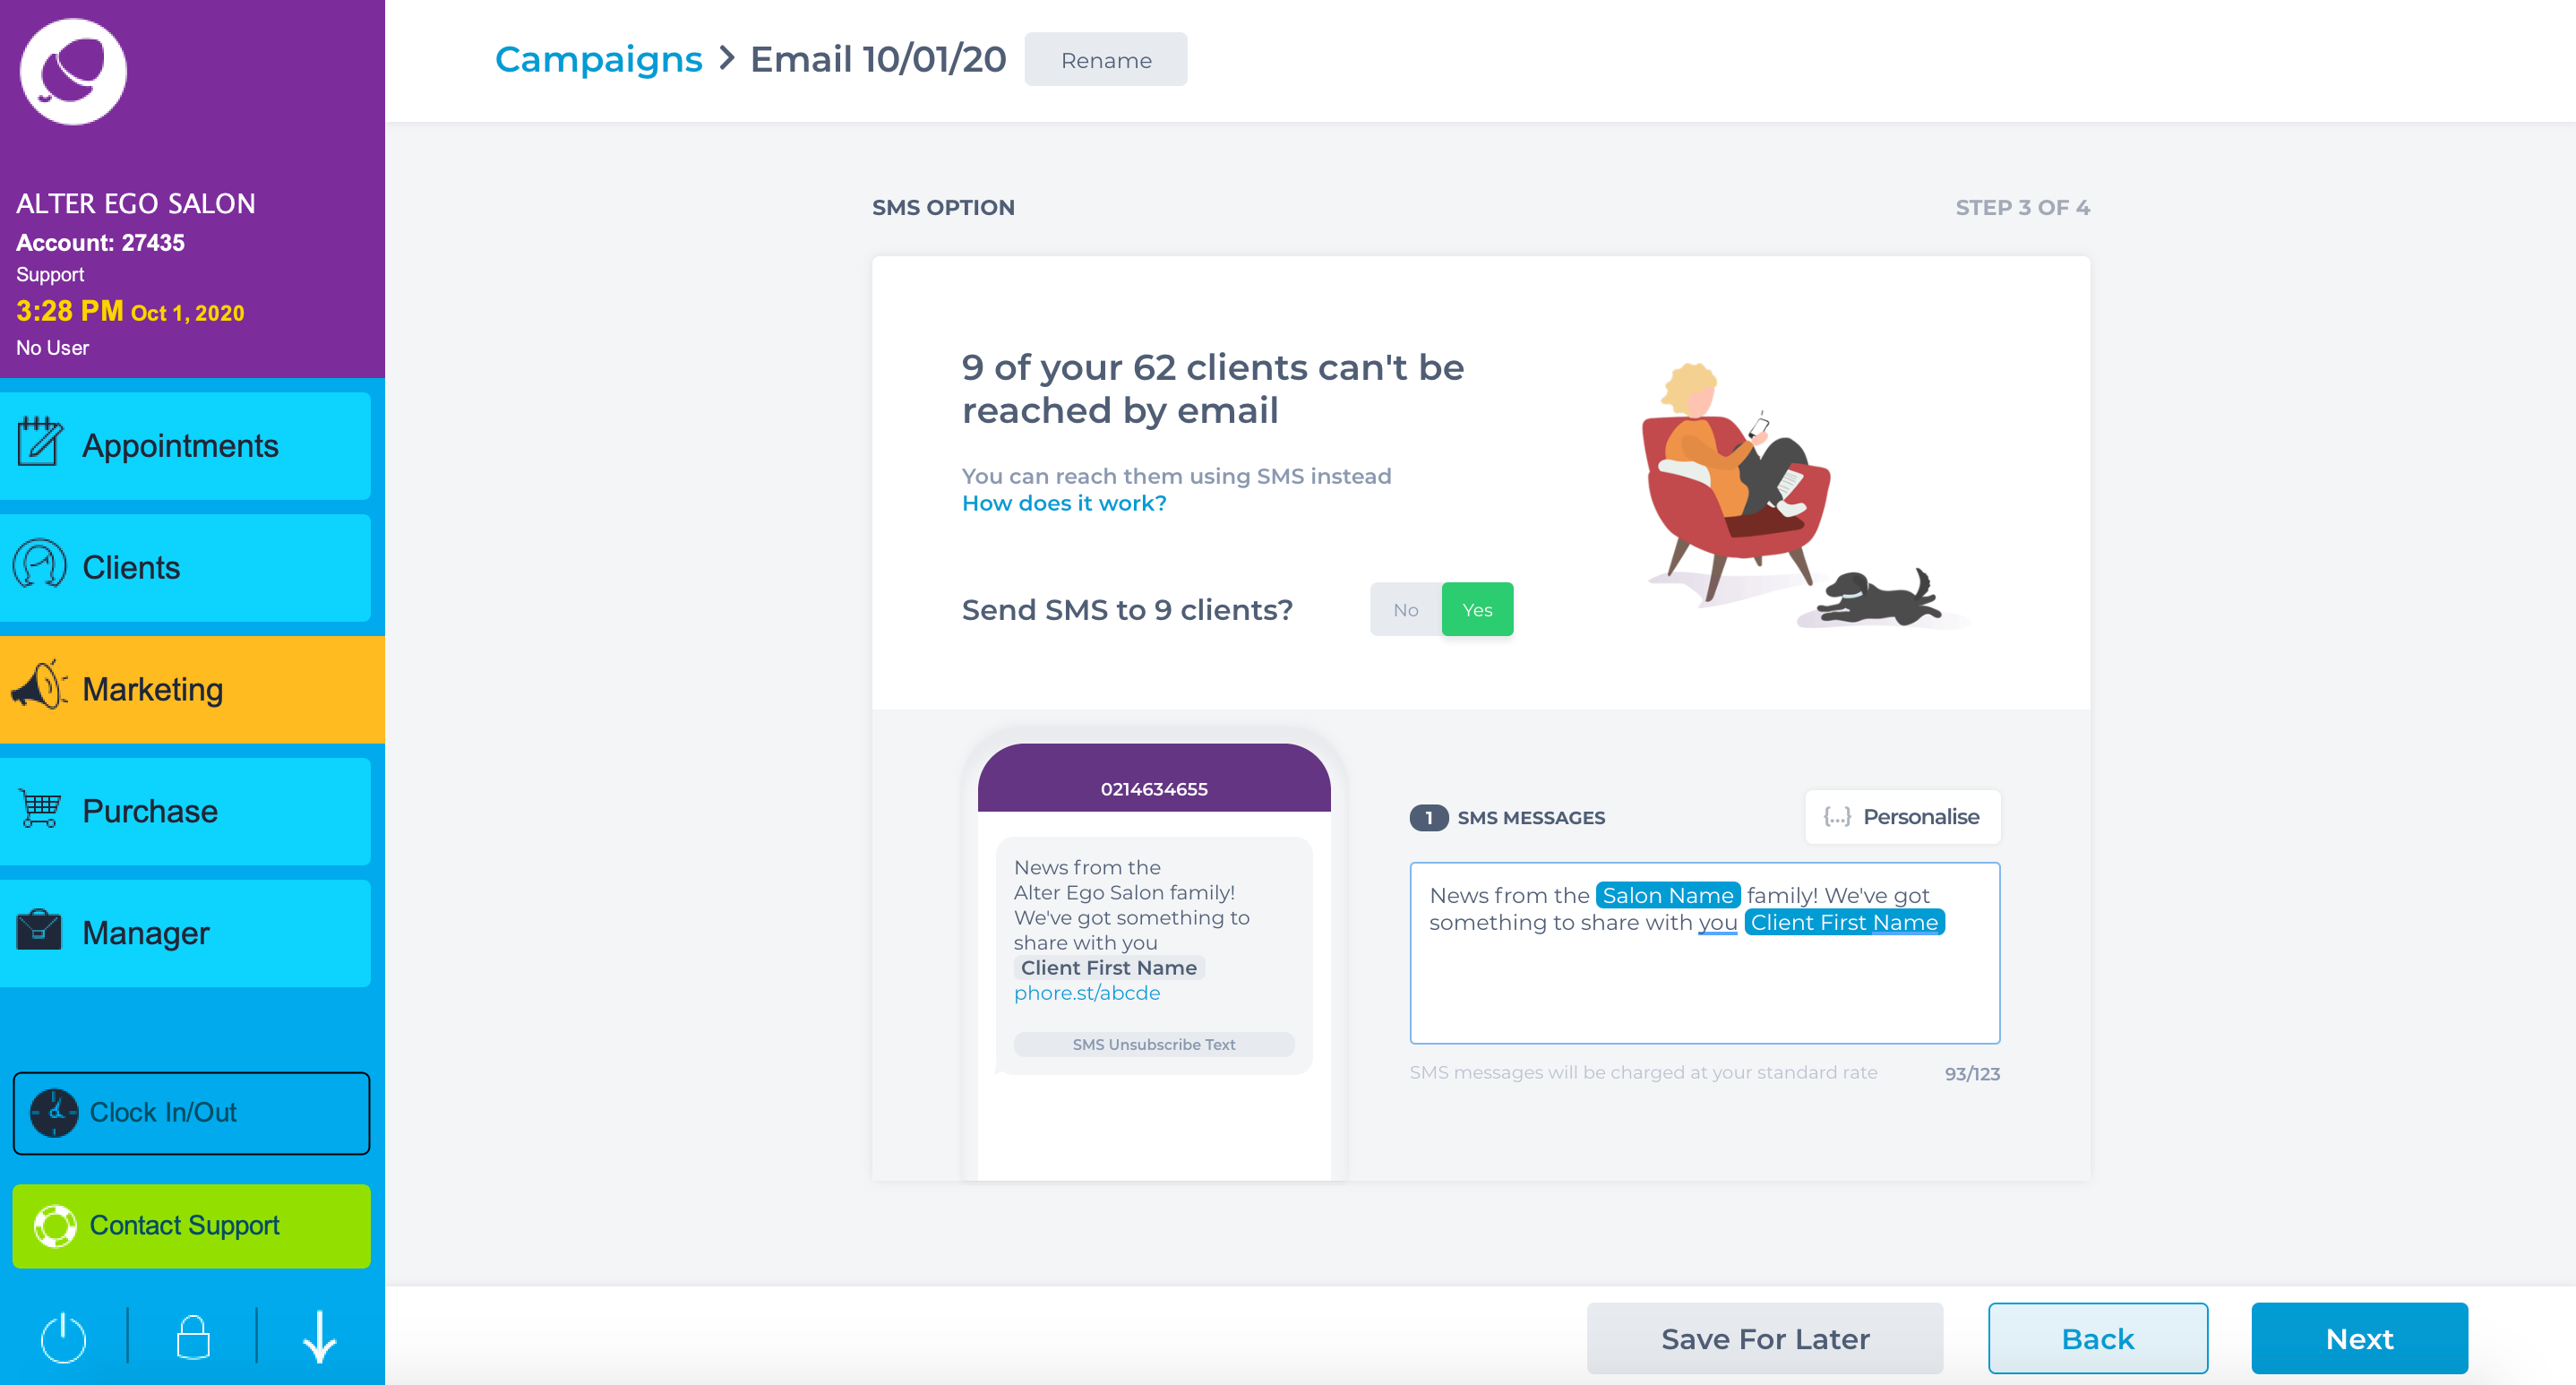
Toggle Add SMS to Yes. This switches on Fallback SMS, which will send a web link of your email content to clients without emails so to reach a wider audience.
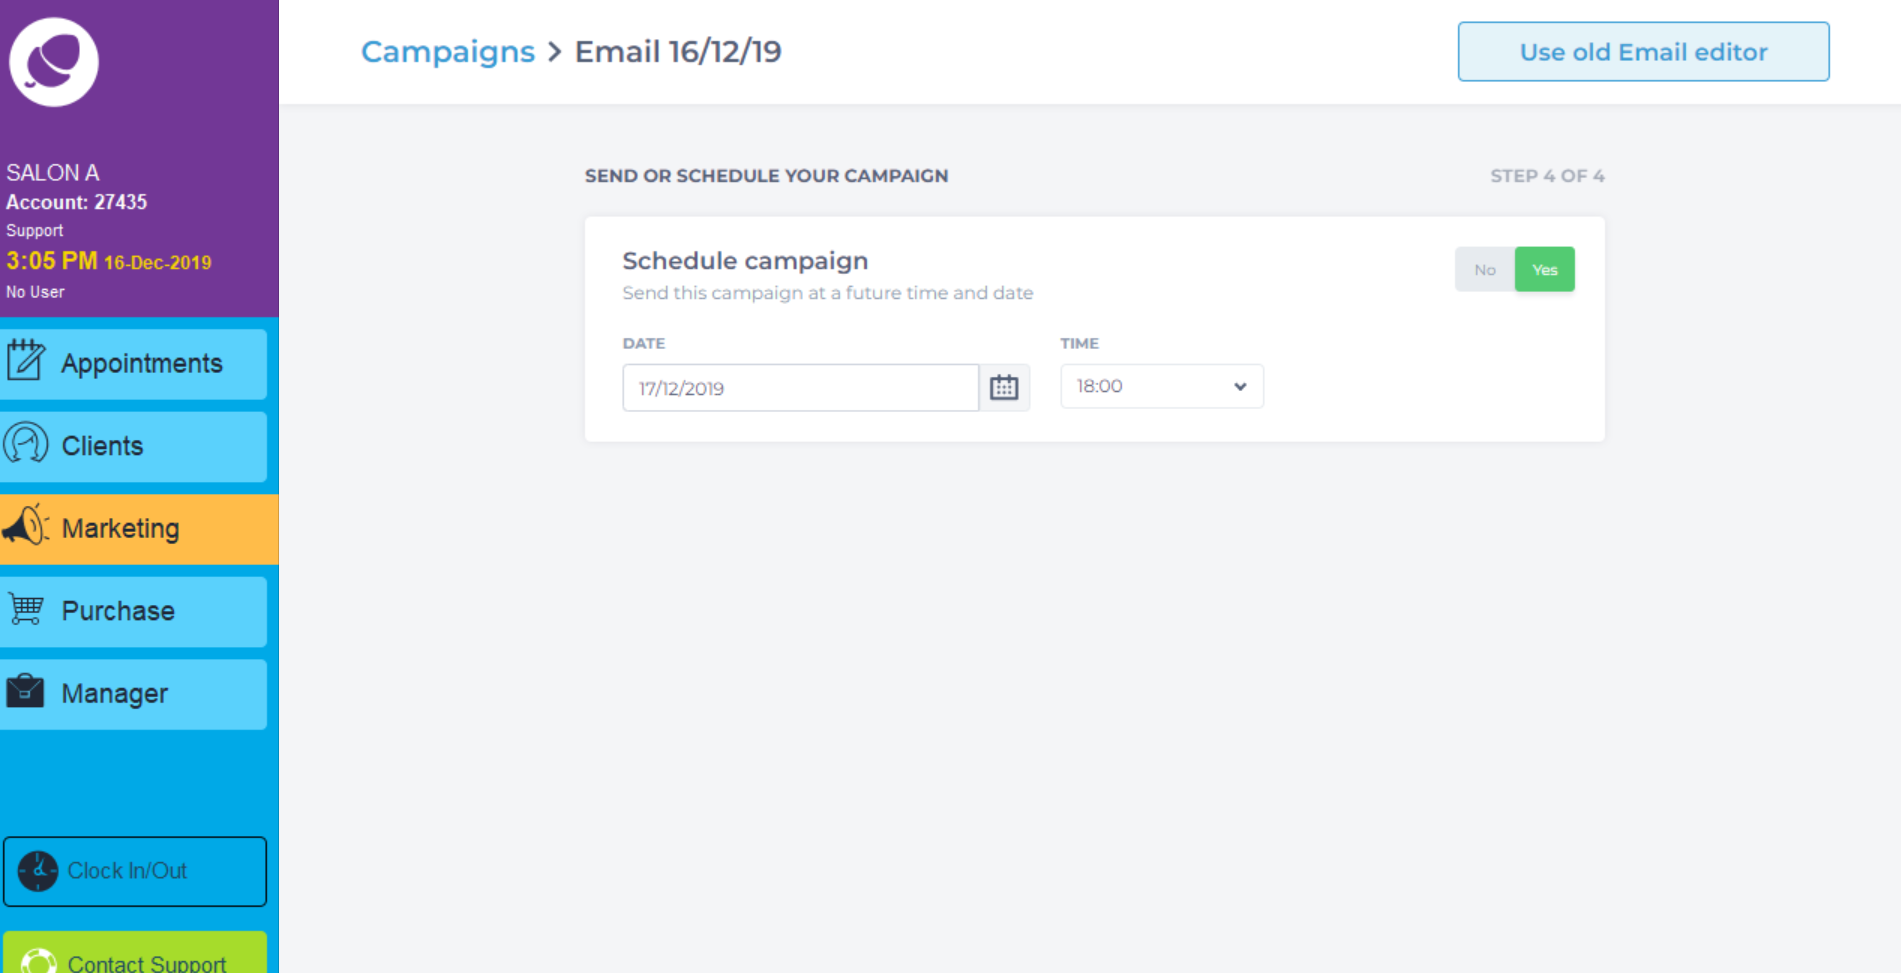
Schedule the email to go out at a certain date and time.
Click Send My Campaign to finish the email.
To learn about more areas like this in your Phorest system enrol in our SMS & Email Marketing Campaigns series in Phorest Academy - online, on-demand and on-the-go learning for busy salon professionals.