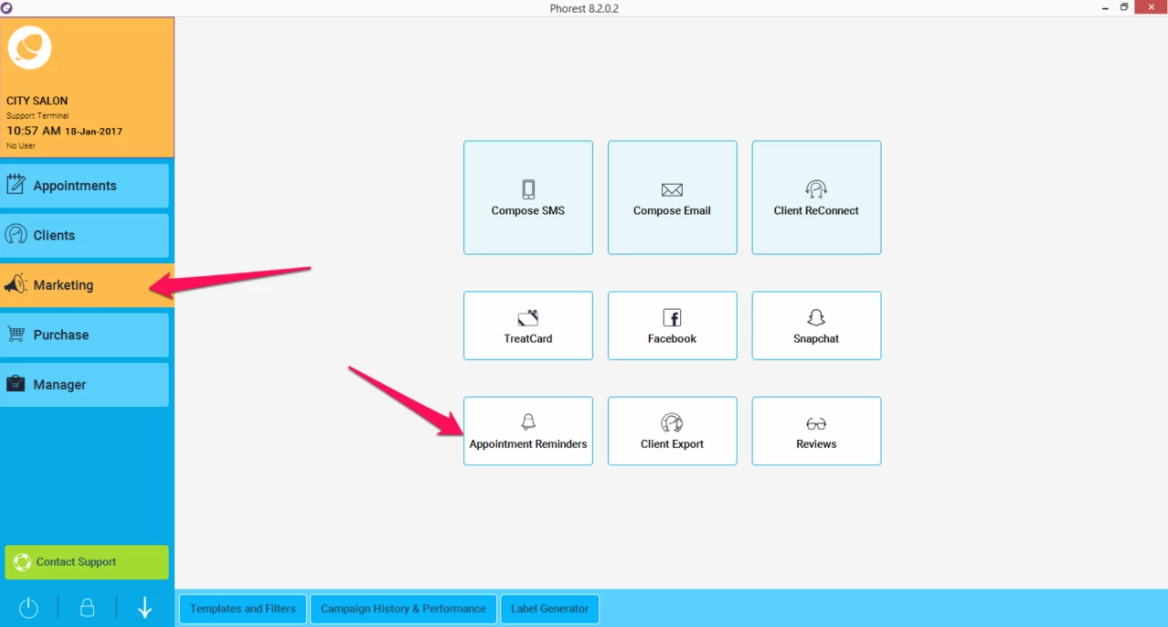
To manually send out appointment reminders you can go to Marketing > Appointment Reminders

Then select Send Manual Reminders from the bottom of the screen

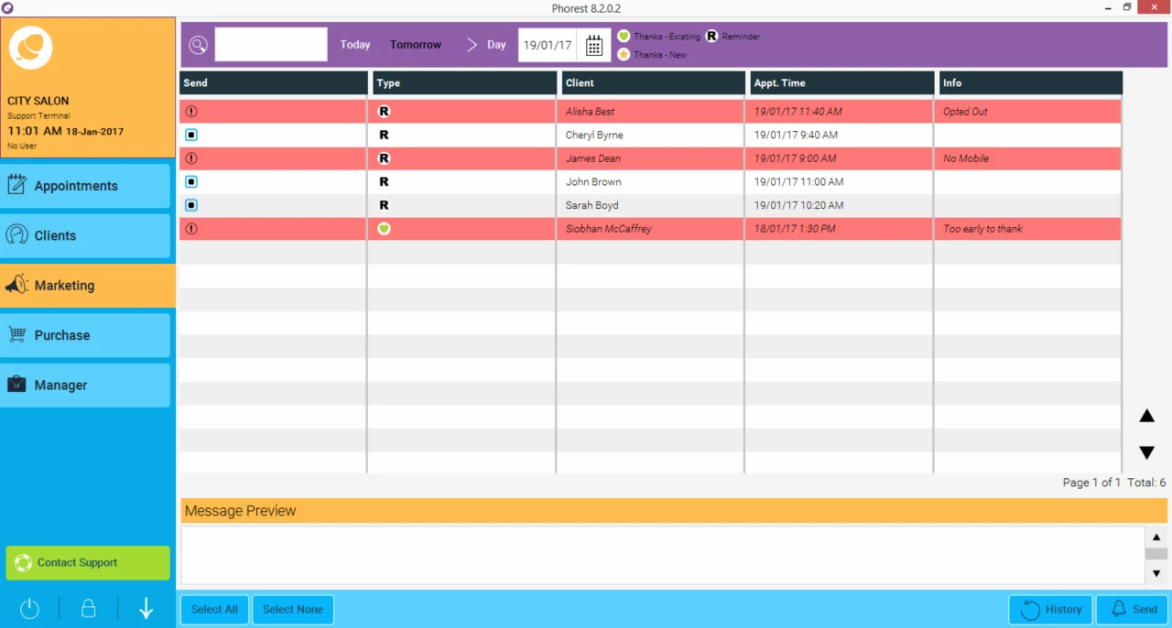
This will bring you to a screen that looks like the following one:

From here you can select which messages you would like to send and for which days.
The calendar in the purple bar across the top allows you to select the day on which the appointments are, that you wish to send the reminders for.
The Send column will have one of three icons. A red exclamation mark means the reminder cannot be sent, and the reason for this will be explained in the Info column on the right. A blue box with a black dot in it means that message is selected to be sent. The blue box with no black dot means the message is not selected to send. You can toggle between selecting all or none of the messages using the Select All or Select None buttons at the bottom of the screen, or you can click in the individual blue boxes to select or deselect messages.
The Type column shows whether the message is a reminder, a thank you to an existing client or a thank you to a new client (as described in the key to the right of the calendar in the purple bar).
Once you have selected the messages you wish to send, then just hit the Send button in the bottom right of the screen and those messages will go to your clients. If a reminder or thank you text has been sent manually then it will not be included in the automatic reminders that are sent for that day, and similarly if the automatic reminders have already been sent then the message will not be eligible to send manually, so your client will never receive more than one reminder.
