When inputting a new clients' information into their client card, it is extremely useful when using the marketing features if you assign at least one Client Category to the client card. This allows you to determine at a glance what kind of client they are; what kind of treatments or services they usually book in for, what kind of products they buy from you and even the times of the week that they may be available for potential appointments.
This information allows you to market more effectively to your clients by narrowing down who you send your campaigns to and in effect making your promotional campaigns as relevant to each client as possible.
There are a number of categories already on your Phorest system as templates but you can also add as many of your own categories as may be necessary to allow you to effectively target your client base when marketing.
Schritt-für-Schritt-Anleitung
To Add a Client Category and Assign it to your Client Card
- Open any client's Client Card.
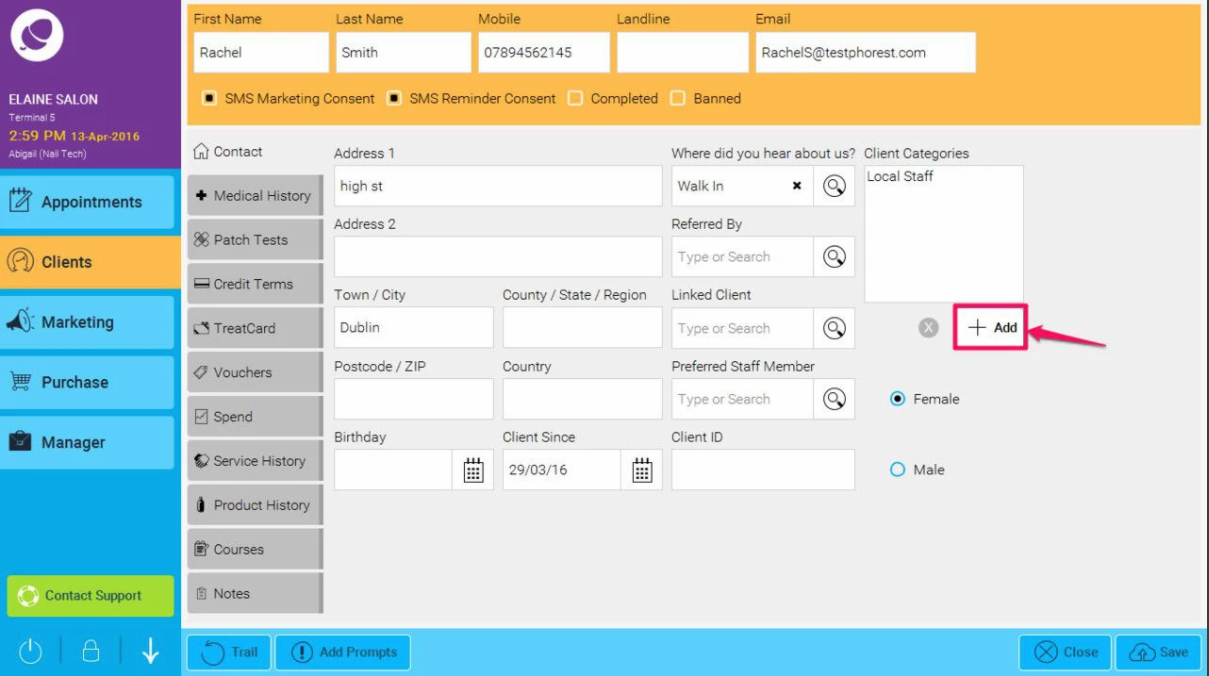
- The Client Categories box can be seen to the right of the client card.
- To view the list of Client Categories available within your system, click on the +Add button beneath on the right.
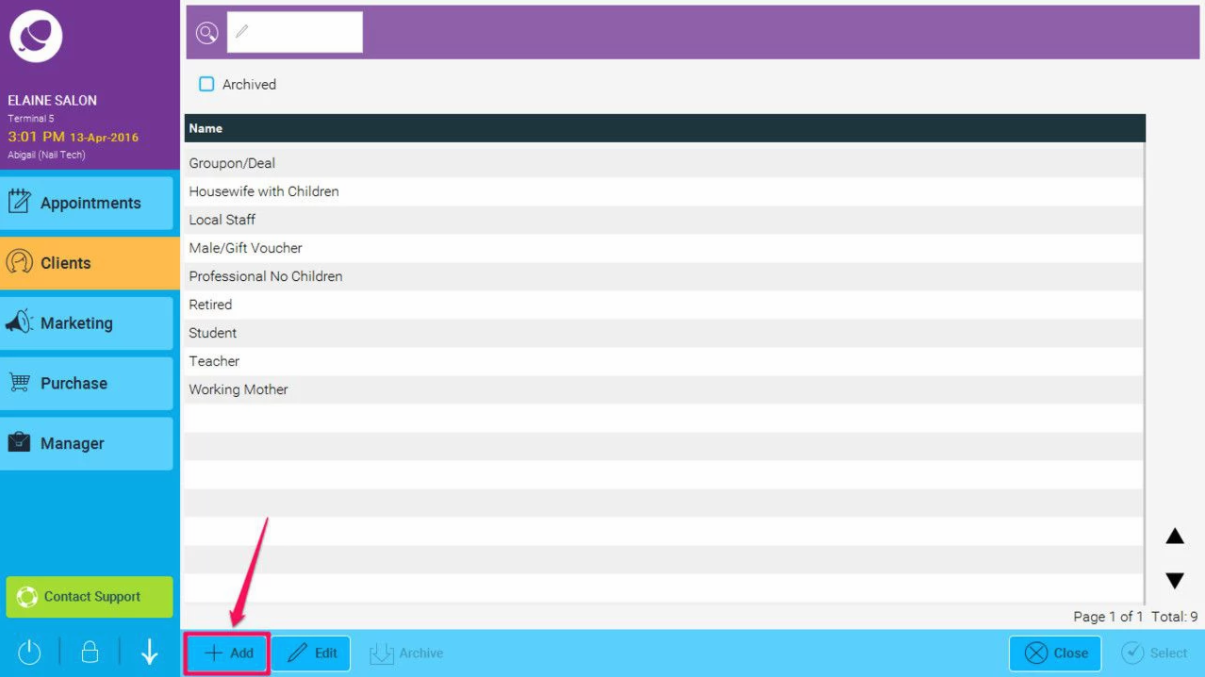
- If you wish to Add a new Client Category, simply click the Add button at the bottom-left-hand corner of the screen.
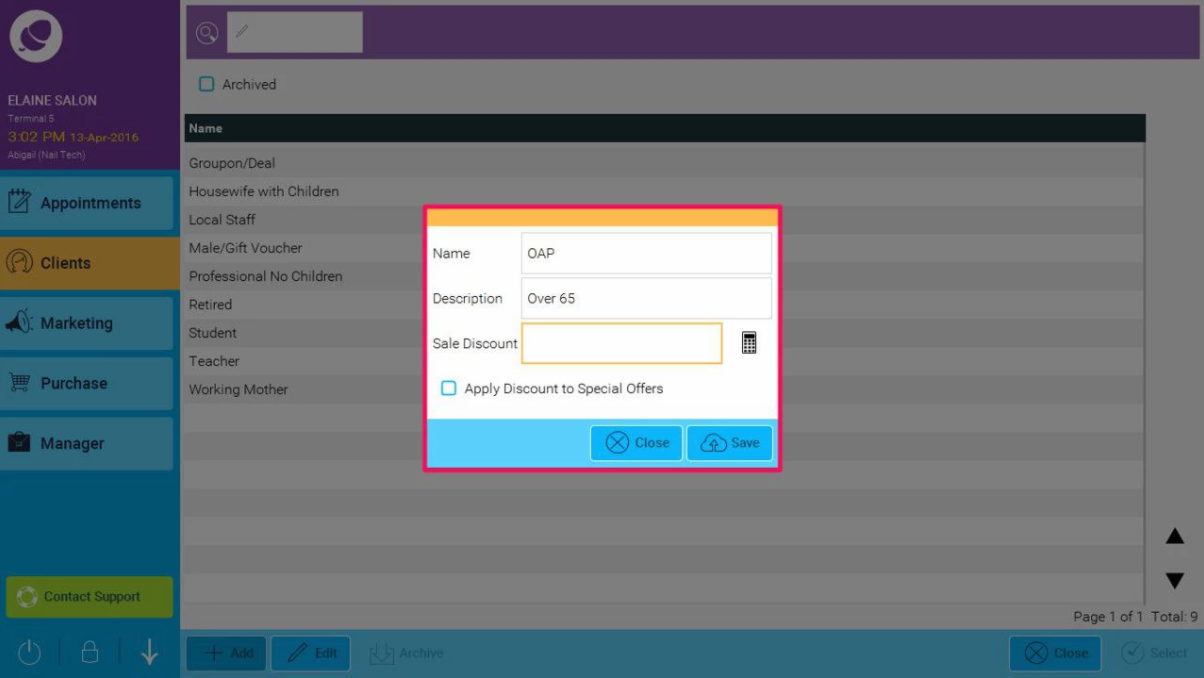
- You will then see a pop up that asks you for the details of your new category - the name, a brief description of the category itself (optional) and whether or not it is a category that would carry a discount eg. retired clientele, students etc.
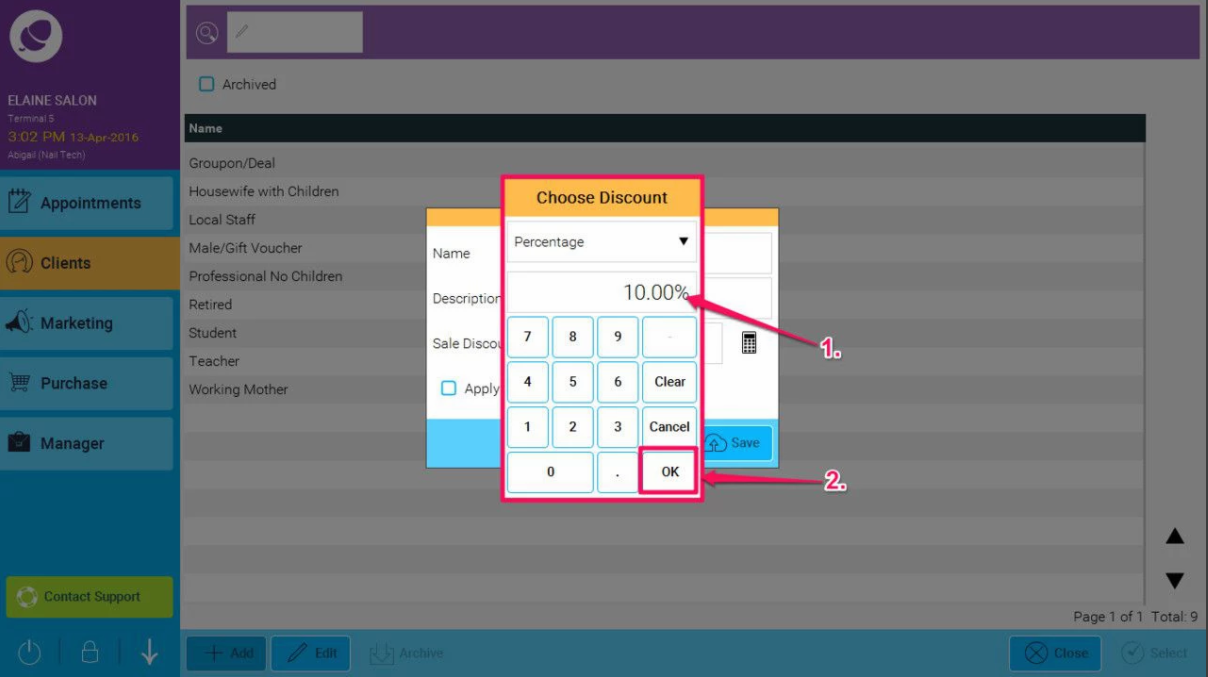
- If you would like to assign a discount, simply click on the calculator icon to the right and assign discount by percentage (1.) , then click on OK (2.)
- You can then choose whether or not you you would like to apply the discount to special offers by checking the box (as shown in point 1. below), and then click Save (2.)
Once you have saved your new category, you will be able to begin assigning it to your client cards.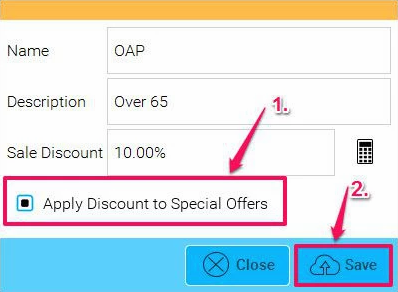
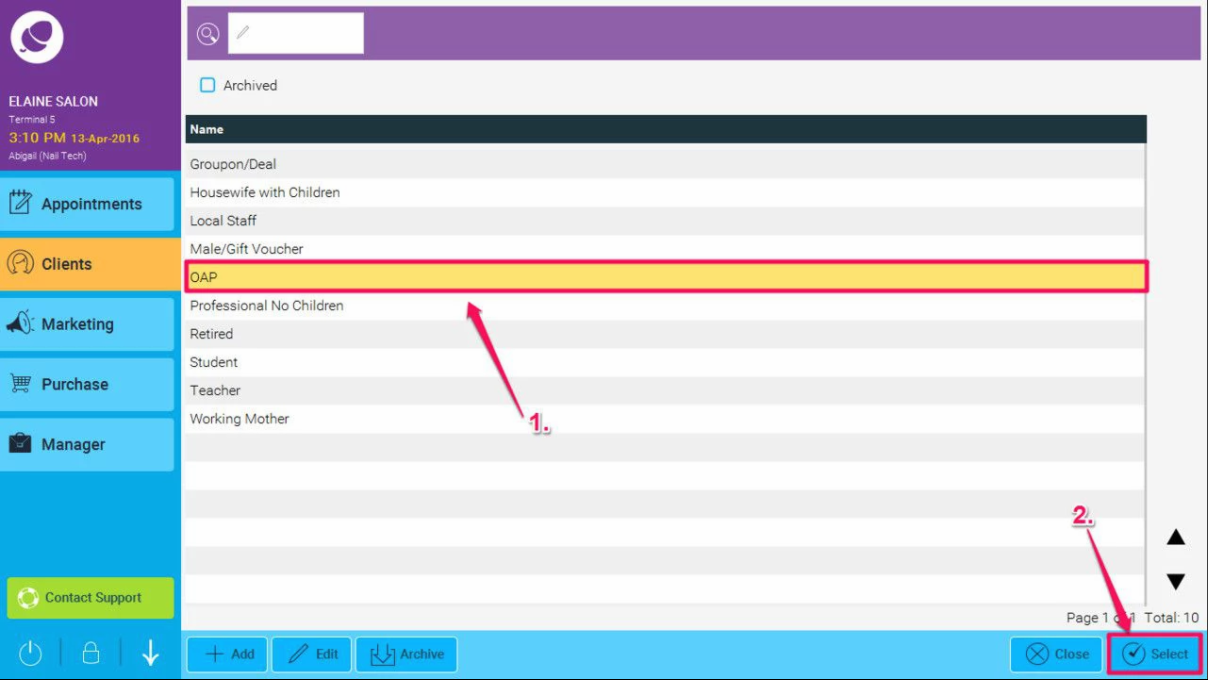
- To assign the Client Category, you can either double-click the category or you can highlight it by clicking once (as shown in point 1. below) and then click select in the bottom right of the screen (2.).
- The Client Category will now be attached to the Client Card.
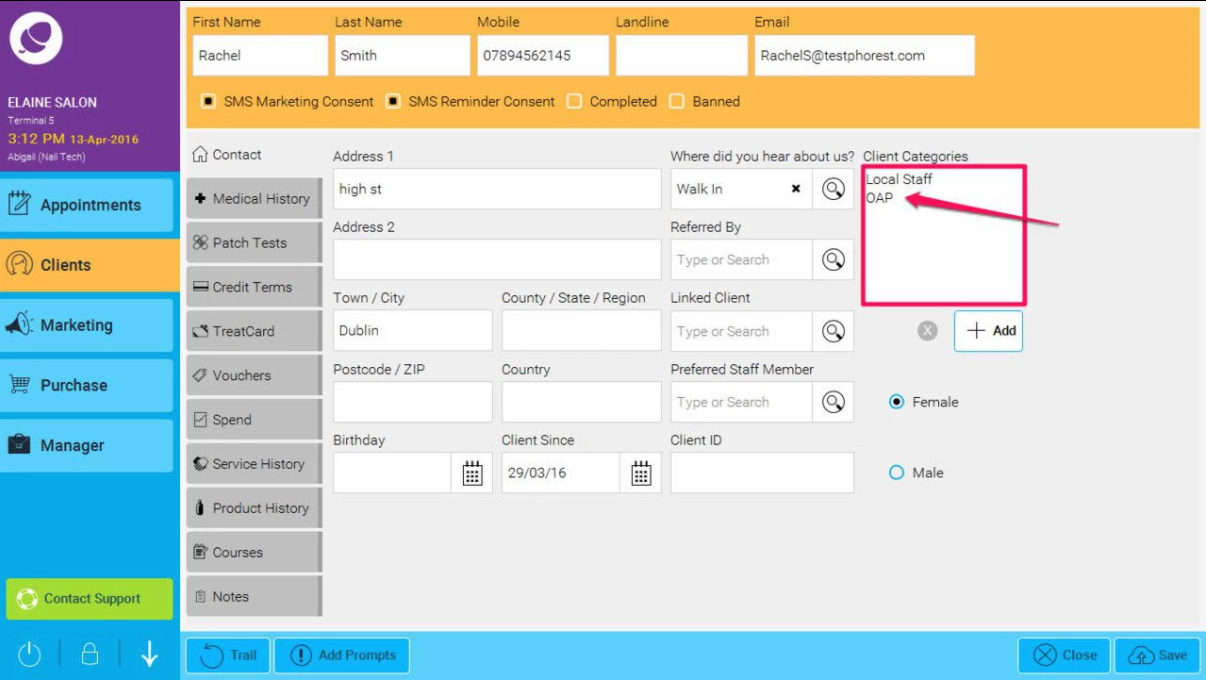
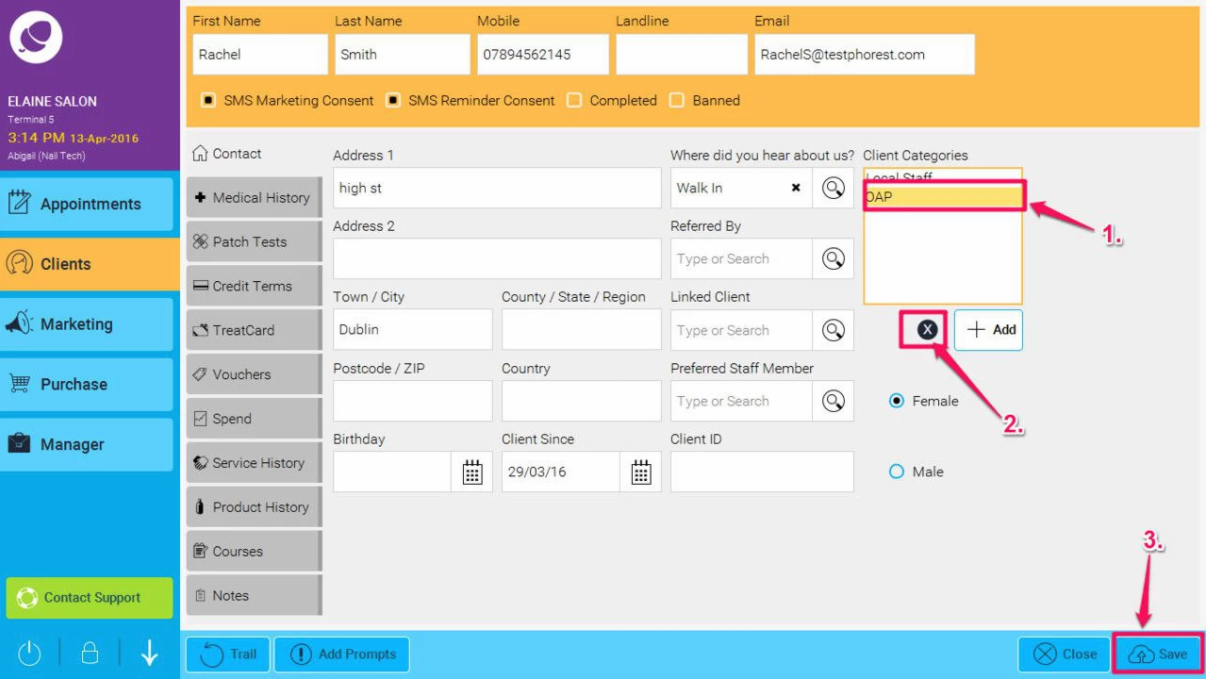
- If you wish to remove the client category in future, simply highlight it (1.), and then click on the cross icon (2.), and finally click Save (3.)
