The following are instructions to set up a Star TSP100 receipt printer with Phorest Cloud on a Windows PC.
Step-by-step guide
- Download the drivers from HERE.
-
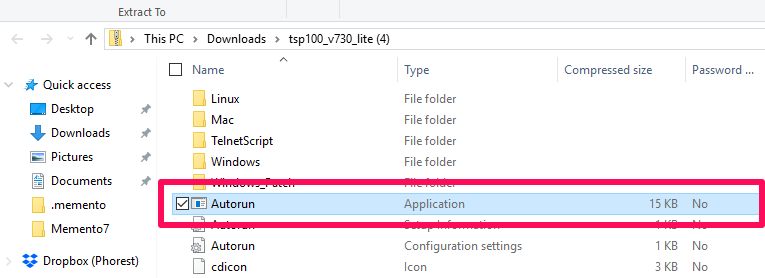
Extract the files to your desktop, open the folder and double click on the hi-lighted file as shown below.
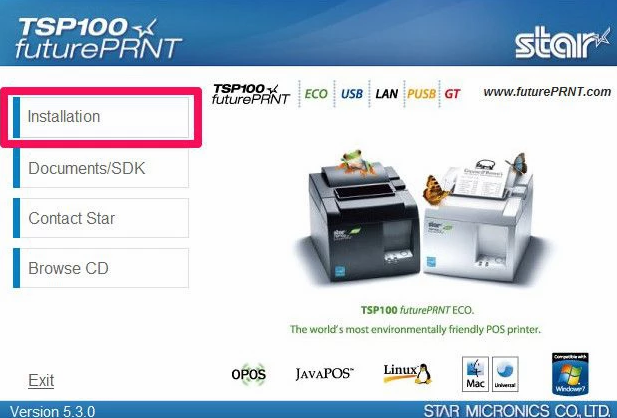
- Click on Installation.
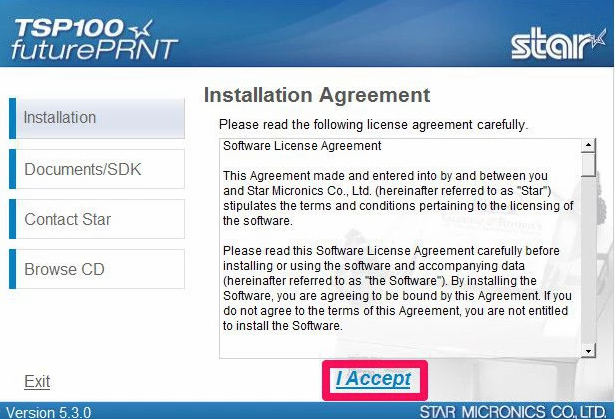
- Click I accept.
- Click Next.

- Select Next.

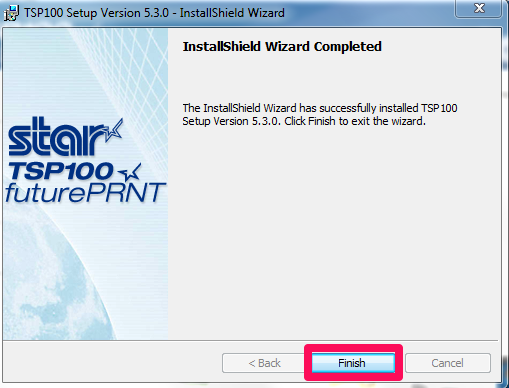
- Click Finish.
- Open the Configuration Utility. On Windows 10, click the windows button (bottom left) and type in Configuration Utility. Click the blue star logo to open.

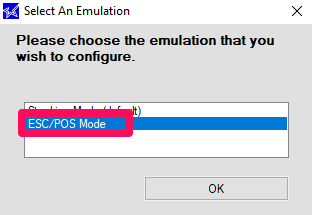
- When the Configuration Utility opens, select ESC/POS Mode
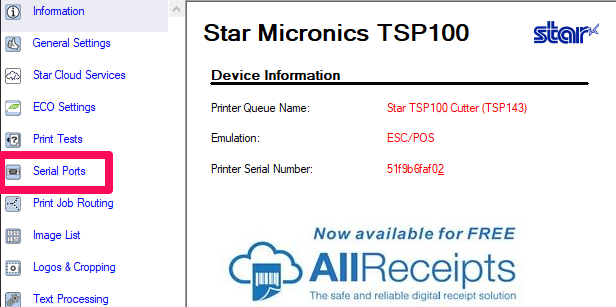
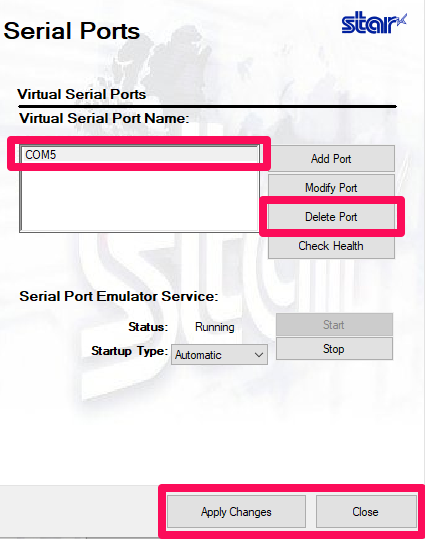
- Then select Serial Ports
- Select Add Port and select the COM you wish to use. (Example: COM3)

- Choose the settings as shown below
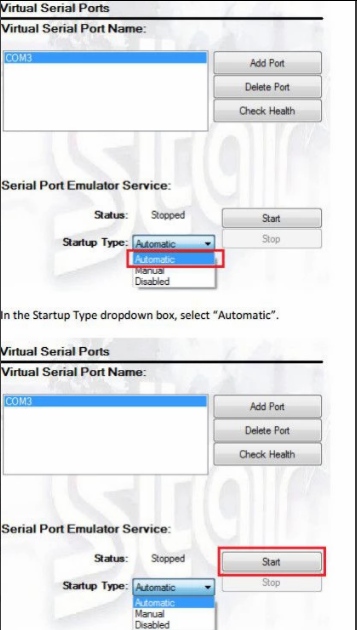
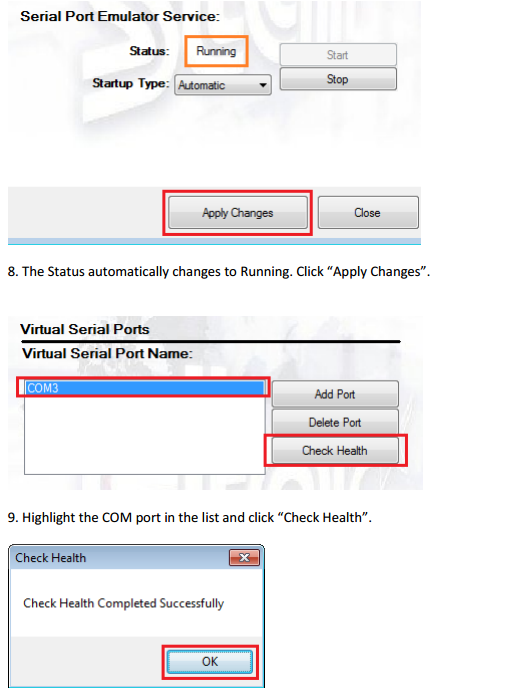
- Click Apply Changes and then click Check Health.
- Now open the Phorest Software and go to Manager > Settings > Terminal Settings

-
Select the following receipt printer configuration Direct > Star TSP100 > COM from the PORT drop down list and click Test. If a test receipt prints, click Save.

- Re-open the Configuration Utility and click ESC/POS Mode

- When the configuration utility opens, select Serial Ports again

- Select the COM port you created & select Delete Port > Apply Changes > Close
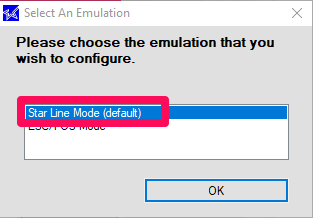
- Re-open the Configuration Utility and click Star Line Mode (Default)
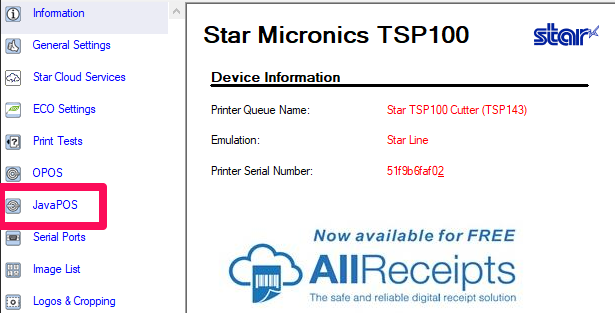
- When the configuration utility opens, select Java POS
- In JavaPOS Settings, Click Create JavaPOS XML Registry File
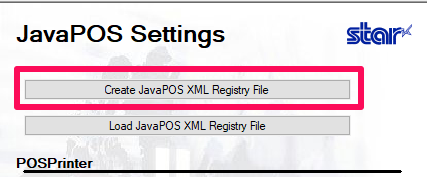
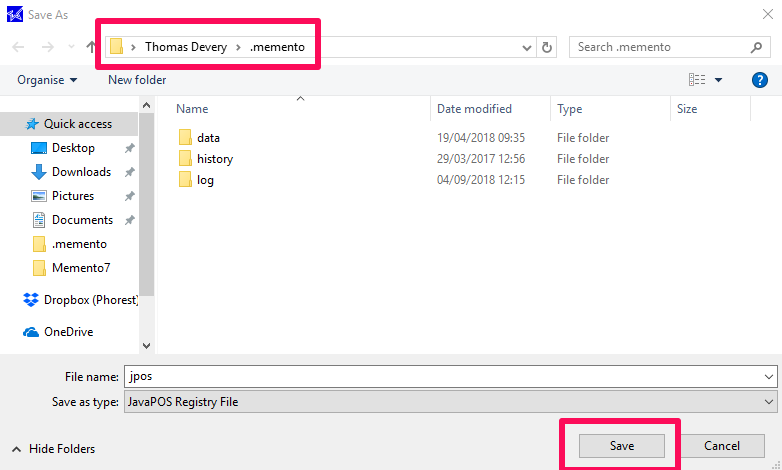
- Save the jpos file under C: Drive > User > .Memento Folder
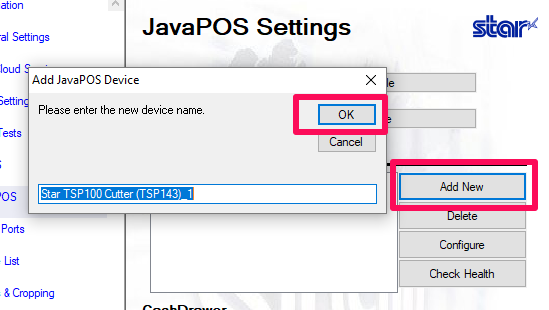
- On Printer Settings, click Add New. Then click OK
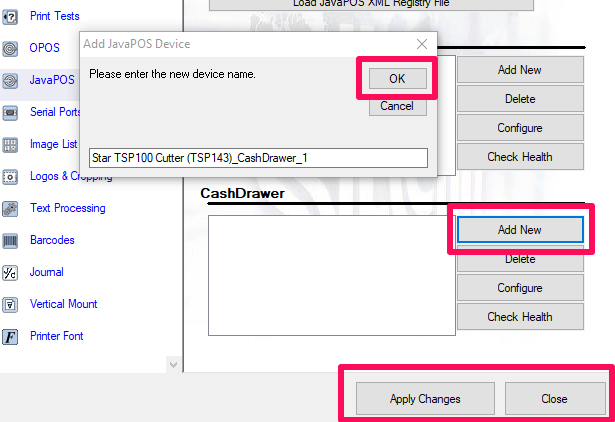
- On Cashdrawer Setting, click Add New. Then click OK,
-
Finally click Apply Changes & Close to terminate the Configuration Utility
- Return to the Phorest Terminal and go to Manager > Settings > Terminal Settings
- Select the following receipt printer configuration Direct > Star TSP100 POS > COM port. Click Save.
Note: The COM port should no longer appear in the drop-down list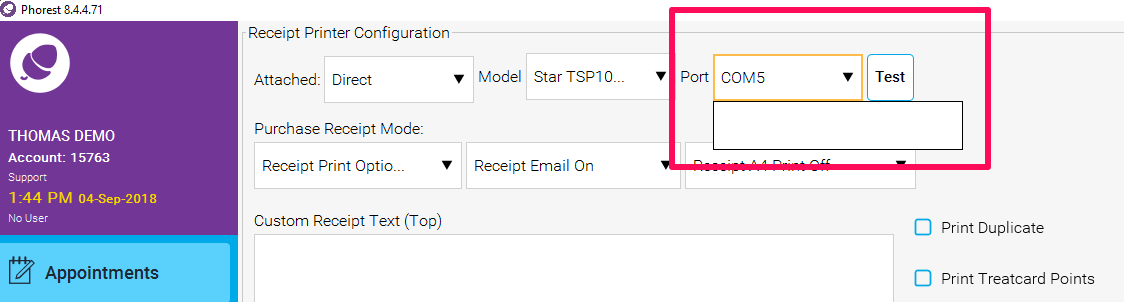
Note: Test the receipt printer & cashdrawer by putting through a sales transaction or print a sales receipt.