The following is the best method to use the a sun bed machine with the Phorest Appointment screen. This will allow you to keep track of how busy the machine is and whether or not it is free at any particular time. This works with both a single sun bed session or a course of minutes.
Step-by-step guide
- Create a new staff member called "Sun Bed" and set the staff members roster as per your salon's business hours. Go to Manager > Staff Members and click add.
For more information on how to add a staff member, click here:How to add a new staff member
- Now create a machine called "Sun Bed". you can create a number of machines if you have more than one. Go to Manager > Resources, Select the Machine tab and the top and click add.
For more information on how to create a machine, click here: Adding a Room or Machine
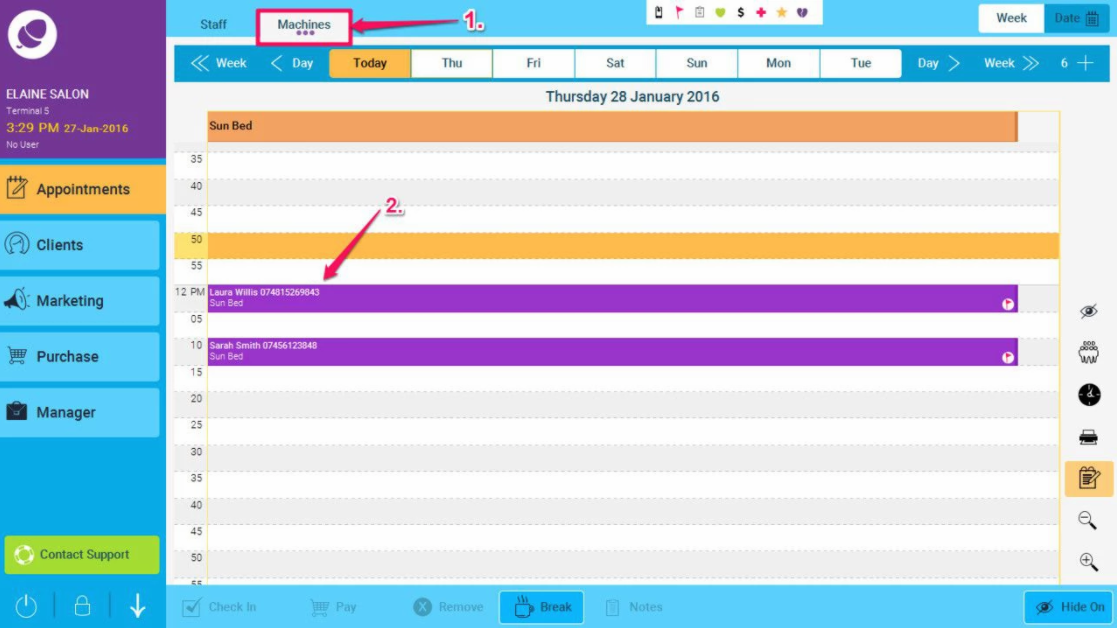
- Now we are ready to make appointments for a Sun Bed. Select the Machine tab at the top and make an appointment as normal, using either a single session or minutes of a course. When selecting the Staff Member, select Sun Bed.
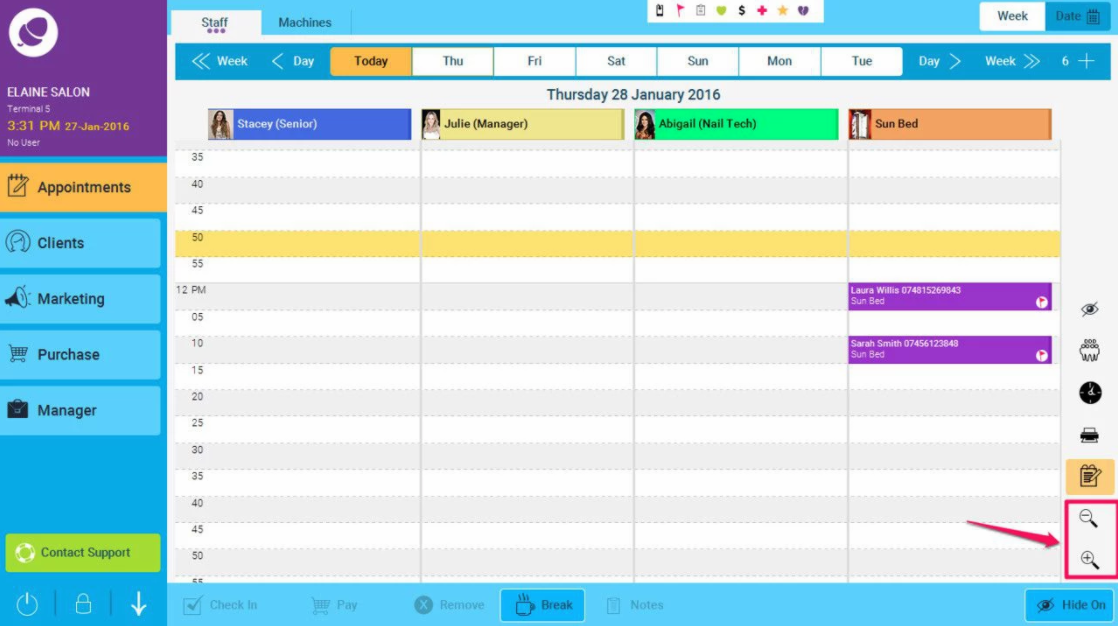
- This appointment now also appears as a normal appointment under the staff section on the appointment screen (if your sunbed sessions are very small, you may need to zoom in to see them using the zoom buttons as indicated on the screen below)
- To pull out a report on every visit to the sunbed, you go to Manager>Reports and choose the transaction report. (Click here to find out more details: Staff Transaction Detail) Select the staff member as Sunbed and run the report. Make sure you tick the Show Client Courses checkbox. Please note that this report just shows the detail of each sunbed visit but won't detail the minutes in each visit - you will have to view this visually on the appointment screen.
