The Following are instructions to set up a Star TSP100 receipt printer with Phorest Cloud.
Quick Version: Download the drivers, extract them and run the auto installer. Open the configuration Utility, select Serial Ports and add a COM. Open the Phorest software and and go to Manager>Settings>Terminal Settings and select Direct, Star TSP100 and the com you set up previously and click Test, click Save and you are done!
Step-by-step guide
- Download the drivers from here..
-
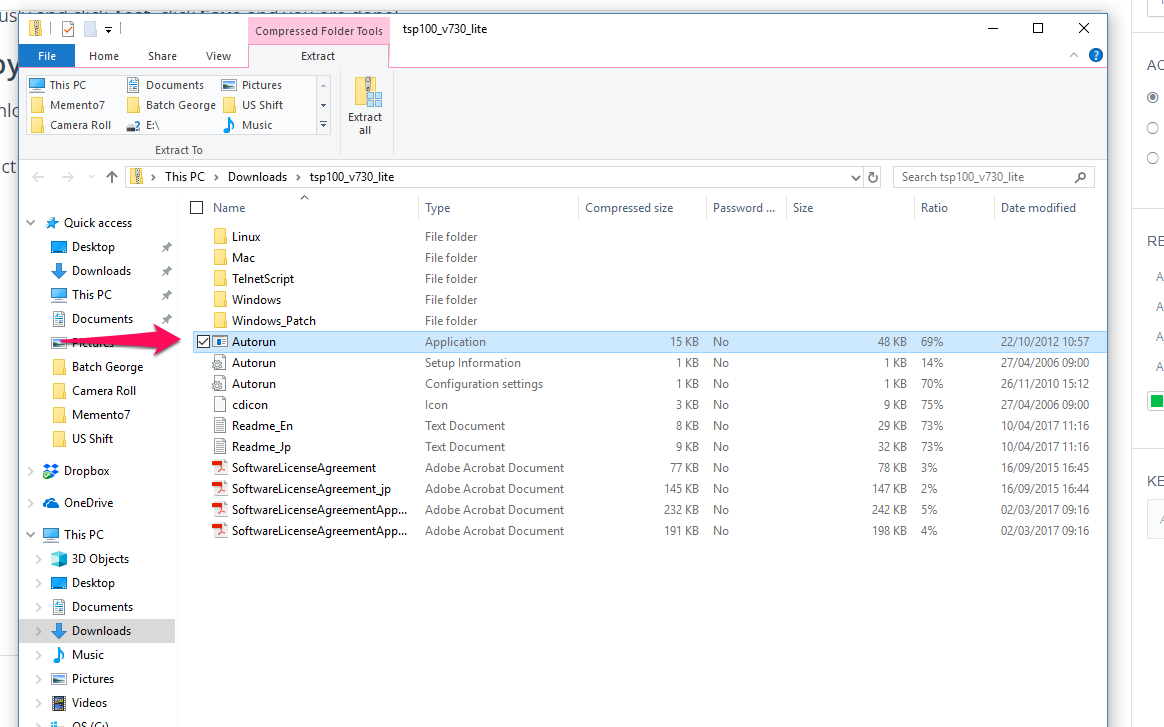
Extract the files to your desktop, open the folder and double click on the file hi-lighted below.
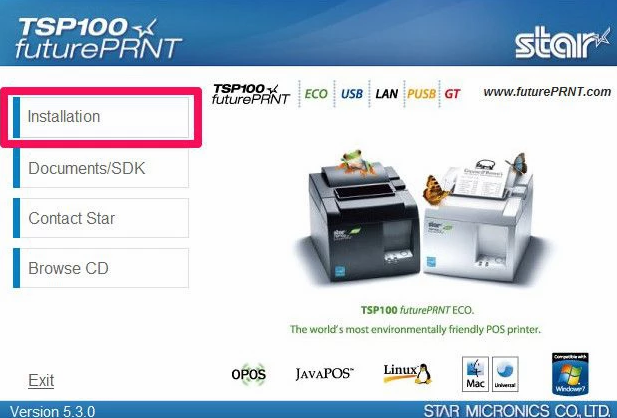
- Click on Installation.
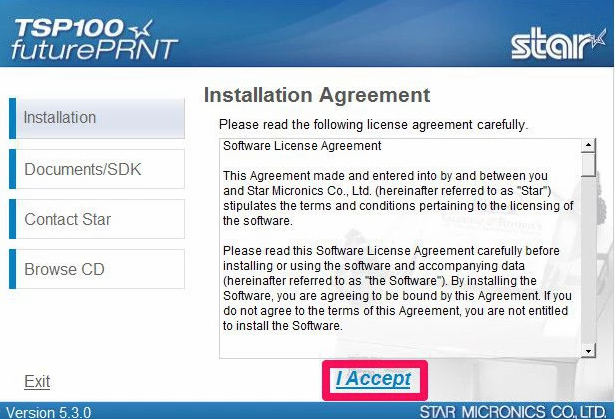
- Now select I accept.
- click Next.

- Select Next.

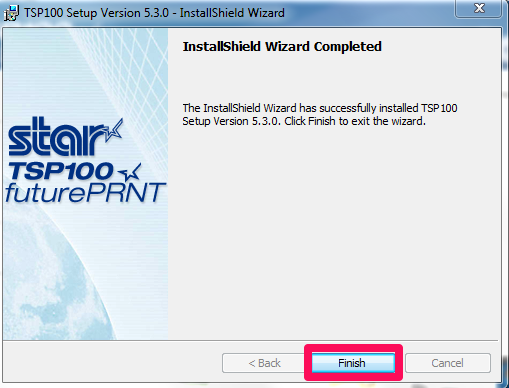
- Click Finish.
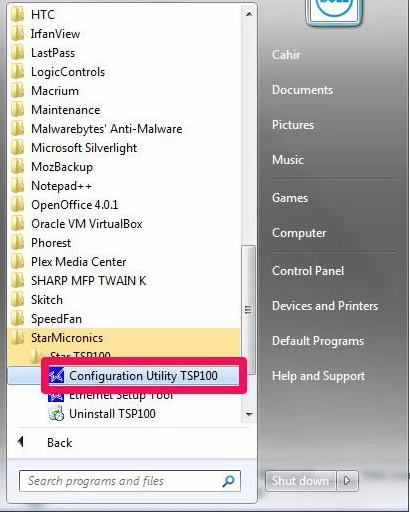
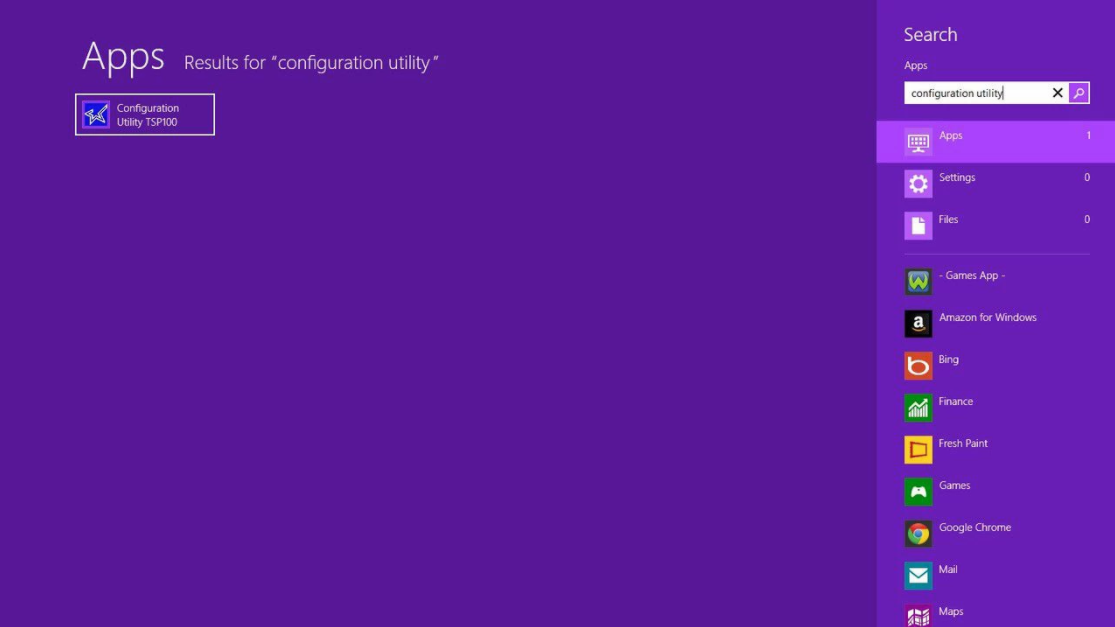
- Now open the Configuration Utility. In Windows 7 it can be found by clicking start, all programs and search for the Starmiconics folder. In Windows 8, click the windows button and type in "Configuration Utility" and click on it when found. On Windows XP - it is called Star TSP 100 Control Panel. (C:\Program Files\StarMicronics\TSP100\Software\20130806)
- When the utility opens, select "ESC/POS Mode"

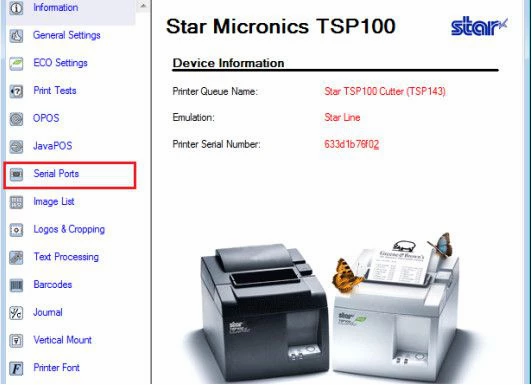
- When the configuration utility opens, select Serial Ports
- Select Add Port and select the Com you wish to use.

- Choose the settings as below
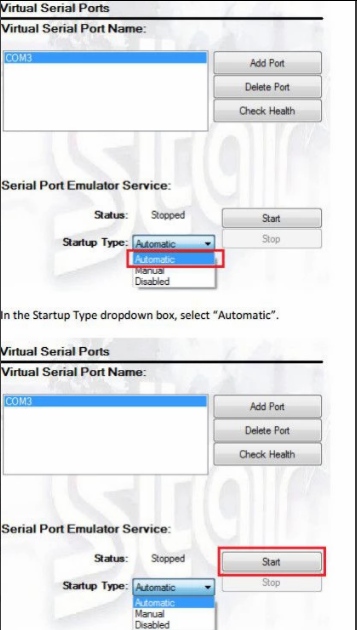
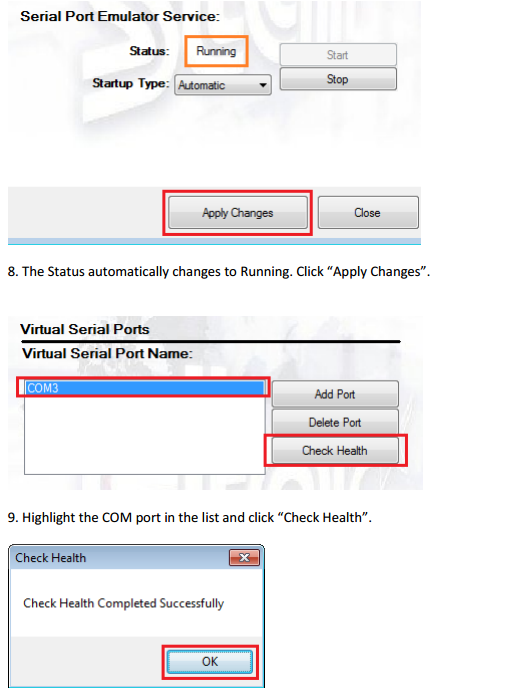
- Click Apply Changes and click Check Health.
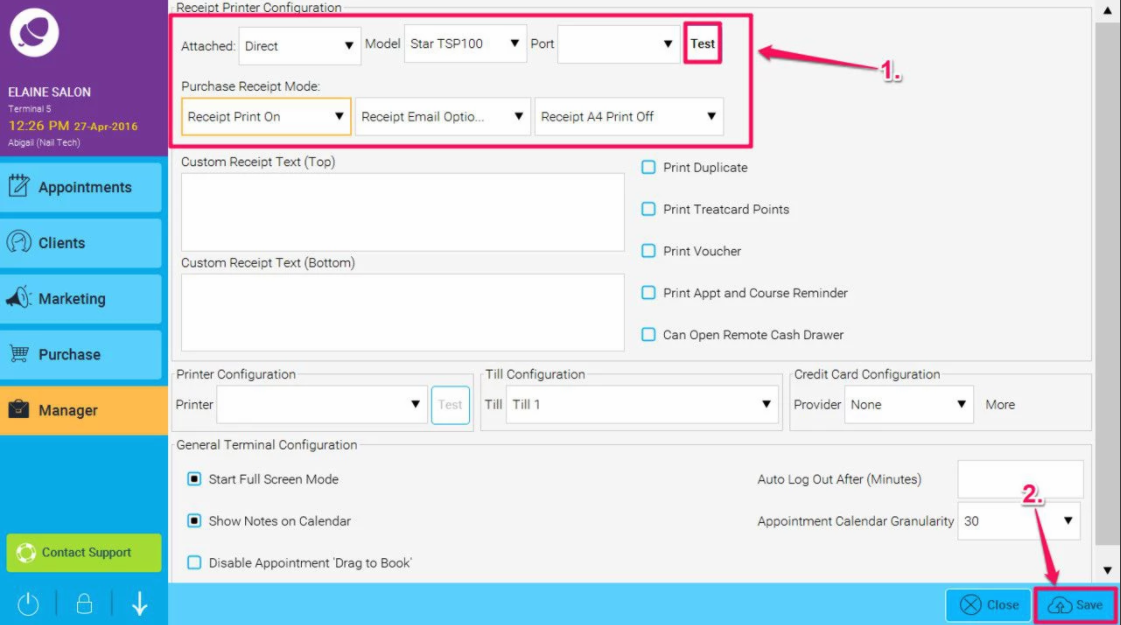
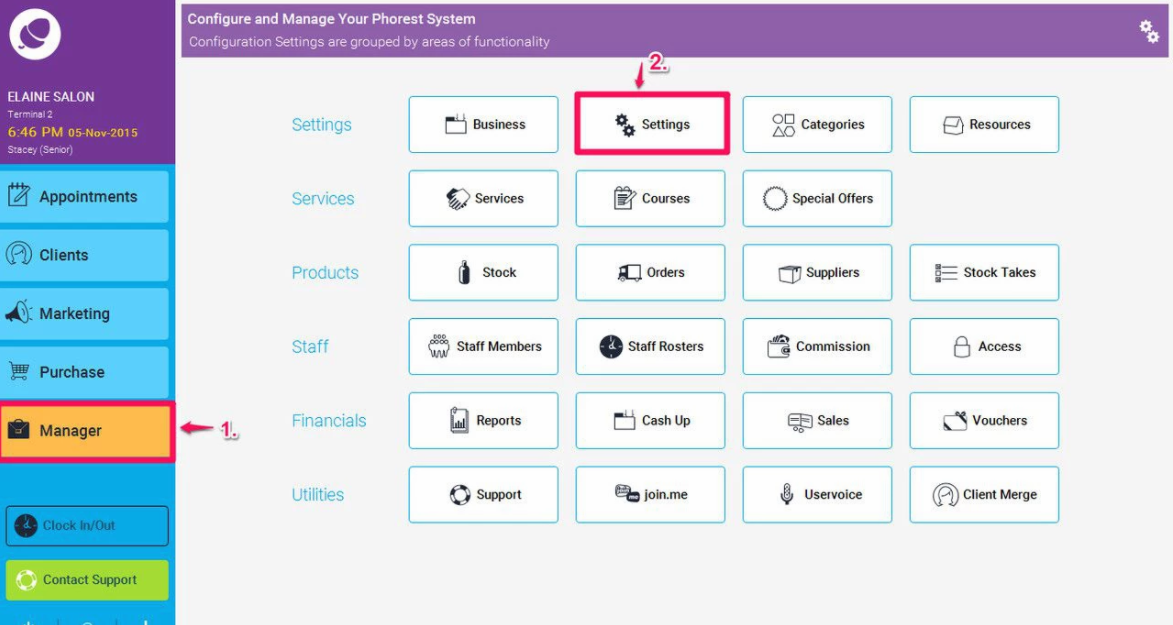
- Now open the Phorest Software and go to Manager>Settings
-
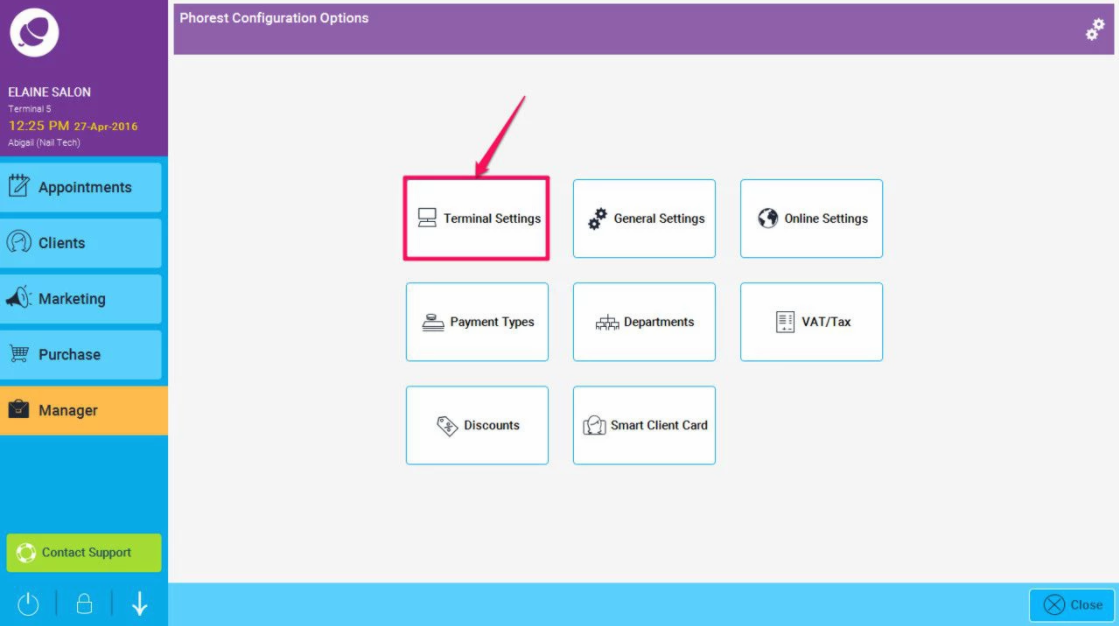
Terminal Settings
-
Select Direct, Star TSP100 and select the COM from the PORT drop down and click Test. If a test receipt prints, click Save and you are done!