Click on Manager and Settings

Under the General tab, choose Financials then Discounts.

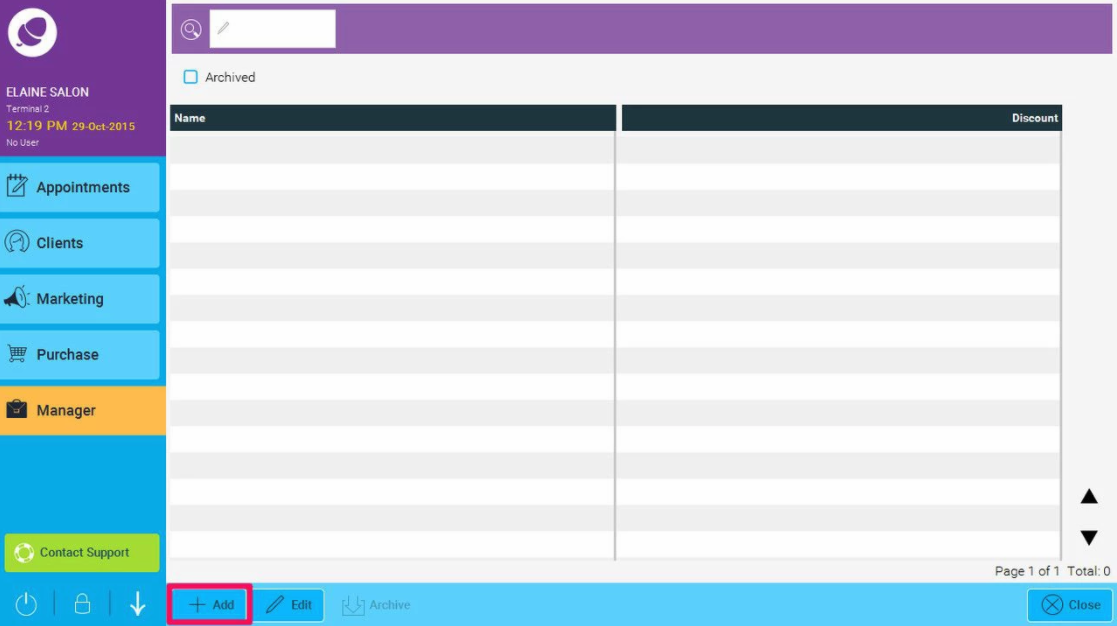
Select Add
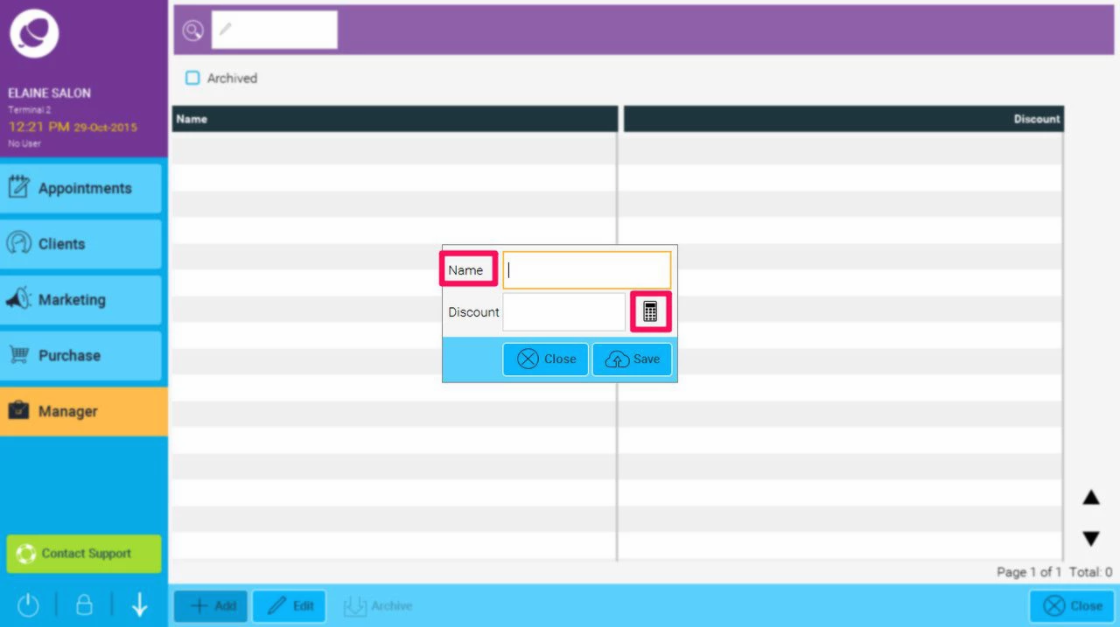
Give the discount a Name, and Discount amount (by clicking on the calculator icon)
You will then be presented with the Discount window, click on the down arrow highlighted below
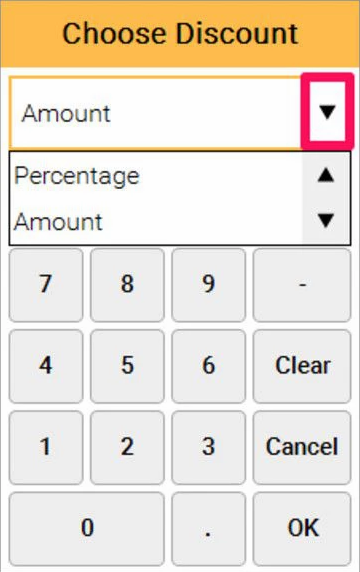
Choose Percentage or Amount and enter the correct value. Here is an example of how to add a percentage:
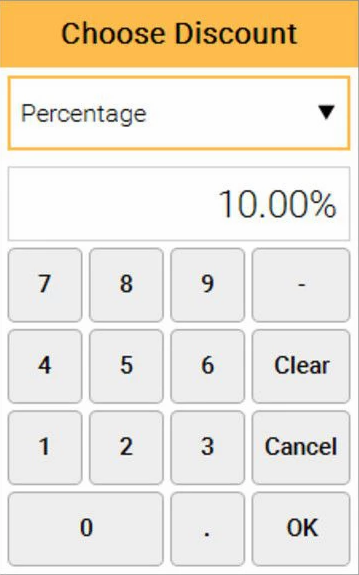
Click on OK, and then you will go back to the details window (shown in point 3) and then click Save
The next few steps will show you how to set up access levels to your discounts that you already set up:
You can also restrict who uses the discount levels set up to certain staff categories, ie. Salon Manager can only apply Staff Discount.
Click on Manager then Access

Select the appropriate staff level in Access Level

Click on the arrow next to the Purchase section to expand it, then click on the arrow next to Discounts to expand it.

Here you can turn on and off the discounts that you want staff levels to have access to by clicking in the square box next to each option. In the example above, Percentage, Flat, OAP and VIP are switched on and Blowdry Tuesday is switched off. Click on Save on the bottom right of the screen to save your changes.
Your discounts are now saved and ready to be used at the point of sale.
To see how to do a discount for a flat amount rather than a percentage - click here. Also please note that once a set discount is created - you can't edit it - you can only archive it and create a new one.