The buttons in our Compose Email screen can make emails so much more attractive and accessible
Follow this step by step guide to find out what all of the buttons do:
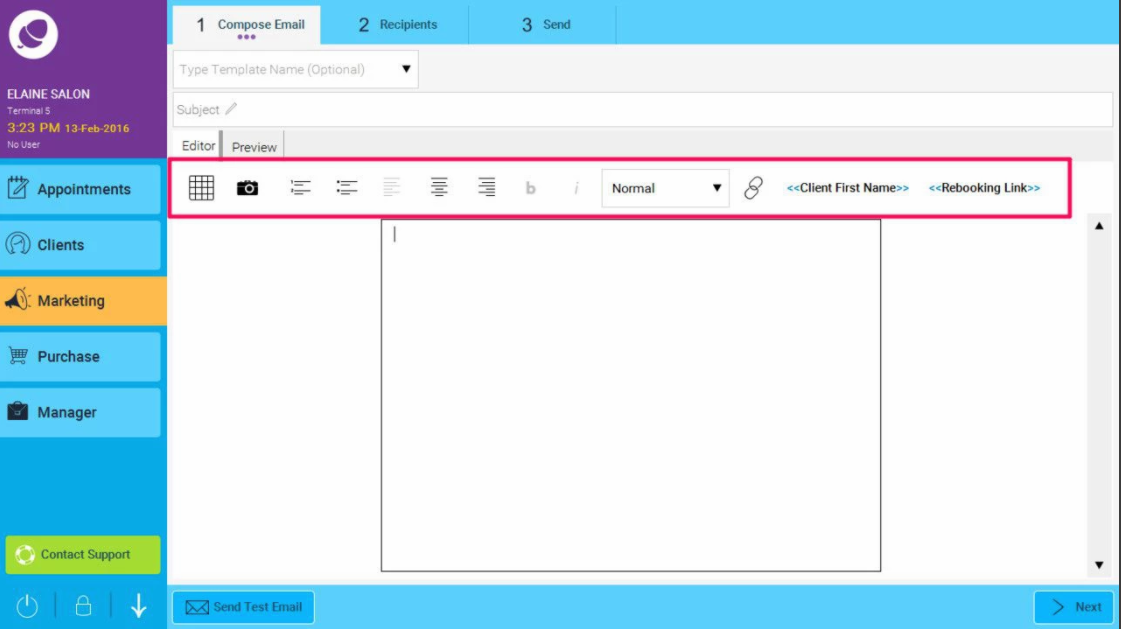
- These are the basic text buttons, and this is what they do (from left to right)
The first button adds a table to the email, and shows the following: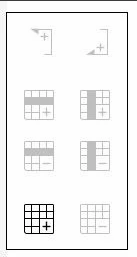
Note that the only icon to be enabled is the Add table icon. Once you have added a table, then click inside of it and the other icons will then be enabled as shown below.
Icon 1. will add a space above the table (the following screen shot has already added a space using this icon to demonstrate this)
Icon 2. will add a new row to the table
Icon 3. will remove a row from the table
Icon 4. will move the cursor underneath the table
icon 5. will add a new column to the table
Icon 6. will delete a column from the table
Icon 7. will delete the whole table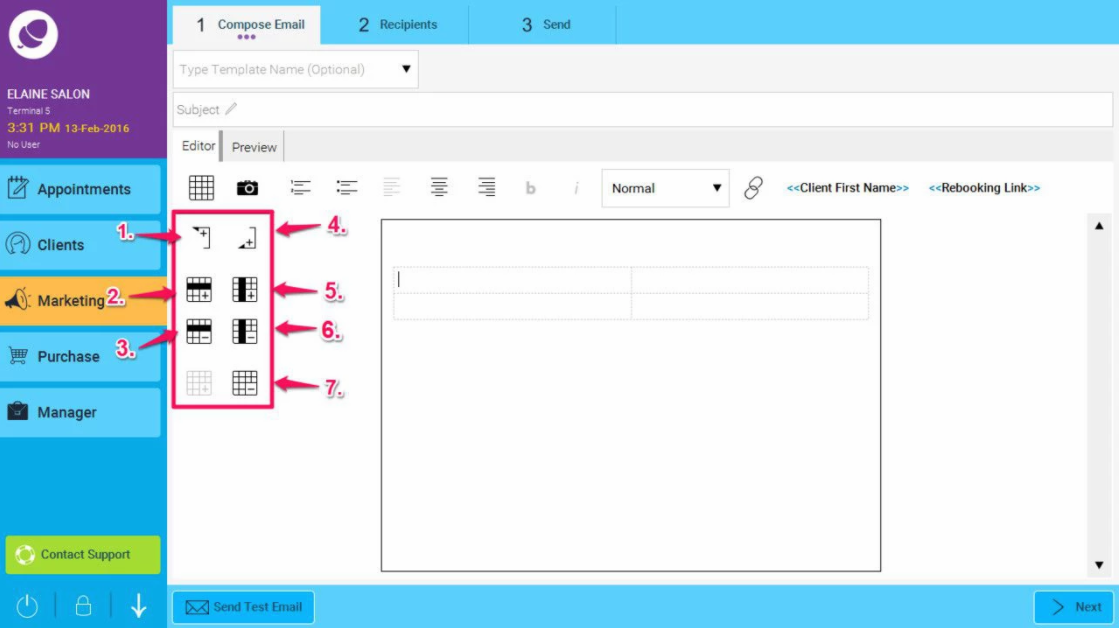
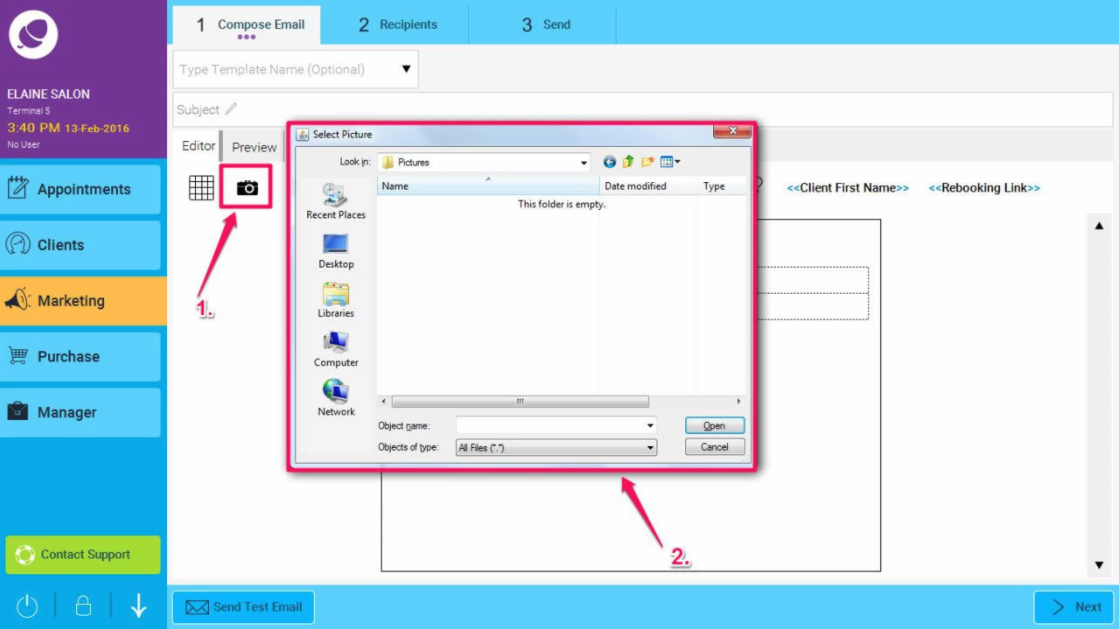
- The next button will allow you to insert a picture to your email from your PC Pressing this button will bring up a window in order for you to select a picture from your PC to add to the email as shown below.
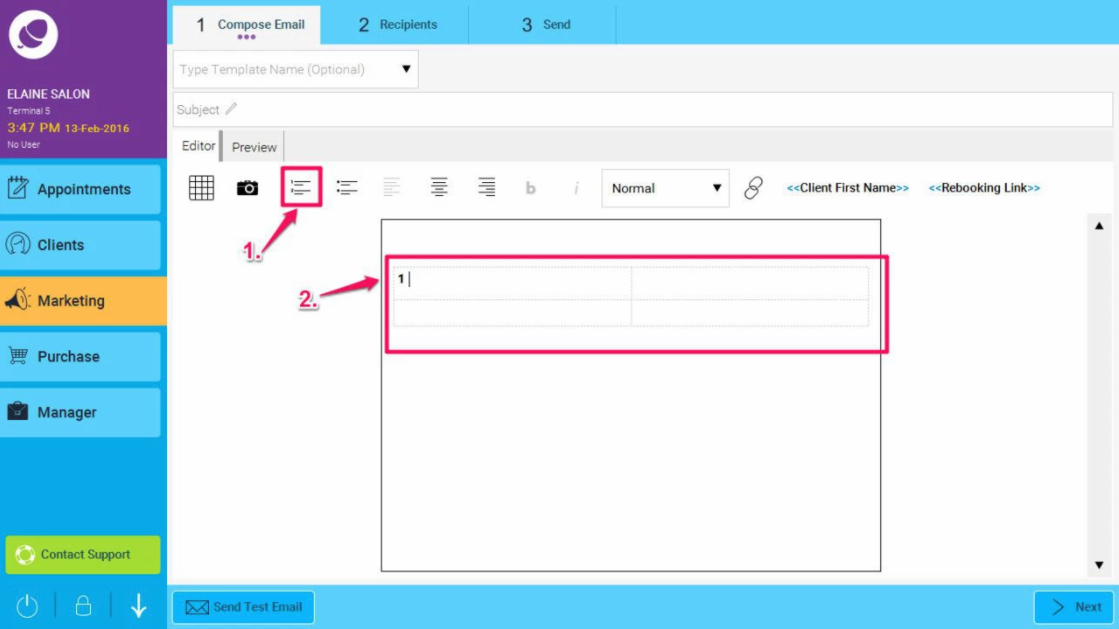
The next button is the Numbered List button. If you press this it will add a number 1. to your table and now can can type in text next to it. When you press return it will then add the next number and you can continue adding text to make a numbered list.
The next button along does exactly the same thing but instead adds bullet points instead of numbers.
The next 3 buttons will Left Justify, Centre or Right justify the text as demonstrated in the example below:

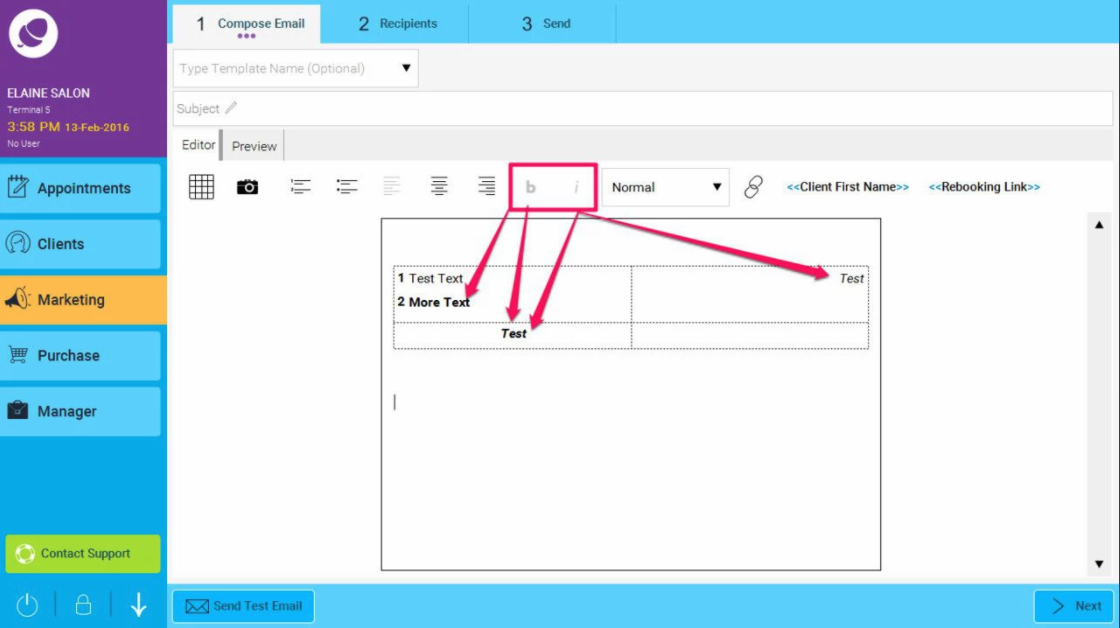
The next 2 buttons will make text Bold or Italic (or both) as demonstrated in the example below:
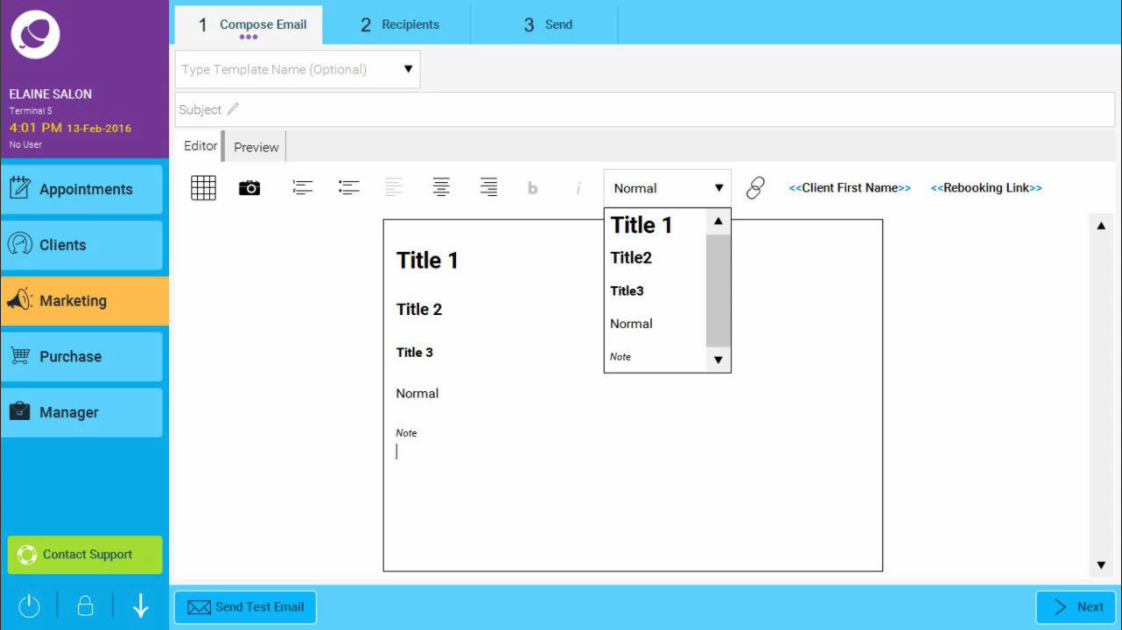
The next feature is a drop down list of different styles for your text which will change the size and boldness. Simply type the text you wish, and then highlight it, and click on the drop down list and choose which style you prefer. Here we have typed out the headings in the list and chosen the corresponding item from the drop down list to demonstrate how each one will look on your email:
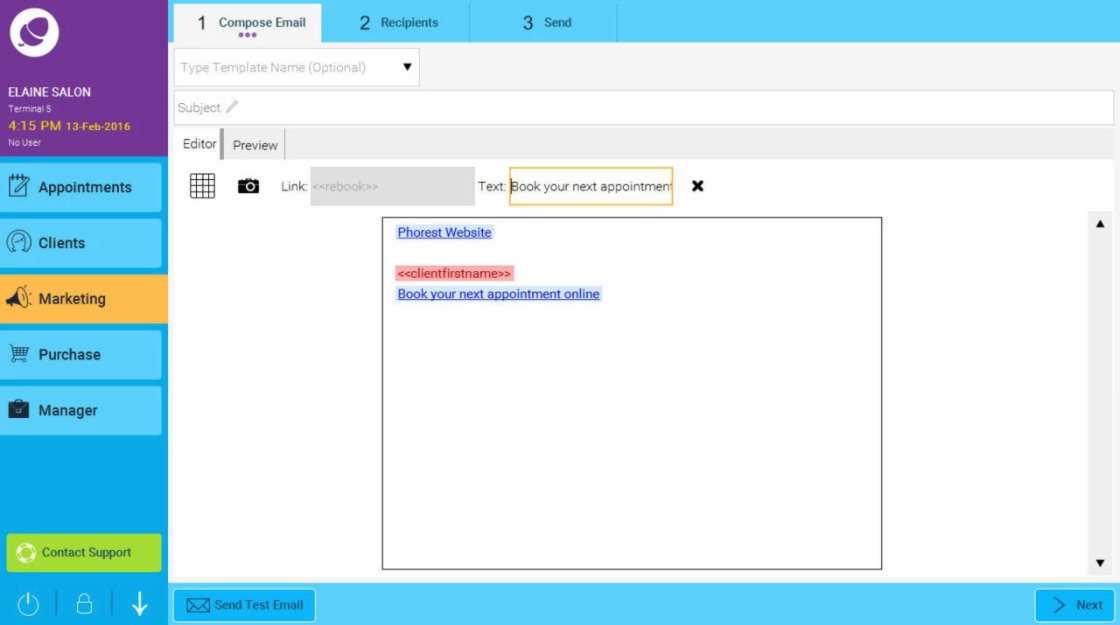
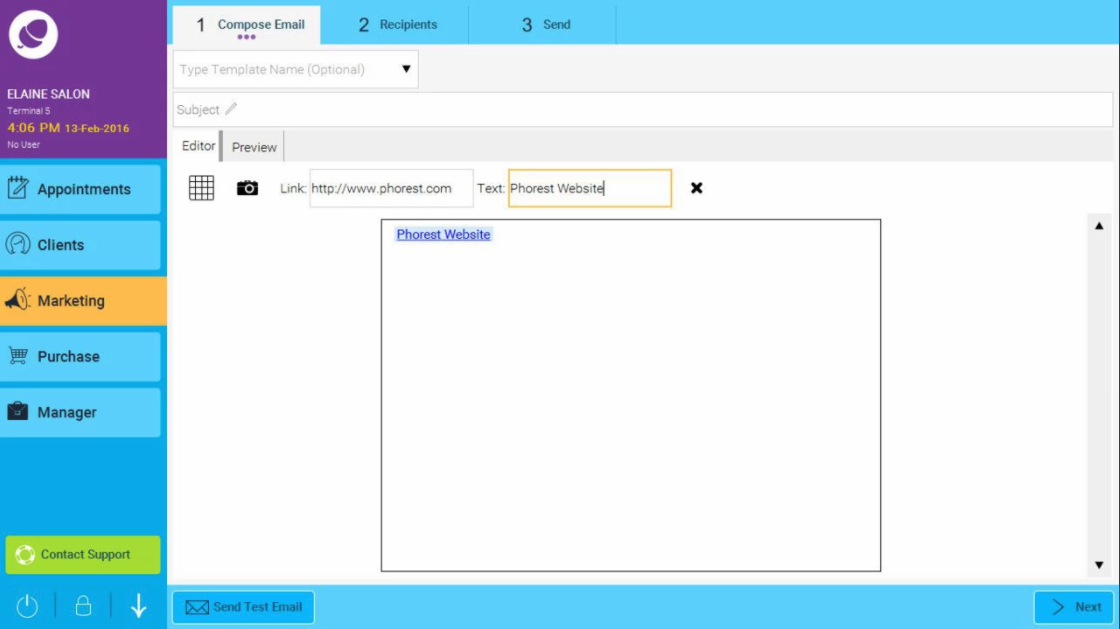
The next feature is how to add a link to a web address. Simply click on the  button, and then you can type in your web address, and the text you wish to display as illustrated below:
Note: to return to the main menu click anywhere underneath the link that you have added.
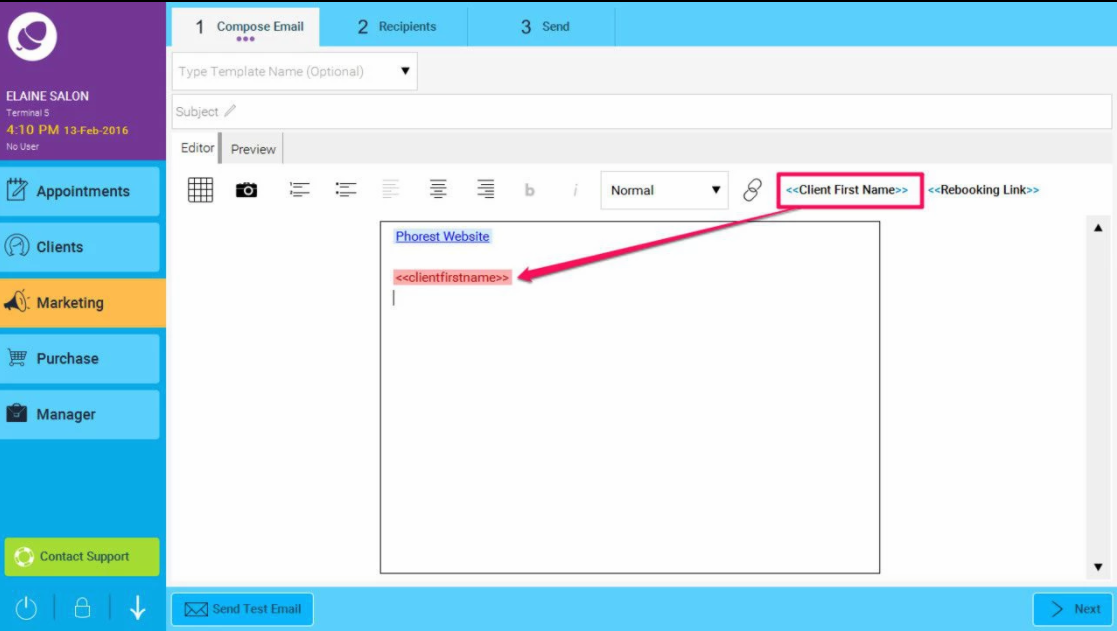
The next button will simply add a link to your client name, so phorest will extract the name of your client and add it to the email to personalise it. It is very important that you do not change this link in any way or it will be unable to extract the information.
- Finally you can add a Rebooking link to your email by clicking on the Rebooking Link button. The default text is 'Book your next appointment online' but this can be edited. As with the Link button, once you are finished and wish to return to the main menu, just click anywhere below the link.