The purpose of this article is to help you with the basics of setting up a Zoom account. Throughout this article, we will link back to the Zoom Help Center if you need more information.
To help you navigate this article, here is the layout:
- Create a Zoom account
- Sign in to your Zoom account on the web
- Update your profile
- Turn on and customize Waiting Room for security
- Find and add your Meeting ID to Phorest
- Download the Zoom client
- Start a test meeting
- Start your first meeting as the host
1. Create a Zoom account.
To sign up for your own free account, visit zoom.us/signup and enter your email address.
You will receive an email from Zoom (no-reply@zoom.us). In this email, click Activate Account.
NOTE: With Zoom's FREE plan, you can host unlimited 1:1 Meetings up to 40 minutes long. If your Video Consultations are longer than 40 minutes each, you will need to purchase a Zoom license.
2. Sign in to your Zoom account on the web
You can log in to your Zoom account on the web at any time, at zoom.us/signin. Once you're logged in, use the panel on the left side to navigate the Zoom web portal. You can update your profile, schedule a meeting, edit your settings, and more.
3. Update your profile
You can update your profile by adding a profile picture, set your time zone, update your password and more. To access your Zoom profile, sign in to the Zoom web portal and click Profile.
4. Turn on and customize the Waiting Room for security
To use Phorest's Video Consultations, we advise enabling Zoom's Waiting Room security feature.
This allows you to control when a participant joins the meeting. This will prevent anyone with the same meeting ID who shouldn't be on the call from joining.
Check out this video and article to find a setup that suits your business.
To enable Waiting Room for all users in the account:
- Sign in to the Zoom web portal.
- In the navigation menu, click on Security
- Verify the Waiting Room feature is enabled.
- Click Edit Options to specify Waiting Room options.
- Tick the Everyone option followed by Continue.
To customize the Waiting Room title, logo, and description at an account, group, or user level, click the pencil icon below the Waiting Room option.
This will open the Waiting Room customization options.
- Title: Click the pencil next to Please wait, the meeting host will let you in soon. To update the meeting title. Click the checkmark (✓) when you are done.
NOTE: Titles are limited to 64 characters.
- Logo: Click the pencil icon to upload a logo.
NOTE: Logos can be in GIF, JPG or PNG format. They cannot exceed 1MB. The minimum height and width is 60px and the maximum is 400px.
- Description: Click Add waiting room description to add a description to the Waiting Room. Click ✓ when you are done.
NOTE: The description is limited to 400 characters.
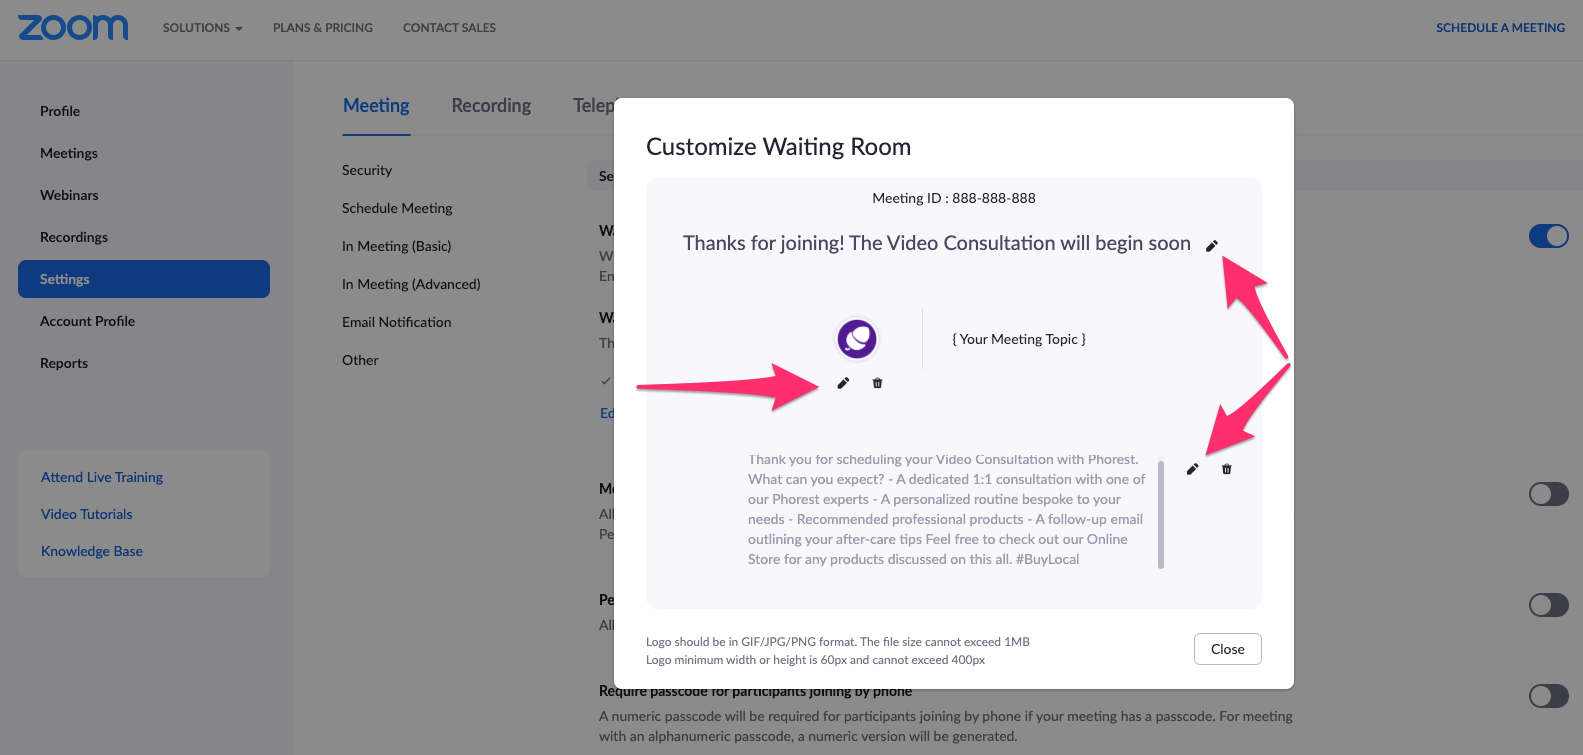
Click Close when you are done.
Participants will see your custom Waiting Room branding when they join the meeting.
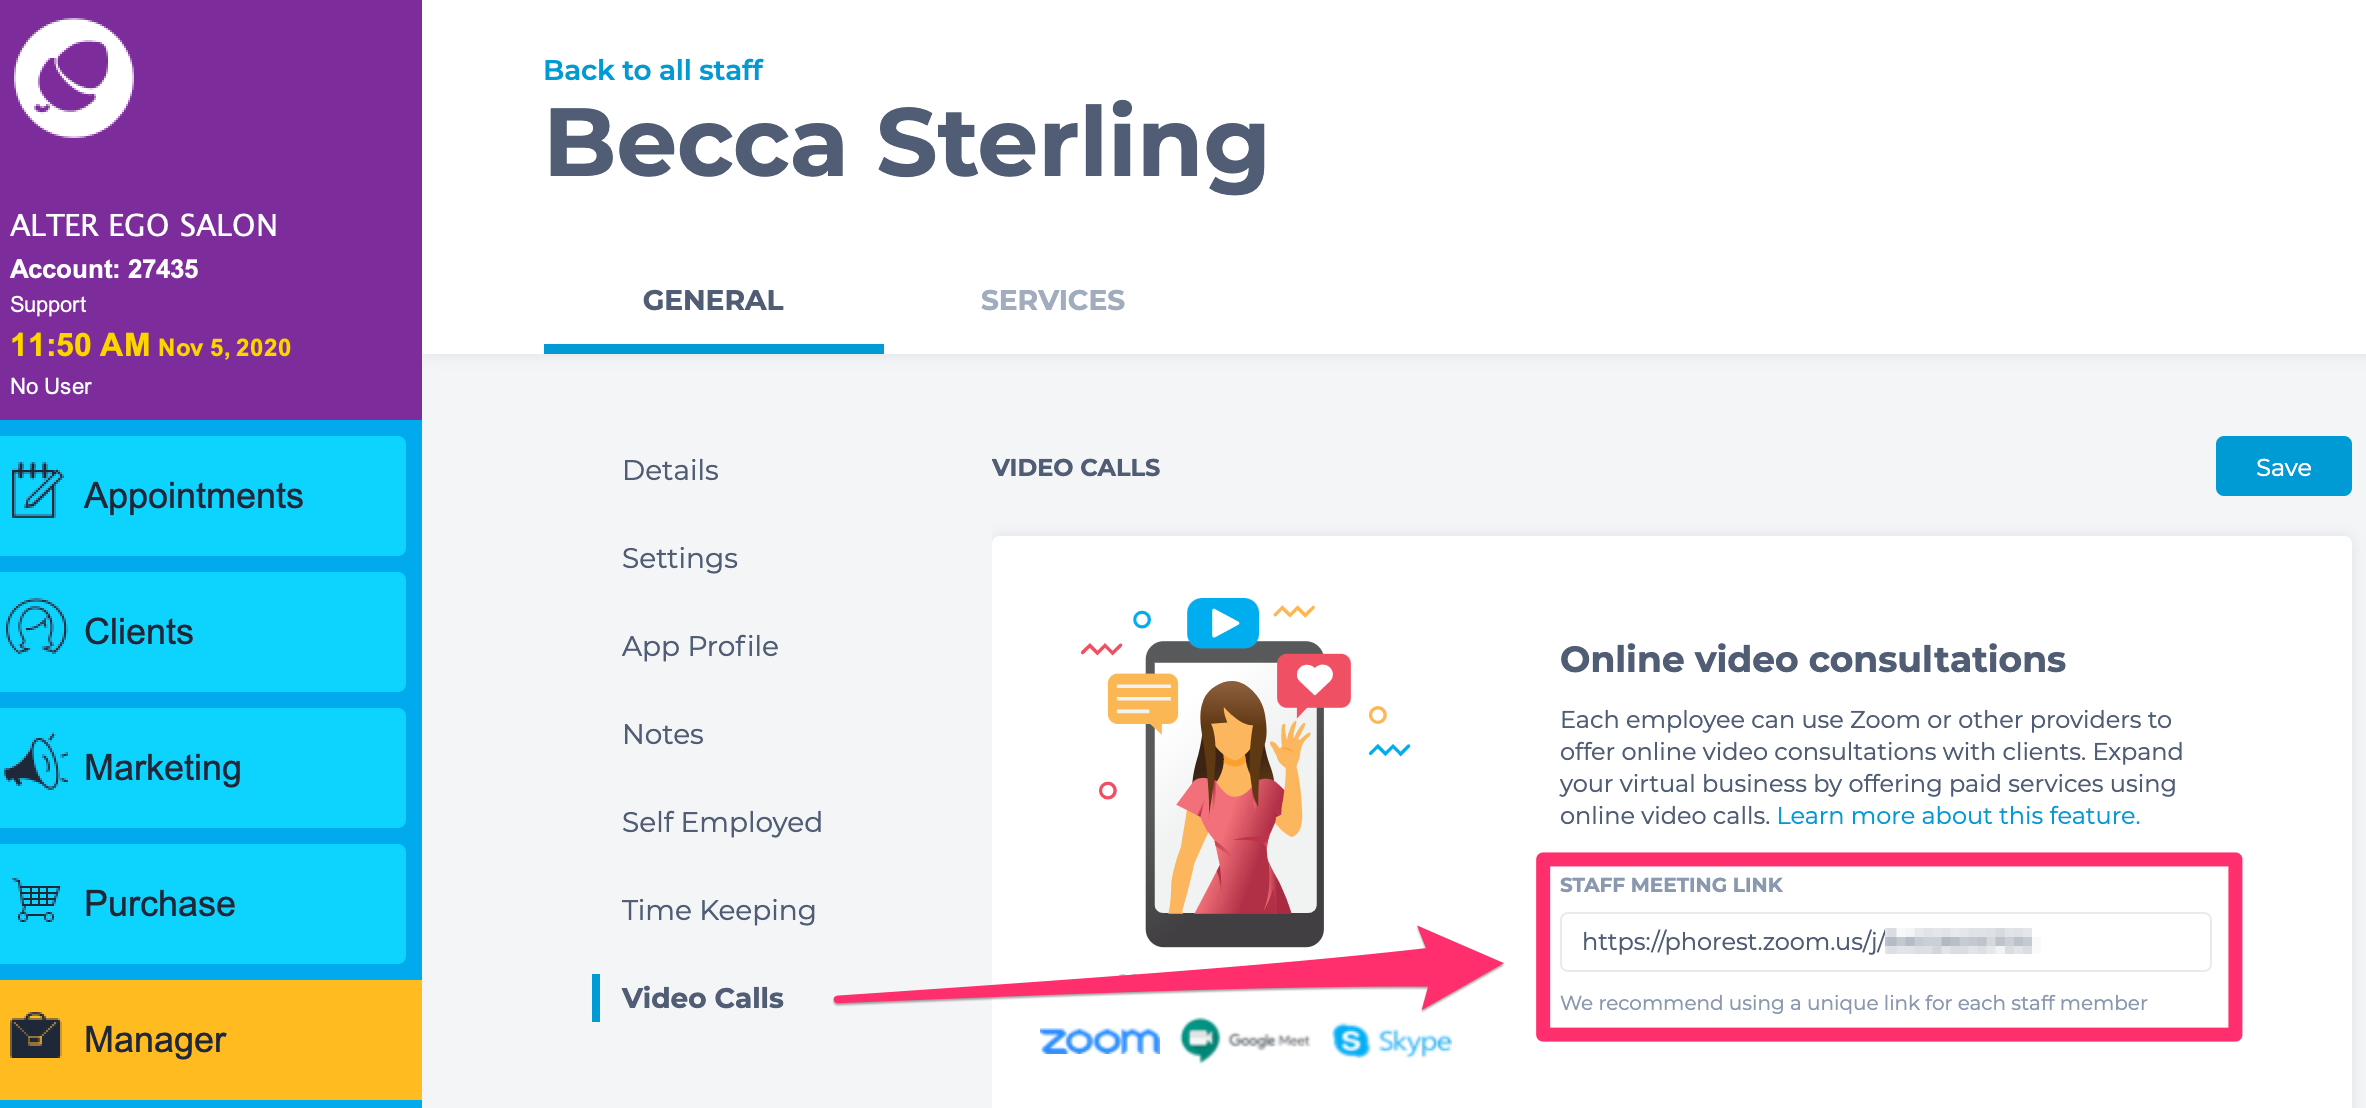
5. Find and add your Meeting ID to Phorest
To connect your Zoom account to Phorest, you will need to find your personal Zoom Meeting ID. This is a URL with a 10-digit number at the end like this: https://zoom.us/j/99037615952.
To find your personal Meeting ID link, sign in to the Zoom web portal, then click Profile.
Click Show and copy the personal link URL.

Paste the meeting ID into the Video Calls tab of your staff profile in Phorest.
6. Download the Zoom client
You can download the Zoom Desktop Client for Mac, Windows, ChromeOS and Linux, as well as the Zoom Mobile App for iOS and Android from Zoom's Downloads page.
7. Start a test meeting
You can join a test Zoom meeting to familiarize yourself with the Zoom and test your microphone/speakers before joining a Zoom meeting. Visit zoom.us/test and click Join.
8. Start your first meeting as the host
As the meeting host, there are several ways you can start your meeting. Your upcoming meetings will be listed in the Meetings tab of your Zoom desktop client or mobile app. You can click Start by the meeting name. You can also start your meetings from the Zoom web portal.
- Log in to My Meetings.
- Under Upcoming Meetings, hover over your Video Consultation and click Start.
To learn about more areas like this in your Phorest system enroll in our Video Consultations course in Phorest Academy - online, on-demand and on-the-go learning for busy salon professionals.